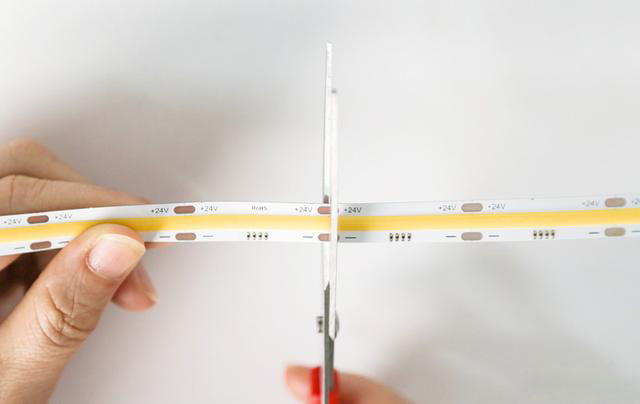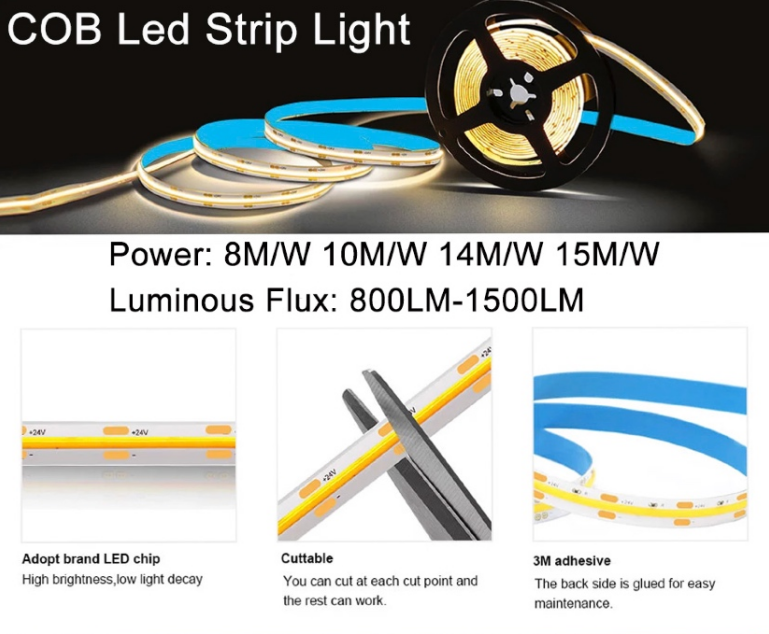
Cutting a COB LED strip correctly is crucial for maintaining its functionality. You want your lighting system to work perfectly, right? Well, improper cuts can damage the strip and affect its performance. Always cut at the designated points to avoid these issues. Customizing your COB LED light strip allows you to fit it into any space, making your lighting setup truly unique. Whether it’s for your living room or workspace, a well-cut COB strip can transform the ambiance. So, get ready to enhance your space with precision and creativity!
Tools and Materials for Cutting COB LED Strips

When you’re ready to cut your COB LED strip, having the right tools and materials is essential. This ensures a clean cut and maintains the strip’s functionality. Let’s dive into what you’ll need.
Essential Tools
Scissors or a Sharp Cutting Tool: You need a sharp tool to make precise cuts on the COB LED strip. Scissors work well, but a utility knife can also do the job. Make sure your tool is sharp to avoid fraying the edges of the strip.
Measuring Tape or Ruler: Accurate measurements are crucial. Use a measuring tape or ruler to determine the exact length you need before making any cuts. This helps in avoiding mistakes and ensures that your strip fits perfectly into your desired space.
Soldering Iron (if necessary): Sometimes, you might need to reconnect sections of the strip. A soldering iron can help you make secure connections. However, if you’re not comfortable with soldering, you can use a solderless cob led connector.
Additional Materials
Connector Clips: These are handy for joining sections of the COB LED strip without soldering. They provide a quick and easy way to reconnect your strip after cutting. Make sure to choose the right size for your strip.
Electrical Tape: Use electrical tape to insulate any exposed wires after cutting and reconnecting the strip. This prevents short circuits and ensures safety.
With these tools and materials, you’re all set to cut your COB LED strip with precision. Remember, the key to a successful project is preparation. Gather everything you need before you start, and you’ll have a smooth experience customizing your lighting setup.
Step-by-Step Guide to Cut COB LED Strips

Ready to dive into cutting your COB LED strip? Let’s break it down step by step so you can get it just right.
Measure and Mark
Measure the desired length
First things first, you need to measure the length you want for your COB LED strip. Grab your measuring tape or ruler and measure the length of the area where you plan to install the strip. This step is crucial because you want your strip to fit perfectly. Once you measure the area, note down the measurement. Remember, accuracy is key here.
Mark the cutting line on the strip
Now that you’ve measured the length, it’s time to mark the cutting line on your COB LED strip. Use a pencil or a marker to draw a line where you plan to cut. Make sure this line aligns with the designated cut position on the strip. This ensures you cut the light strip at the right spot, maintaining its functionality.
Identify the Cutting Line
Locate the designated cutting points on the strip
Before you cut, you need to locate the designated cutting points on your COB LED strip. These points are usually marked by copper pads. It’s important to cut only at these points to avoid damaging the strip. Take a close look and make sure you align the cutting line with these copper pads. This step is vital for a successful cut.
Make the Cut
Use the appropriate tool to cut along the marked line
Now comes the moment of truth—it’s time to cut the LED strip. Use a sharp tool like scissors or a utility knife to cut along the marked line. Make sure your tool is sharp to ensure a clean cut. Cutting LED light strips requires precision, so take your time and cut carefully. Remember, you should cut LED strip lights at the cut line to maintain their functionality.
By following these steps, you’ll be able to cut COB LED strips with confidence. Whether you’re customizing your living space or creating a unique lighting setup, these steps will guide you to success. Happy cutting!
Reconnect the Strip (if necessary)
After cutting your COB LED strip, you might need to reconnect it. This step is crucial if you want to connect LED strip sections to create a continuous lighting effect. Let’s explore how you can do this effectively.
Use connector clips or soldering to reconnect
Connector Clips: These are your best friends when you want to connect LED strip sections without soldering. Start by aligning the cut ends of your COB LED strips with the connector clip. Make sure the copper pads on the strip align perfectly with the metal contacts inside the clip. Once aligned, close the clip to secure the connection. This method is quick and easy, allowing you to connect COB LED strips seamlessly.
Soldering: If you’re comfortable with soldering, this method provides a more permanent connection. Begin by stripping a small section of the silicone coating from the ends of the COB LED strips. Expose the copper pads. Apply a small amount of solder to the pads on both strips. Then, use a soldering iron to connect the pads by melting the solder. This creates a strong bond between the strips. Soldering ensures a reliable connection, especially if you plan to connect two COB LED strips for a longer setup.
Both methods have their advantages. Connector clips offer convenience and flexibility, while soldering provides durability. Choose the method that suits your project needs. Remember, a secure connection is key to maintaining the functionality of your COB LED strip. Whether you decide to connect LED strip sections with clips or solder, ensure the connections are tight and secure. This will keep your lighting system running smoothly.
Common Mistakes and Precautions When You Cut LED Strip Lights
When you decide to cut a COB LED strip, it’s crucial to avoid common pitfalls that can compromise its functionality. Let’s explore some key mistakes and how you can steer clear of them.
Avoid Cutting at Incorrect Points
Importance of cutting only at designated points
You must cut the COB LED strip only at the designated points. These points are usually marked by copper pads. Cutting elsewhere can disrupt the circuit and cause sections of the strip to stop working. Precision is key here. Use a sharp tool like scissors or an LED-specific cutter to ensure a clean cut. This helps maintain the integrity of the circuit and keeps your COB LED light strip functioning as intended.
Handle with Care
Tips for preventing damage to the strip
Handling your COB LED strip with care is essential. The strip is delicate, and rough handling can damage the LEDs or the circuit. Always use a gentle touch when measuring, marking, and cutting. Avoid bending the strip excessively, as this can break the internal connections. After you cut, test the strip to ensure all sections light up properly. This step helps you catch any issues early and avoid surprises later.
Ensure Proper Reconnection
Importance of secure connections for functionality
After you cut LED strip lights, reconnecting them securely is vital. Whether you use connector clips or soldering, ensure the connections are tight and aligned with the copper pads. Loose connections can lead to flickering or non-functional sections. If you’re using connector clips, double-check that the metal contacts align perfectly with the pads. For soldering, make sure the solder forms a strong bond. Secure connections keep your COB LED strip running smoothly and efficiently.
By following these precautions, you can confidently cut and customize your COB LED strips. Remember, attention to detail and careful handling make all the difference in achieving a flawless lighting setup.
You’ve now got the know-how to tackle cutting a COB LED strip with confidence. Remember, the key steps involve measuring accurately, identifying the correct cutting points, and using the right tools. These steps ensure your COB LED strip maintains its functionality. Always follow the outlined precautions to avoid common mistakes, like cutting in the wrong place. Customizing your COB LED strips allows you to create a lighting setup that perfectly fits your space and style. So, go ahead and transform your environment with precision and creativity!
See Also
Steps To Successfully Connect Your COB Lighting Strip
Understanding COB And SMD LED Strip Light Differences
Choosing The Perfect LED Strip Lights For Linear Lighting


