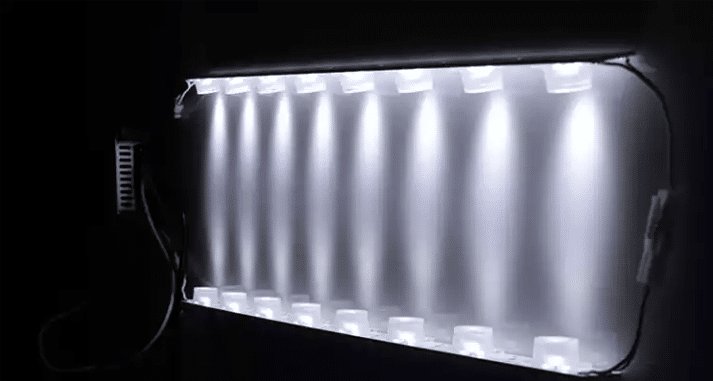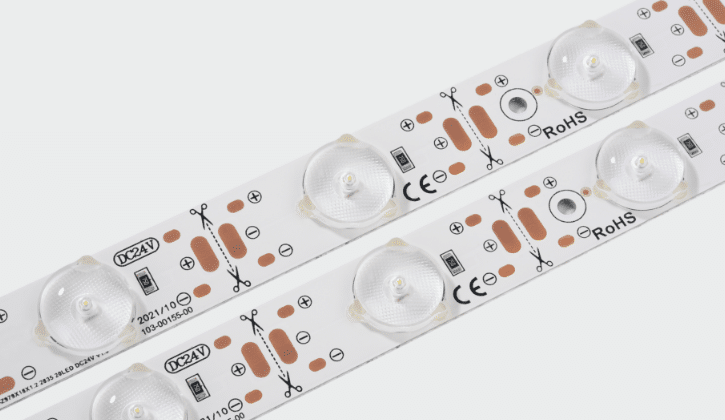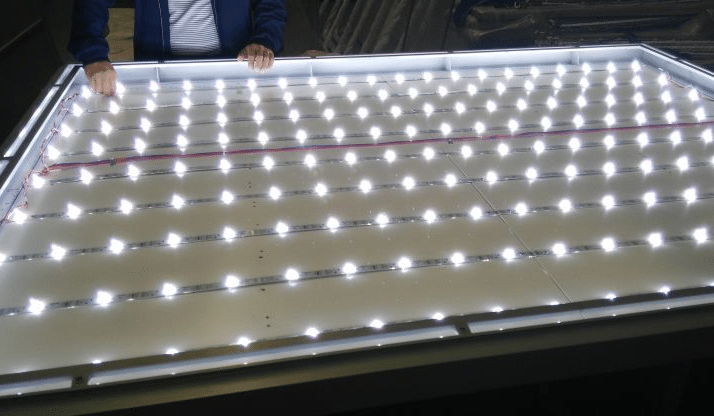
Rigid LED light bars are great for lighting up lightboxes. They are very bright and use energy efficiently. Brands like Rigid Industries make powerful models. For example, the SR-30 gives 9,600 lumens of light. It only uses 7.2 amps of power. The aluminium body helps release heat, keeping it cool under 145°F. Installing them properly is important for the best results. This ensures the light spreads evenly and works well. These bars are strong and simple to set up. They are a top choice for lighting any lightbox professionally.
Key Takeaways
Collect tools like a ruler, screwdriver, and voltage tester first. This helps make the job easier.
Work out how bright your lightbox needs to be. Aim for 400 to 600 lumens per square foot for even lighting.
Place the light bars carefully to avoid uneven light. Space them evenly and keep them away from picture panels.
Check all wires to make sure they are connected right. Use a voltage tester to stay safe while working.
Clean your LED light bars often to keep them bright. Using good-quality parts will make them last longer.
Preparation for Installation

Tools and Materials
Tools you will need
Before you start, collect all the tools you need. These include:
A measuring tape to place the lights correctly.
A pencil or marker to mark where to mount.
A screwdriver or drill to fix the light bars.
Wire strippers and cutters to prepare the wires.
A voltage tester to check if power is off.
Having these tools ready will make the job easier and faster.
Materials for setting up the lightbox
You also need some materials to set up your lightbox. These are:
Rigid LED light bars that fit your lightbox size.
Mounting brackets or sticky strips to hold the lights.
Electrical wires and connectors to link the lights to power.
A power supply unit that works with the light bars.
Use good-quality materials for better results and longer-lasting lights.
Safety Guidelines
Turn off power before starting
Safety is very important. Switch off the power where you will work. Use a voltage tester to check there is no electricity. This keeps you safe from shocks and makes the area safe.
Tip: Label the breaker you turn off so no one turns it back on by mistake.
Handle LED light bars with care
Rigid LED light bars are strong but need careful handling. Don’t drop or bend them, as this can break them. Hold the edges to avoid smudges or fingerprints. Careful handling keeps them in good shape and working well.
Planning the Installation
Lumens and Beam Angle
Figuring out how bright it should be
To light your lightbox well, calculate the needed brightness. LED light bars’ brightness is measured in lumens. Aim for 400 to 600 lumens per square foot. This will light up the whole area without dark spots. Measure your lightbox size and multiply the area by the lumens needed. This gives you the total lumens required. Add or remove light bars to match this number.
Picking the best beam angle
The beam angle shows how light spreads over the surface. A narrow angle, like 15 degrees, focuses light on small areas. This is good for highlighting parts of the box. A wide angle, like 45 degrees, spreads light evenly. This works better for general lighting. Choose the angle based on your lightbox’s size and use. Adjustable angles let you change the light spread for better results.
Positioning the Rigid LED Light Bar
Choosing where to place the lights
Where you put the light bars matters for good lighting. In single-sided boxes, keep the lights far from the graphic panel. This avoids spots and spreads light smoothly. For double-sided boxes, place the lights in the middle. This helps light spread evenly on both sides.
Keeping the spacing even
Even spacing of light bars stops uneven lighting. Use a measuring tape to mark equal gaps between each bar. This keeps the backlighting consistent. The table below shows tips for good light placement:
Strategy | Explanation |
|---|---|
Keep lights far from graphic panel | Avoids ‘spotting’ and spreads light smoothly. |
Place lights in double-sided boxes | Put bars in the middle for even lighting on both sides. |
Plan lumens output | Use 400-600 lumens per square foot for good brightness. |
Adjust beam angles | Narrow (15°) for focus, wide (45°) for even spread. |
Follow these steps to get professional-looking lightbox backlighting.
Installing LED Light Bars

Mounting the Light Bars
Marking positions for mounting
First, decide where to place the light bars. Use a measuring tape to keep the spaces between bars equal. Mark these spots clearly with a pencil or marker. This helps you mount the bars correctly and avoids uneven lighting. Proper placement is key for a neat and professional look.
Securing light bars with screws or adhesive
After marking, fix the bars using screws or adhesive. Foam tape works well for lighter bars and makes mounting easier. For heavier bars, screws give better support. For example, the SR-30 LED bar has a strong aluminium heat sink. This keeps it cool and stable, even in tough conditions. Its durability allows different mounting methods.
Wiring the Light Bars
Connecting to the power supply
Once mounted, link the bars to the power supply. Use wires and connectors that match your LED light bars. For instance, the SR-30 uses 7.2 amps and gives 9,600 lumens. Make sure the power supply can handle the total power of all bars.
Ensuring proper polarity and secure connections
Be careful with polarity when wiring the bars. Wrong connections can harm the LEDs or shorten their life. Use a voltage tester to check if the connections are safe and working. Double-check all wires to avoid loose or exposed parts, which can be dangerous.
Testing the Installation
Powering on to check lighting
After wiring, turn on the power to test the lights. Check if all bars light up evenly and are bright enough. For example, the 5″ MORE LED module gives 625 lumens, perfect for extra lighting setups.
Adjusting placement if needed
If the lighting looks uneven or has dark spots, move the bars. Adjust their positions to make the light spread evenly. This final step ensures the setup looks professional and improves the light box’s appearance.
Troubleshooting and Tips
Solving Common Problems
Fixing flickering or dim lights
Flickering or dim lights can happen for different reasons. First, check the power supply. Make sure it matches your LED light bars’ needs. If it doesn’t, the lights may not work properly. Next, look at the wiring. Loose or bad wires often cause flickering. Tighten all connections and replace any damaged wires.
If the problem continues, check the LED light bars. Over time, they can wear out and stop working well. Replace any broken bars to fix the lighting. A multimeter can help find electrical problems quickly.
Tip: Use a power supply with slightly more wattage than needed. This avoids overloading and keeps the lights steady.
Fixing uneven lighting
Uneven lighting often happens because of poor placement or spacing. Check your setup and measure the gaps between the bars. Adjust them to make the spacing equal. For single-sided boxes, keep the lights evenly spaced from the graphic panel to avoid bright spots.
If the issue remains, check the beam angle of your LED light bars. A narrow beam might not cover enough area. Switching to a wider beam angle can spread the light better.
Helpful Practices
Regular care and cleaning
Taking care of your light box helps it work well. Dust can build up on the LED light bars and make them dimmer. Clean them often with a soft cloth. Don’t use strong chemicals that could harm the surface.
Check the wiring and connections regularly. Look for damage or rust. Fixing these early stops bigger problems later.
Choosing good-quality parts
Using good-quality parts makes your light box last longer. Buy LED light bars from trusted brands. These usually have better warranties and are more durable. Use strong power supplies and connectors to avoid frequent repairs.
Note: Good-quality parts may cost more at first but save money later by needing fewer repairs or replacements.
Putting a rigid LED light bar in your light box needs good planning and careful work. By following the steps, you get bright and even lighting. A proper setup makes your lights last longer and work better.
Rigid Industries makes strong and reliable LED light bars. Buying these ensures they will last a long time. If you need help, ask an expert for perfect installation. Upgrade your light box today with trusted products from Rigid Industries.
FAQ
How should I clean LED light bars?
Use a soft cloth to gently clean the surface. Do not use strong chemicals or rough materials that might harm the bars. Cleaning them often keeps them bright and makes them last longer.
Can LED light bars fit in any light box?
Yes, but check the size and power needs of your light box. Make sure they match your LED light bars. This helps avoid uneven lighting and electrical problems.
How do I pick the right power supply for LED light bars?
Add up the total wattage of all your light bars. Choose a power supply with a bit more wattage than needed. This stops overloading and keeps the lights working well.
Why does my LED light bar flicker after setting it up?
Flickering can happen if wires are loose or the power supply is wrong. Check all the connections and ensure the power supply matches the voltage and current needs of your LED light bars.
Can I change how bright my LED light bars are?
Yes, many LED light bars let you dim them. Use a dimmer switch or controller that works with your lights to adjust the brightness as you like.
See Also
Fitting LED Light Bars Into Lightbox Signage Solutions
Understanding The Functionality Of LED Light Bars In Lightboxes
Guide To Installing LED Module Lights For Channel Letters


