Properly installing LED COB strip 12V lights is very important. It helps you get the best performance and avoid problems. When you install LED COB strip 12V lights the right way, you can enjoy many benefits. These include using less power, having smoother light, and being more flexible. But, if you make mistakes while installing, you might face issues. These issues can be flickering lights or a shorter lifespan. To make sure your project works well, plan your installation layout carefully. Also, follow the best practices.
Key Takeaways
Always use the right voltage for your power supply and LED strips. The wrong voltage can break your lights.
Figure out the total wattage your LED strips need. Pick a power supply that is 20-30% stronger to avoid overload.
Check all connections before you install. Loose or bad connections can make lights flicker and work poorly.
Test your LED strips before you put them up. This makes sure they work well and helps you find problems early.
Keep your installation area clean and ready. A clean surface helps the adhesive stick better and keeps your lights safe.
Wiring Errors
Wiring mistakes can really change how well your 12V COB LED strips work and how long they last. It is important to know some wiring basics to avoid these problems.
Understanding Wiring Basics
When you set up LED strip lights, watch out for some common wiring errors. Here are some mistakes you might see:
Not choosing the right wattage power supply.
Wrongly connecting several strips together or to the same power source.
Forgetting about voltage drop effects, especially with longer wires or LED strips.
These mistakes can cause big problems. For example, if you connect a 12V LED strip to a 24V power supply, it can burn out the LED chips right away because of too much current. Also, resistors can get too hot, which may lead to failure and fire risks. In the end, these errors can make the whole light strip useless, leading to high replacement costs.
Connecting Multiple Strips
If you want to connect several LED strips, you need to follow some rules for a good installation. Here are some tips for setting up LED strip lights well:
Make sure the total power use of the connected LED strips does not go over the power supply limit to prevent overload.
Check the voltage of the combined LED strips first, making sure the power source matches the LED strip voltage (like 12V for 12V strips).
Use good quality LED strips to avoid problems when connecting multiple lights.
Think about connecting LED strips in parallel for even brightness, but this might need more complex wiring.
Keep the number of LED strips in one chain low to help the driver last longer, ideally keeping the load under 80% of the power supply capacity.
By following these tips, you can avoid common wiring mistakes and make sure your installation of flexible LED strip lights is safe and works well.
Power Supply Selection
Choosing the right power supply is very important for your 12V COB LED strips. A good power supply makes sure your LED strip lights get steady voltage. This helps prevent damage and makes them last longer.
Choosing the Right Power Supply
When picking a power supply for your LED strip lights, think about these things:
Voltage Matching: Make sure the power supply’s voltage matches what the LED strip needs. For 12V COB LED strips, you need a 12V power supply.
Wattage Calculation & Safety Margin: Figure out the total wattage your LED strips need. Then add a 20-30% safety margin. This helps avoid overload and keeps everything running well.
Current: Find out the current needs based on total power and voltage. This will help you choose a power supply that can handle the load.
Power Factor: Check how well your system uses power. A higher power factor means better efficiency.
Efficiency: Look at how well the power supply changes incoming energy to output. Choose supplies with high efficiency ratings to save energy.
Protection Level (IP Level): Pick the right IP ratings for where you will use it. For dry areas, use IP20. For wet places, use IP65.
Dimming: Make sure it works with dimmable LED drivers if you want to change brightness.
Using a bad power supply can cause many problems. It might give too much voltage, which can hurt your LED strips. Overheating can happen, making your lights last less time. You could also see uneven brightness, which looks bad.
Testing Power Supply Output
Before you connect your power supply to the LED strip lights, test its output to make sure it meets the right specs. Follow these steps:
Check the voltage match: Make sure the power supply voltage matches the LED strip’s voltage (12V). A lower voltage can make lights dim, while a higher voltage can break the LEDs.
Check the power supply capacity: Make sure the power supply can handle the total power your LED strip needs. For example, a 5-meter strip that uses 10W per meter needs a power supply that gives at least 50W.
By carefully choosing and testing your power supply, you can avoid common mistakes and make sure your flexible LED strip lights work well.
Testing LED Strip Lights
Before you put in your 12V COB LED strips, it is very important to test them. This helps make sure everything works right and stops problems later. A good test before installation can save you time and stress.
Pre-Installation Testing
Use this simple guide to test your LED strip lights before you install them:
Unroll the LED strip from the reel.
Connect the strip to the power source.
Turn on the power and check the brightness.
See if the strips light up evenly; if not, check the connection.
Ask yourself:
Are there enough lights?
Do I need a dimmer?
Is the color right for what I need?
Are all the LED lights working?
By doing these steps, you can make sure your LED strip lights are ready to be installed.
Troubleshooting Common Issues
If you find problems while testing, use these tips to fix them:
Check for loose connections: Make sure all wires and connectors are tight, especially solderless ones.
Look for short circuits: Check for signs of short circuits, especially if you soldered wires.
Test for hidden short circuits: Use a multimeter to check resistance along the LED strip.
Check for voltage drop: Measure voltage at different points on the strip to find any drops.
Check the input voltage: Make sure the input voltage is correct to avoid dim lights.
Inspect adhesive: If the strip is drooping, add more double-sided tape or try other ways to mount it.
Check solder joints: Look at solder joints for loose or broken connections if some parts are not lighting.
By following these troubleshooting steps, you can quickly fix common problems and make sure your LED strip lights work well.
Mounting Issues
How you mount your 12V COB LED strips is very important. Good mounting helps your lights last longer and work better. You want your installation to be safe and look nice.
Surface Preparation
Before you put up your LED strip lights, get the surface ready. Preparing the surface well is key for strong sticking. Here are some steps to follow:
Clean the Surface: Get rid of dust, oil, and moisture from where you will mount. Any leftover stuff can make the lights peel off or fall later.
Use High-Quality Adhesive: Choose LED strips with strong adhesive backing. This choice helps your lights stick well and last longer.
Apply Firm Pressure: When you attach the LED strip, press down firmly and evenly. This helps the adhesive stick better to the surface.
Avoid Sharp Bends: If you need to go around corners, use connectors or clips. This way, you won’t damage the strip and it will look neat.
Secure Endpoints and Corners: Use clips or extra adhesive to hold down the ends and corners. This extra help keeps everything stable over time.
Schedule Regular Inspections: Check the sticking of your LED strips now and then. Regular checks can help you find problems early and keep your installation safe.
Wire Management Tips
Managing your wires well is just as important as mounting your LED strips right. Here are some tips to keep everything neat and organized:
Plan Your Layout: Before you start, plan where your LED strips and wires will go. This helps avoid tangles and keeps things looking clean.
Use Cable Clips: Keep loose wires in place with cable clips. This keeps your setup tidy and stops wires from getting unplugged by accident.
Avoid Overcrowding: Don’t fill your mounting area with too many wires. A clean setup looks better and lowers the chance of electrical problems.
Label Wires: If you have many strips or circuits, label your wires. This makes fixing problems and maintenance easier later on.
By following these mounting techniques and wire management tips, you can make sure your installation of flexible LED strip lights stays stable and looks great.
Safety Precautions
When you install your 12V COB LED strips, it is very important to follow safety rules. These tips will help you stay safe and make sure your installation goes well.
Electrical Safety Tips
To keep everything safe, think about these electrical safety tips:
Clean the LED Strip Regularly: Dust can make lights dim and less efficient.
Check Connections Periodically: Look for any damage or wear.
Avoid Overloading the Power Supply: This can cause overheating and other dangers.
Investigate Flickering or Dimming: Fix these problems right away to avoid more issues.
Grounding: Ground your COB LED strip to protect against electrical faults.
Surface Compatibility: Make sure the surface is clean, dry, and safe.
Avoid Overbending: Follow the manufacturer’s rules to keep the strip safe.
Adequate Ventilation: Make sure air can flow to prevent overheating.
Temperature and Humidity: Use the strips in the right temperature and humidity to avoid problems.
Chemical Exposure: Stay away from chemicals that can harm the strip.
Waterproofing: Use waterproof strips in wet places and check the IP rating.
Regular Inspection: Look for damage or wear often.
Keep Away from Children and Pets: Prevent accidents with electrical parts.
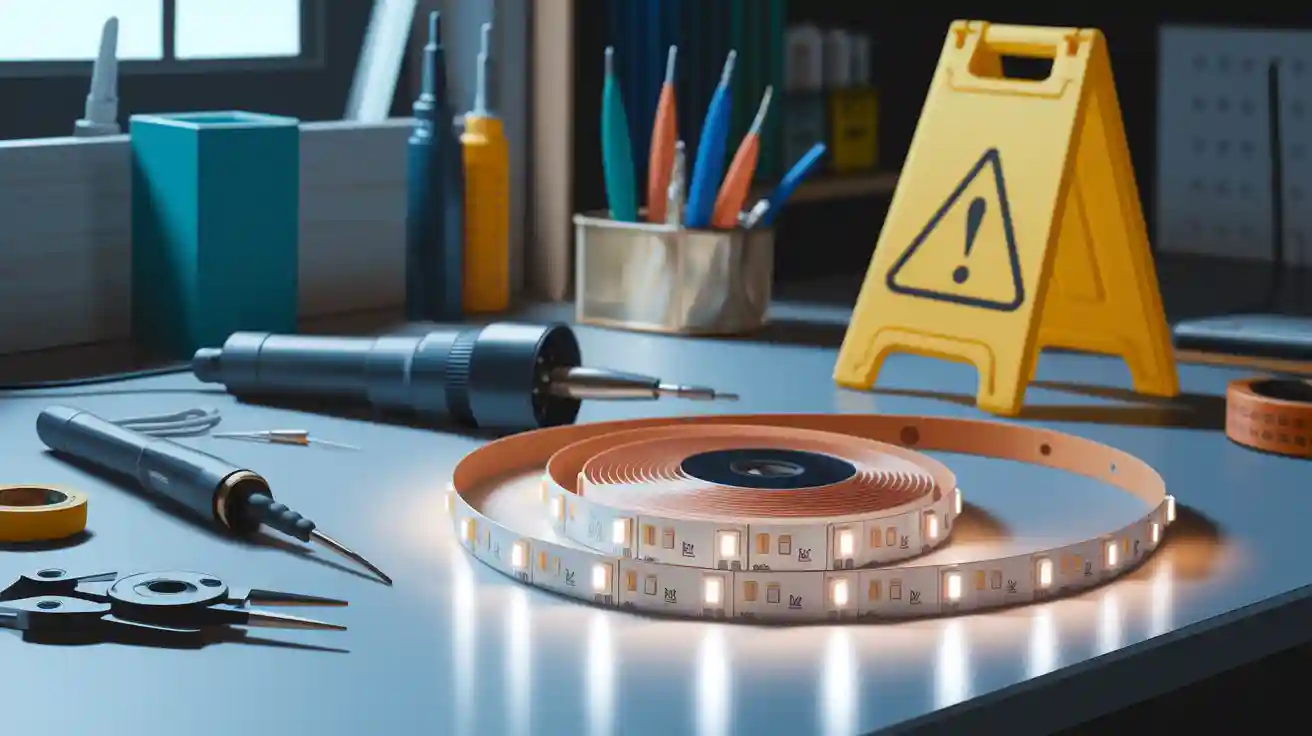
Using the Right Tools
Using the right tools is key for a safe and easy installation. Here’s a list of tools you should have:
COB LED Strip Roll: Make sure you have the right length and type.
12V Power Supply: Pick one that matches the voltage and wattage you need.
Connectors or Soldering Tools: These help make secure connections.
Measuring Tape: For placing everything accurately.
Scissors: Use these to cut at the marked spots.
Mounting Clips: Optional for extra support.
Wire Strippers and Electrical Tape: Important for preparing and securing connections.
By following these safety tips and using the right tools, you can make sure your installation of flexible LED strip lights is successful and safe.
Installing your 12V COB LED strips needs careful attention. Avoid these important mistakes for a good installation:
Mismatched Voltage: Always check voltage ratings to stop damage.
Overloading the Power Supply: Pick a power supply that is at least 20% more than your total wattage.
Ignoring Polarity: Check connections to avoid LEDs that do not work.
Voltage Drop: Use center power feeds for longer runs to keep brightness.
Poor Connections: Make sure connections are tight to stop flickering.
By following these tips, you can improve the performance and life of your flexible LED strip lights. Remember to get your tools ready, test your setup, and keep the installation surface clean.
Tip: Check your installation often to find any problems early.
FAQ
What is the best way to cut 12V COB LED strips?
Cut the strips at the marked cut points. These points usually have a line. This helps you avoid damaging the circuit and keeps everything working well.
How do I connect my LED strips to a power supply?
You can use connectors or solder the wires to the power supply. Make sure the voltage matches your LED strips. Also, check the polarity before you connect them.
Can I use dimmers with my 12V COB LED strips?
Yes, you can use dimmers made for LED lights. Just make sure the dimmer works with 12V systems. This will help prevent flickering or damage.
How long can I run my LED strips without overheating?
You can run your LED strips for several hours. Just make sure there is good ventilation. Also, avoid overloading the power supply to stop overheating.
What should I do if my LED strips flicker?
First, check your connections. Make sure the power supply matches the needed voltage. If the flickering continues, test the power supply output for stability.
See Also
Steps To Properly Cut Your Cob Led Strip
Guide To Connecting Your Cob Lighting Strip
Effective Installation Tips For RGB LED Strip Lights


