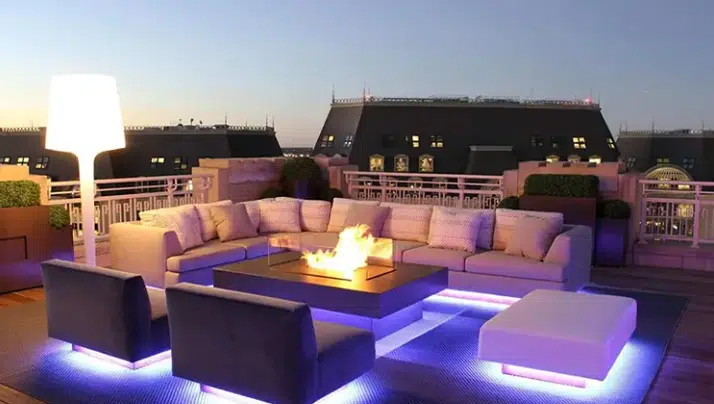
LED strip lighting offers a variety of fun DIY options. You can create a cozy atmosphere in your bedroom or brighten up a wall with these versatile lights. Not only are they stylish, but they are also practical.
Here’s why:
LED strip lighting consumes 75% less energy than traditional bulbs, helping you save on your electric bill.
They have a lifespan of over 25,000 hours, meaning you won’t need to replace them anytime soon.
Their flexibility and customizability allow you to use them under cabinets or to highlight artwork.
More people are now incorporating LED strip lighting to enhance their home decor. Join the trend and showcase your creativity!
Key Takeaways
LED strip lights use less energy, saving 75% compared to old bulbs. This helps lower your electric bill.
Pick the right LED strips by checking brightness, color, and if they are waterproof for your project.
Plan your project well. Measure spaces and draw designs to avoid wasting materials.
Use controllers and diffusers to adjust your LED strips. This makes your space look better.
Stay safe by using the right tools, securing wires, and following instructions.
What You Need for LED Strip Lighting Projects
Before starting your LED strip lighting project, gather all the tools first. Being prepared makes the process easier and more fun.
Essential Tools and Materials
Types of LED strip lights and their features
Not all LED strips are alike. Some are single-color, while others are RGB for colorful effects. Addressable LEDs let you control sections for cool designs. Look for strips that meet LM-80 and TM-21 standards. These ensure they last long and work well. Strong resistors and good wiring help avoid problems and keep lights bright.
Power supply and connectors
Your LED strips need the right power source. Pick a power supply that matches the strip’s voltage and length. For longer strips, you may need connectors or a soldering kit. This keeps the brightness even across the setup.
Adhesive or mounting tools
Most LED strips have sticky backs, but clips can add support. Double-sided tape works on bumpy surfaces. Use a ruler or tape measure to line everything up neatly.
Optional tools for custom LED strips (e.g., controllers, diffusers)
Want to make your project stand out? Controllers let you change brightness and colors. Diffusers make the lights look smooth and professional. These extras are great for unique designs.
Pro Tip: Always check for certifications like FCC, CE, and RoHS. These ensure your LED strips and tools are safe and high-quality.
Certification Type | Description |
|---|---|
FCC | Makes sure it meets interference rules. |
CE | Confirms safety and environmental standards. |
RoHS | Limits harmful materials in products. |
Ecodesign Directive | Improves product eco-friendliness. |
Safety Equipment
Insulated gloves and voltage tester
Safety is key! Insulated gloves stop shocks, and a voltage tester checks if power is safe. These are must-haves when working with wires.
Cable management tools
Messy wires can look bad and be dangerous. Use ties or clips to keep them tidy. This makes your setup safer and more professional.
Certification | Region Of Application | Mandatory or Voluntary | Requirement |
|---|---|---|---|
FCC Certification | US | Mandatory | EMC |
CE Certification | European Union | Mandatory | LVD and EMC tests |
CCC Certification | China | Mandatory | Safety |
SAA Certification | Australia | Mandatory | Safety |
BIS Certification | India | Mandatory | Safety |
PSE Certification | Japan | Mandatory | Safety; EMC |
RoHS Certification | European Union | Mandatory | Directive (EU) 2015/863 |
EN62471 Certification | Worldwide | Mandatory | Photobiological safety |
Note: Following safety rules keeps you safe and ensures your project meets local laws.
Getting Started with LED Strip Lighting
Picking the Best LED Strips
Think about brightness, color, and waterproofing
When choosing LED strips, check brightness, color, and waterproofing. Brightness is measured in lumens. More lumens mean brighter light. A good strip should have 450 lumens per foot. This is as bright as a T8 fluorescent bulb. Color temperature, in Kelvin (K), changes the room’s feel. Warm 2700K light feels cozy. Cool 6500K light feels fresh and energizing.
If using LED strips outside or in wet areas, waterproofing is key. Look for IP65-rated strips or higher. These handle moisture well. This makes your project last longer and work better.
Types of LED strips (single-color, RGB, smart LED strips)
There are different LED strips for different needs. Single-color strips are great for steady lighting, like under cabinets. RGB strips let you change colors for a fun look. Smart LED strips give you full control. You can adjust colors, brightness, and sync them with apps or voice commands. They feel modern and cool.
Planning Your Project
Measure and plan the space
Before starting, measure where the LED strips will go. Use a tape measure to be exact. Plan the layout to know how much strip you need. This avoids wasting materials. Long projects need careful planning. Too much strip can cause dim or uneven light.
Pick power supplies and wiring
Get a power supply that matches your LED strips. For long setups, use more than one power source. This keeps the light even. Place the driver and dimmer where you can reach them. Check all wires before turning on the power. This keeps it safe and working well.
Draw your design
Sketch your idea before starting. Whether it’s a bookshelf, wall, or patio, a plan helps. Think about how the lights will look when turned on. A good plan saves time and gives better results.
Pro Tip: Install on aluminum surfaces. They keep LED strips cool and last longer.
Step-by-Step Guide to Installing LED Strip Lights
Getting the Area Ready
Cleaning and preparing surfaces
Before starting, clean the surface for the LED strips. Dirt or dust can make the adhesive weak, causing the strips to fall. Follow these easy steps to prepare:
Step | Instruction |
|---|---|
1 | Wipe the area with a damp cloth where the strips will go. |
2 | Wait for the surface to dry fully before sticking the strips. |
A clean, dry surface helps the adhesive stick well. This makes your project look neat and last longer.
Measuring and marking for accuracy
Use a tape measure to mark where the LED strips will go. This avoids uneven placement or wasting materials. Mark the path with a pencil or masking tape. Double-check your marks to ensure they are correct. Taking time to measure now saves trouble later.
Setting Up LED Strip Lights
Cutting strips to fit your project
You can cut LED strips to the size you need. Look for small lines or scissors icons on the strip. These show where to cut. Use sharp scissors for a clean cut. Always turn off the power before cutting to protect the LEDs.
Sticking strips with adhesive or clips
Peel off the backing from the sticky side of the strip. Press the strip firmly onto the cleaned surface, following your marks. For extra hold, use mounting clips, especially on bumpy or vertical areas. Clips keep the strips secure and prevent sagging.
Connecting to the power source
Attach the LED strips to the power supply using the right adapter. Make sure the power supply matches the strip’s voltage. For long strips, use connectors or extension cables to keep brightness even. Plug in the power and test the lights to see if they work.
Pro Tip: When using multiple strips, match the + and – sides to avoid problems.
Personalizing LED Strip Lighting
Changing colors and brightness with controllers
Controllers let you change how your LED strips look. Use a remote or app to adjust brightness and colors. RGB strips can create fun effects for parties or relaxing nights. Try different settings to match your mood or space.
Using diffusers for a smooth finish
Want a polished look? Add diffusers over your LED strips. Diffusers soften the light and make it glow evenly. They are great for under-cabinet lighting or accent walls.
Pairing smart LED strips with apps or voice controls
Smart LED strips let you control lights with apps or voice assistants like Alexa. You can set schedules, change colors, or sync lights with music. This makes your setup modern and fun to use.
Fun Fact: Gamers and streamers love smart LED strips. They create cool lighting effects that match their games or videos.
Tips and Tricks for Using LED Strip Lighting
Troubleshooting Common Issues
Fixing dim or flickering lights
Dim or flickering lights can be annoying but are easy to fix. First, check if the power supply matches the strip’s voltage. If it doesn’t, the lights won’t work properly. Loose connections can also cause problems. Make sure all connectors are tight and clear of dirt. Flickering lights may need a capacitor to steady the voltage. If the issue continues, check solder joints for breaks or weak spots.
Quick Tip: Use a power supply that handles the strip’s full current to avoid issues.
Resolving connectivity problems
If your LED strips don’t light up, check the connections. Ensure the positive (+) and negative (-) ends are aligned correctly. For multiple strips, confirm that connectors are secure and compatible. Use a voltage tester to find damaged sections. Replace broken wires or connectors to fix the problem.
Enhancing Your Designs
Layering lights for depth and dimension
Layering LED strips can make your space look amazing. Use strips with different brightness levels for a cool effect. For example, put one strip under a shelf for soft light. Add another behind it for a glowing look. This works great in living rooms, kitchens, or gaming setups.
Using LED strips in unique places (e.g., furniture, artwork)
Be creative! LED strips can go in unexpected spots. Add them under a coffee table for a floating look. Frame your artwork with strips to make it pop. Waterproof strips are great for patios or garden paths. These ideas can make your DIY projects stand out.
Fun Fact: DIY projects have made LED strips super popular for home decor.
Ensuring Safety and Longevity
Preventing overheating and overloading circuits
To keep your LED strips safe, don’t overload circuits. Use good-quality power supplies and dimmers with safety labels like UL or CE. Install strips on aluminum to help with heat. This stops overheating and keeps them working well.
Securing wires and connections properly
Messy wires can be unsafe and look bad. Use ties or clips to keep wires neat and organized. Make sure all connections are tight to avoid accidents. Check your setup often to ensure everything stays in place.
Pro Tip: LED strips stay cool, but proper setup and materials make them even safer.
Adding LED strip lighting to your DIY projects is simple and fun. Start by planning your design, then install and customize the lights. These lights save energy and work well in many places. Use them under cabinets, behind TVs, or on stairs. Their bendable design and bright colors make cool creations easy.
Why not try custom LED strips for your next idea? They’re easy to use and can make your home look amazing. Use them to show off artwork or set a cozy mood in a room. LED strip lighting gives you so many creative options. Grab your tools and start now—you’ll love what you can make!
Fun Fact: DIY fans love LED strip lighting because it’s cheap, easy to set up, and super fun to use.
FAQ
What are the best places to use LED strip lights?
You can use LED strip lights almost anywhere! Popular spots include under cabinets, behind TVs, along stairs, or even outdoors. They’re great for adding ambiance to bedrooms, kitchens, and patios. Just make sure to pick waterproof strips for outdoor use.
Can I cut LED strip lights to fit my project?
Yes, you can! Look for the scissor icons on the strip, which show where it’s safe to cut. Use sharp scissors and always turn off the power first. Cutting outside these marks can damage the strip.
How do I control the colors and brightness of LED strips?
You can use a remote, app, or voice assistant to adjust colors and brightness. RGB and smart LED strips offer the most flexibility. Controllers let you create effects like fading, flashing, or syncing with music.
Are LED strip lights safe to use?
Absolutely! LED strips are safe when installed correctly. Use a power supply that matches the strip’s voltage and avoid overloading circuits. For extra safety, secure wires neatly and check connections regularly.
Do LED strip lights consume a lot of electricity?
Not at all! LED strip lights are energy-efficient and use up to 75% less electricity than traditional bulbs. They’re a great way to save on energy bills while adding style to your space.
Pro Tip: Always unplug your LED strips when making adjustments to avoid accidents.
See Also
Creative Christmas Lighting Ideas Using LED Strip Lights
Versatile COB LED Strips for Unique Design Concepts
Selecting The Perfect LED Strip Lights For Linear Lighting
Effective Installation Tips For RGB LED Strip Lights
Best Practices For Installing LED Strip Lights In 2025


