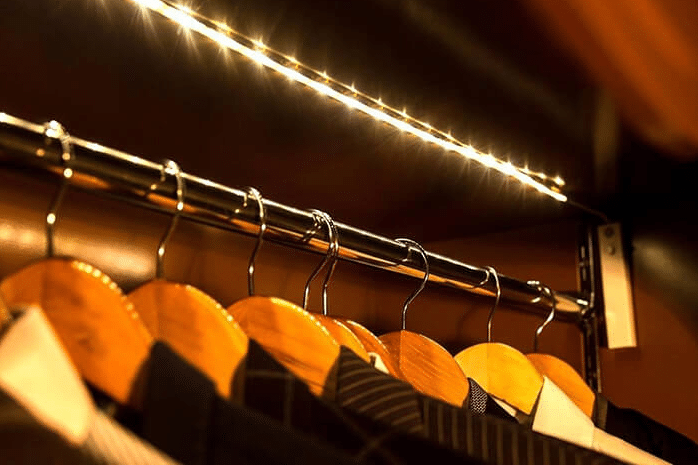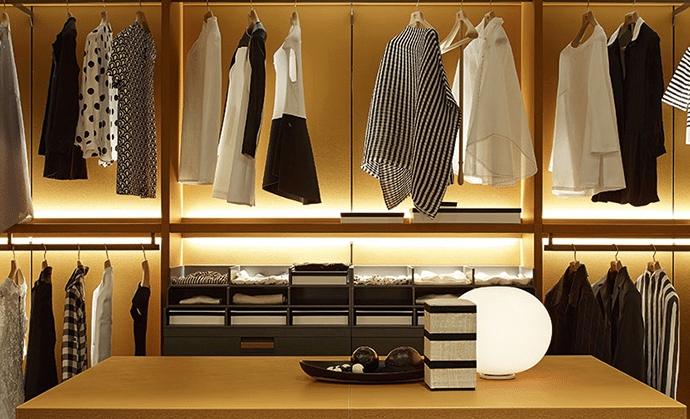
Imagine opening your wardrobe and being greeted by a soft, glowing light. It activates automatically when you open the door. Closet LED strip lighting can make this a reality. They enhance the functionality of your space while also adding a touch of elegance. With motion-sensing lights, you’ll no longer have to rummage around in the dark. These lights sense your presence and illuminate your closet instantly.
Did you know that motion sensor lights can save up to 50% of energy? This translates to lower bills and less hassle for you. It’s a simple upgrade that makes life easier and more stylish.
Key Takeaways
Motion sensor LED strip lights brighten your wardrobe automatically. This helps you find things easily without searching in the dark.
Using these lights can cut energy costs by 50%. They are convenient and save money too.
Clean surfaces and plan well before installing for a good fit. This ensures the LED strips work their best.
Keep your LED lights clean and check connections often. This helps them last longer and look nice.
Battery-powered lights are cordless and easy to install. They give you more flexibility in setup.
Tools and Materials for Closet LED Strip Lighting

Tools you need for easy installation
Before starting, gather tools to make the job simple. Here’s a quick list:
Decide where the light will be placed.
Measure the space to ensure the strip fits well.
Cut the strip to size at marked points.
Clean the surface with a wet cloth, then dry it.
Stick the strip down firmly for a secure hold.
Following these steps will save time and effort. You’ll need basic tools like scissors, a tape measure, and a ladder for high spots. Use 3M double-sided tape for extra stickiness if needed.
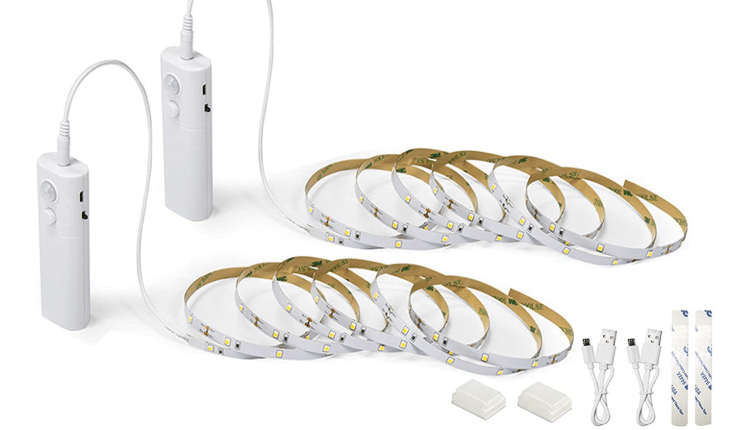
Materials like LED strips and motion sensors
Picking the right materials is important for success. For closet LED lighting, you’ll need:
LED strips: Choose ones with adhesive backing for easy sticking.
Motion sensors: These turn the lights on automatically.
Power supply: Make sure it matches your LED strip’s voltage.
Connectors: Use these to join multiple strips if required.
When buying LED strips and sensors, check their details. For example:
Feature | What It Means |
|---|---|
Brightness | Shows how much light the strip gives, measured in lumens. |
Power Use | Tells how much energy it uses, shown in watts per metre. |
Colour Accuracy | Measured by CRI; higher CRI means better colour quality. |
Customisation | Includes RGB or adjustable white light for different looks. |
Installation Needs | Things like strip quality and power supply affect how long it lasts. |
Sensor Range and Sensitivity | Shows how far and how well the sensor detects movement. |
Extras for a neat and stylish finish
To make your project look great, consider these extras:
Cable clips or channels to hide messy wires.
Dimmable motion sensors for brightness control.
Battery-powered or rechargeable lights for cordless setups.
These extras can make your lighting look professional and tidy. Wireless options are perfect if you don’t want to deal with cords.
Getting Your Wardrobe Ready for LED Strip Lights
Measuring and planning the layout
Before sticking anything, take time to plan first. Use a tape measure to check your wardrobe’s size. This helps the LED strips fit without gaps or overlaps. Decide where you want the light to shine. Should it brighten shelves or highlight hanging clothes?
Draw a simple sketch to guide your setup. It doesn’t need to be perfect, just clear enough to follow. If using more than one strip, plan how they’ll connect. Careful planning now avoids mistakes later.
Cleaning the surface for better sticking
A clean surface helps the LED strips stick well. Dust or grease can make the adhesive weak. Follow these steps to prepare the surface:
Wipe it with a soft cloth to remove dust.
Use a mild cleaner to get rid of grease or dirt.
Let the surface dry completely before sticking the strips.
If the surface is rough, add extra adhesive like double-sided tape. Don’t use strong chemicals as they might harm the strips. Clean regularly to keep the adhesive strong and your wardrobe tidy.
Choosing where to place LED strips and sensors
Placement is key for good lighting in your wardrobe. Decide where the strips should go. For shelves, place them along the edges to light everything. For hanging areas, put them at the top for even lighting.
Motion sensors also need careful placement. Follow these tips for the best results:
Pick a height and angle that covers the whole wardrobe.
Place the sensor where clothes or doors won’t block it.
Check the product guide for specific instructions.
If you’re unsure about wiring, ask a professional for help. Good placement makes your lights work well and look great.
Step-by-Step Guide to Installing Motion-Activated Lights

Cutting and attaching the LED strip
Getting the LED strip ready is the first step. Follow these simple instructions to ensure a smooth process:
Measure and mark the length: Use a tape measure to determine how much LED strip you need. Mark the cutting points carefully.
Cut at the designated points: Look for the marked cut lines on the strip. Use sharp scissors to make a clean cut.
Attach the strip to the surface: Position the LED strip about 3 to 4 inches from the edges of your wardrobe. Peel off the adhesive backing and press the strip firmly onto the surface.
Connect to the power supply: Attach the connectors to the strip and plug them into the power source.
Test the lights: Turn on the power to check if the LED strip works properly.
💡 Tip: Use wire clips or cable ties to keep the wiring neat and secure. This will give your closet a polished look.
Installing and positioning the motion sensor
The motion sensor is what makes your lighting smart and convenient. Here’s how to set it up:
Choose the right spot: Place the motion sensor where it can detect movement easily. Avoid areas where clothes or doors might block it.
Secure the sensor: Use screws or adhesive to attach the sensor to the chosen spot. Make sure it’s stable and won’t shift over time.
Adjust the angle: Tilt the sensor slightly to cover the entire area of your wardrobe. This ensures it picks up movement effectively.
Test the sensor: Wave your hand in front of it to see if the lights turn on. Adjust the sensitivity if needed.
For a PIR motion sensor, ensure it’s positioned at the correct height for optimal detection. Check the product manual for specific recommendations.
Connecting the power supply securely
A secure power connection is crucial for the safety and longevity of your LED strip lighting. Here’s what you need to do:
Match the voltage: Ensure the power supply matches the voltage of your LED strip. This prevents damage and ensures consistent performance.
Choose your connection method: You can solder the wires for a strong connection or use solderless connectors for convenience. Both methods work well, so pick the one you’re comfortable with.
Avoid voltage drops: For high-power LED strips, use a circuit board with a copper weight of at least 2 oz. This helps maintain a steady voltage.
Test the setup: Once everything is connected, turn on the power and check if the lights and motion sensor work as expected.
⚠️ Safety Note: Always unplug the power supply before making any adjustments to avoid electrical hazards.
Hiding wires for a neat look
Visible wires can spoil the stylish feel of your LED lights. Hiding them not only makes your wardrobe look better but also keeps it safer and easier to use. Here are some simple ways to manage those wires:
Use cable clips or adhesive channels: These tools help organise wires neatly. Stick adhesive channels along wardrobe edges to hold wires securely. Cable clips are also useful and won’t damage walls or furniture.
Hide wires behind panels: If your wardrobe has gaps or removable panels, use them. Push the wires behind these panels and secure them with tape or clips. This keeps the wires completely hidden.
Tie wires together: In places where hiding isn’t possible, bundle wires neatly. Use cable ties or Velcro straps for a clean and reusable solution. A tidy bundle looks much better than messy wires.
💡 Pro Tip: Pick clips or channels that match your wardrobe’s colour. This helps the wires blend in and stay unnoticed.
For long wires, cut them to the right length using a wire cutter. Reconnect the ends carefully and test the lights to ensure they work properly.
Taking time to hide wires gives your wardrobe a clean, professional finish. It’s a small effort that makes a big impact!
Testing and Fixing Your LED Strip Setup
Checking the motion sensor
Testing the motion sensor is important to make sure it works. Start by testing it during the day. Bright light can sometimes affect how it works, especially sunlight or reflections. Wave your hand in front of the sensor to see if the lights turn on. If they don’t, move the sensor or change its angle a little.
Keep the sensor clean and free from blockages. Dust or dirt can stop it from sensing movement properly. Check how far the sensor can detect and how well it responds. Stand at different distances and move around to test it. If it doesn’t work well, you might need to adjust it.
Try testing it in different conditions. Cover the sensor to make it dark and see if it works. Use the test mode, if available, to check it in bright light. These steps help make sure the sensor works in all situations.
Changing sensitivity and placement
Adjusting the sensor’s sensitivity can improve its performance. Start with a middle setting and change it based on your tests. If the lights turn on too often, lower the sensitivity to stop false triggers. If the lights don’t turn on when needed, increase the sensitivity a bit.
Where you put the sensor is also important. Place it where it can see the area you want to light up. Don’t put it behind clothes or near doors that might block it. Tilt the sensor so it covers the whole wardrobe. If using a PIR sensor, follow the maker’s instructions for the best height and position.
Use the manual override to keep the lights on while testing. This lets you check the sensor and make changes without stopping.
Fixing common problems
Fixing issues with your LED setup can be simple. Start by checking the basics. Is the power supply connected properly? Are the wires attached securely? Loose wires can cause flickering or stop the lights from working.
If the sensor isn’t working, check if it’s clean and placed correctly. Dust or bad positioning can make it work poorly. Adjust the sensor if needed and test it again. For battery-powered lights, make sure the batteries are charged or replaced.
Make a checklist to organise your fixes. This helps you find and solve problems step by step. For example:
Check all wire connections.
Look for dirt or blocks on the sensor.
Test the lights in different conditions.
Following these steps keeps your LED setup working well and easy to use.
Maintaining Your Motion Sensor LED Strip Lights
Cleaning and taking care of the LED strips
Keeping your LED strips clean helps them shine brightly for longer. Dust and dirt can make them less effective. Follow these steps to maintain them:
Clean weekly: Use a soft cloth to wipe off dust gently. This stops dirt from building up and dimming the lights.
Deep clean monthly: For tough stains, use a damp cloth with mild soap. Wipe carefully, rinse with clean water, and let them dry fully.
Avoid harsh cleaners: Strong chemicals or rough sponges can harm the LED surface. Use gentle cleaning products instead.
💡 Tip: Keep the temperature within the recommended range to avoid overheating. This helps your LED strips last longer.
Regular cleaning keeps your lights looking good and working well.
Inspecting and fixing wiring connections
Loose or broken wires can cause flickering or stop the lights. Checking and fixing connections is important for safety and performance. Focus on these areas:
Wires and cables: Check for damage or wear. Replace any frayed wires quickly.
Power connections: Make sure the power supply matches the LED strip’s voltage. Wrong voltage can cause problems.
Sockets and plugs: Look for loose or damaged parts.
Areas to Check | Common Problems Found |
|---|---|
Wires and Cables | Frayed or exposed wires |
Power Connections | Loose or wrong voltage |
Sockets and Plugs | Damaged or loose parts |
⚠️ Safety Note: Always unplug the power before checking or fixing wires.
Replacing parts when needed
Sometimes, parts of your LED setup might need changing. Look out for these signs:
Lights are dim: If the brightness fades, replace the LED strip.
Flickering lights: This could mean a problem with the strip or wires.
Rust or corrosion: Replace metal parts showing rust to avoid electrical issues.
Physical damage: Cracks in the strip can expose parts and make it unsafe.
When replacing parts, think about upgrading to rechargeable or battery-powered lights. These are easier to use and need less wiring.
💡 Pro Tip: Check the cost and energy savings of new parts. This helps you choose the best option for your wardrobe lighting.
Motion sensor LED strip lights are a brilliant addition to wardrobes. They use less energy, lower bills, and make your space stylish. These lights can last up to 25,000 hours, so replacements are rare. They turn on and off by themselves, making life easier for you. You can also adjust the light’s colour to set the perfect mood.
Why not try this easy DIY project? It’s a simple way to light up your wardrobe and make it more useful. Whether sorting clothes or showing off outfits, these lights make your wardrobe look amazing.
FAQ
What LED strips work best for wardrobes?
Pick LED strips with sticky backs for easy setup. Choose ones with bright light (lumens) and adjustable colours. For a fun look, try RGB strips that change colours.
💡 Tip: Look for high CRI (Colour Rendering Index). It makes colours look real under the light.
Can I use motion sensor lights without wires?
Yes, you can! Battery-powered or rechargeable lights are great for no wires. They’re simple to set up and don’t need electrical connections.
⚠️ Note: Don’t forget to charge or replace batteries often to keep them working.
How can I stop LED strips from falling off?
Clean the area well before sticking the strips. Use strong double-sided tape if needed. For extra hold, try mounting clips or channels.
Do motion sensor lights save energy?
Yes, they do! These lights only turn on when needed, saving power. LED strips already use less energy, and sensors make them even better.
🌱 Eco-Friendly Tip: This setup saves energy and lowers your electricity costs.
Can I change how bright the lights are?
Yes, many LED strips let you adjust brightness. Use dimmable sensors or remotes to control it. This helps you set the right lighting for your wardrobe.
💡 Pro Tip: Use dim light for a cosy vibe or bright light for clear visibility.
See Also
Utilising Smart LED Strips for Home Lighting Solutions in 2025
Creative LED Strip Lighting Concepts for Festive Celebrations
Enhancing Kitchen Cabinets with LED Strip Lighting
Effective Installation Techniques for LED Strip Lights in 2025


