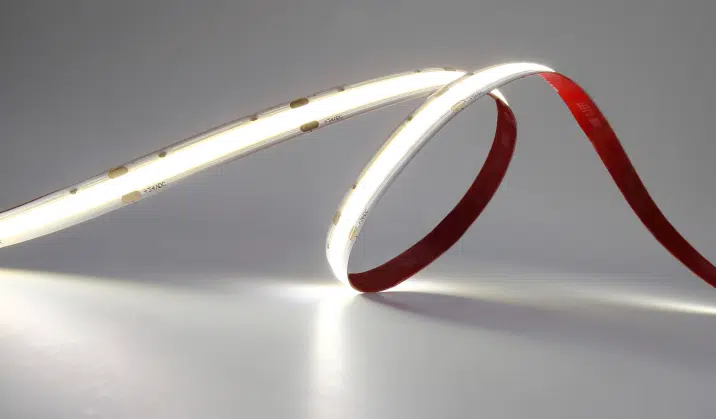
Switching to COB LED light technology offers remarkable advantages. You gain energy efficiency, extended durability, and superior lighting quality. These lights consume less power, reducing electricity bills significantly. Additionally, the benefits of LED floodlights include enhanced brightness and reliability, making them ideal for both residential and commercial spaces. Upgrade today for better performance.
Key Takeaways
Changing to COB LED lights uses less energy and lowers bills. Get brighter and longer-lasting lights for your home or office.
Turn off the power before you start installing. Use safe tools and wear safety gear to stay protected while upgrading.
Clean your COB LED lights often to keep them bright. Clean them every few months to make them last longer.
Preparation for Replacing Traditional Lights
Tools Needed for COB LED Light Installation
Before starting, gather the tools and materials needed for a smooth installation process. Using the right tools ensures efficiency and prevents damage to the COB LED lights. Here are some essential items:
Tool Type | Purpose |
|---|---|
Sharp scissors/cutting tool | For cutting COB LED strips at designated points to avoid damage to the circuit and LEDs. |
Compatible connectors | To connect the strips to the power supply, ensuring proper fit with the strip’s configuration. |
Dimmer | To control brightness, ensuring compatibility with the strip’s voltage and power requirements. |
Having these tools ready will save time and help you avoid unnecessary interruptions during installation.
Safety Measures to Follow
Safety precautions are critical when working with electrical components. Always prioritize your safety to prevent accidents or damage to the lighting system. Follow these guidelines:
Turn off the power supply at the circuit breaker before starting.
Use insulated tools to avoid electrical shocks.
Wear protective gloves to handle sharp edges or hot components.
Additionally, be cautious of potential glare from COB LEDs. Using diffused optical lenses can reduce glare and protect your eyes. Remember, proper safety measures ensure a hassle-free installation process.
Assessing Your Current Lighting Setup
Preparing for installation involves evaluating your existing lighting setup. Start by checking the compatibility of your fixtures with COB LED lights. High-quality COB LEDs are essential for optimal performance. Consider these factors:
Inspect the materials used in your current fixtures to ensure they can support COB LEDs.
Verify the reputation of the manufacturer to avoid issues with inferior products.
Assess the quality of your COB LED strips to ensure they meet your lighting needs.
By thoroughly assessing your setup, you can avoid compatibility issues and ensure a seamless upgrade to COB LED lighting.
Choosing the Right COB LED Light

Ensuring Compatibility with Existing Fixtures
Before purchasing a COB LED light, you must confirm that it fits your current fixtures. Check the size and type of the socket or mounting system. For example, if you are upgrading recessed lights, ensure the COB LED light matches the housing dimensions. Additionally, verify the voltage and wattage requirements of your fixtures. Using incompatible lights can lead to poor performance or even damage to the system.
Tip: If you are unsure about compatibility, consult the fixture’s manual or contact the manufacturer for guidance.
Key Specifications to Consider (Wattage, Lumens, Color Temperature)
When selecting a COB LED light, focus on three critical specifications:
Wattage: Choose a wattage that matches your lighting needs. Lower wattage saves energy, while higher wattage provides brighter illumination.
Lumens: This measures brightness. For task lighting, aim for higher lumens, while ambient lighting requires fewer lumens.
Color Temperature: Measured in Kelvin (K), this determines the light’s appearance. Warm white (2700K-3000K) creates a cozy atmosphere, while cool white (4000K-5000K) suits workspaces.
Understanding these specifications ensures you achieve the desired lighting effect without compromising efficiency.
Selecting Reliable COB LED Strip Lights and Brands
Choosing the right COB LED strip lights and brands is crucial for long-term performance. Look for brands with positive reviews and proven reliability. High-quality strips often include features like better heat dissipation and consistent brightness. Avoid generic or unbranded products, as they may lack durability.
Note: Investing in a trusted brand may cost more initially but saves money in the long run by reducing replacements and maintenance.
By carefully evaluating these factors, you can make an informed decision when choosing the right LED floodlight bulb or COB LED light for your space.
Step-by-Step Guide to Installing COB LED Lights

Turning Off Power to the Lighting Circuit
Before starting the installation, you must turn off the power to the lighting circuit. This step ensures your safety and prevents electrical hazards. Follow these essential safety protocols:
Turn off the power supply at the main electrical panel.
Wear appropriate safety gear, such as gloves and eye protection.
Taking these precautions minimizes risks and creates a safe environment for your LED upgrade.
Removing Old Fixtures or Bulbs
Removing old fixtures or bulbs is a critical step in the process. Follow this proper procedure for connecting LED light strips and replacing the LED floodlight bulb:
Carefully unscrew the existing bulb by holding its base and turning it counterclockwise.
Handle the old bulb gently to avoid breakage, especially if it contains hazardous materials.
Inspect the socket for any signs of damage or corrosion. Address any issues before proceeding.
Install the new LED bulb securely.
Restore power and test the new LED bulb to ensure it functions correctly.
This method ensures ease of installation and prepares the fixture for the COB LED light strip.
Installing the COB LED Light or COB LED Strip Lights
To install COB LED strip lights, follow these steps:
Prepare the surface by cleaning it thoroughly. Ensure it is dry and smooth for proper adhesion.
Plan your layout, including the starting and ending points, and locate the power source.
Adhere the strip by removing the adhesive backing and pressing it firmly onto the surface. Use mounting clips if necessary.
Connect COB LED strips to the power supply connection, ensuring compatibility with dimmers or controllers.
Safely connect LED strips by selecting the right connector and securing it properly.
For connecting multiple LED light strips, repeat the process while ensuring each strip aligns with the power source. This step-by-step guide simplifies the LED installation process.
Testing the Lights for Proper Functionality
After installation, test the COB LED light strip to verify its functionality. Perform the following checks:
Test the dimming and control functions to ensure they operate correctly.
Adjust settings to achieve optimal performance.
Confirm the output light power is stable before finalizing the installation.
These tests ensure your COB LED strip lights deliver consistent and reliable performance.
Troubleshooting Issues with COB LED Lights
Fixing Flickering or Dimming Lights
Flickering or dimming COB LED lights can disrupt your lighting experience. Addressing these issues requires identifying the root cause and applying the right solution. Here are common causes and fixes:
Bad Driver: Over time, LED drivers may degrade due to heat exposure. Replace faulty drivers with high-quality ones to stabilize the power supply.
Loose Wiring or Bulb: Check for loose connections in the circuit or bulb socket. Secure any loose wires to restore proper functionality.
Dimmer Incompatibility: Ensure your dimmer switch is compatible with COB LED lights. Incompatible dimmers often cause flickering or uneven brightness.
Low-Quality Fixtures or Bulbs: Inferior products may have substandard drivers. Upgrade to certified, high-quality COB LED lights for consistent performance.
Surge in Wattage: High power loads on the same circuit can affect LED performance. Distribute the load evenly or use a dedicated circuit for your LEDs.
Tip: Use a multimeter to measure voltage at the LED connection. This helps identify power supply issues causing dimming or flickering.
Addressing Non-Functioning COB LED Lights
When your COB LED lights fail to turn on, follow these troubleshooting steps:
Check if the power supply matches the LED’s voltage and current requirements.
Use a multimeter to verify the power supply’s voltage output.
Inspect all connections, ensuring wires and connectors are secure.
Remove dimmers or controllers temporarily to test if the lights work without them.
These steps help isolate the problem and determine whether the issue lies with the power supply, connections, or accessories.
Resolving Dimmer Compatibility Problems
Dimmer compatibility issues often lead to flickering or unresponsive lights. To resolve this:
Verify that your dimmer switch supports LED technology. Look for dimmers labeled as “LED-compatible.”
Replace incompatible dimmers with models designed for COB LED lights.
Adjust the dimmer settings to ensure smooth operation.
Note: Always consult the manufacturer’s guidelines to select the right dimmer for your COB LED setup. This ensures optimal performance and prevents future issues.
Maintenance Tips for COB LED Lighting
Cleaning and Dusting COB LED Lights
Regular cleaning keeps your COB LED lights functioning efficiently and looking their best. Dust and debris can accumulate on the surface, reducing brightness and heat dissipation. To clean your lights:
Use a soft, lint-free cloth to wipe the surface gently. Avoid abrasive materials that may scratch the LEDs.
For stubborn dirt, dampen the cloth slightly with water or a mild cleaning solution. Ensure no moisture seeps into the electrical components.
Clean the surrounding area to prevent dust from settling back onto the lights.
Tip: Schedule cleaning every few months to maintain optimal brightness and extend the lifespan of your COB LED lights.
Checking for Loose Connections
Loose connections can disrupt the performance of your COB LED lights. Regularly inspect the wiring and connectors to ensure everything is secure. Key indicators of loose connections include:
The LED strip not lighting up or flickering intermittently.
A noticeable voltage drop at the connection point, which you can measure using a multimeter.
If you find any loose or corroded connections, tighten or replace them immediately. This simple step prevents potential damage and ensures consistent lighting performance.
Following Manufacturer Guidelines for Longevity
Adhering to manufacturer guidelines is essential for maximizing the lifespan of your COB LED lights, which can last up to 50,000 hours with proper care. Follow these best practices:
Install the lights in a way that allows adequate heat dissipation. Overheating can shorten their lifespan.
Protect the lights from excessive moisture and mechanical stress. Use waterproof casings if necessary.
Choose reliable brands with clear labeling and proven quality. Authentic COB LEDs often perform better and last longer.
By following these recommendations, you can enjoy the full benefits of your COB LED lights while minimizing maintenance needs.
Upgrading to COB LED lights transforms your lighting experience. These lights deliver unmatched energy efficiency, reducing electricity costs while providing superior brightness. Their durability ensures long-term reliability, making them ideal for spaces like kitchen lights where consistent performance is crucial.
COB LEDs consume less power and generate minimal heat, extending the lifespan of your fixtures. As production scales up, these lights are becoming more affordable, offering a cost-effective alternative to traditional options. Government initiatives to phase out incandescent bulbs further highlight the growing demand for energy-efficient solutions.
Take the first step today. Replace your outdated lighting with COB LEDs and enjoy reduced operational costs, better illumination, and a sustainable future. Whether for your home or kitchen lights, this upgrade is a smart investment in quality and savings.
FAQ
What makes COB LED lights better than traditional LED lighting?
COB LED lights provide higher brightness and better heat dissipation. They also offer a more uniform light output, making them ideal for task and ambient lighting.
Can you install COB LED lights without professional help?
Yes, you can install COB LED lights yourself. Follow the manufacturer’s instructions, ensure compatibility with your fixtures, and prioritize safety during the process.
How do COB LED lights save energy?
COB LED lights consume less power while delivering brighter illumination. Their efficient design reduces energy waste, lowering electricity bills and promoting sustainable lighting solutions.


