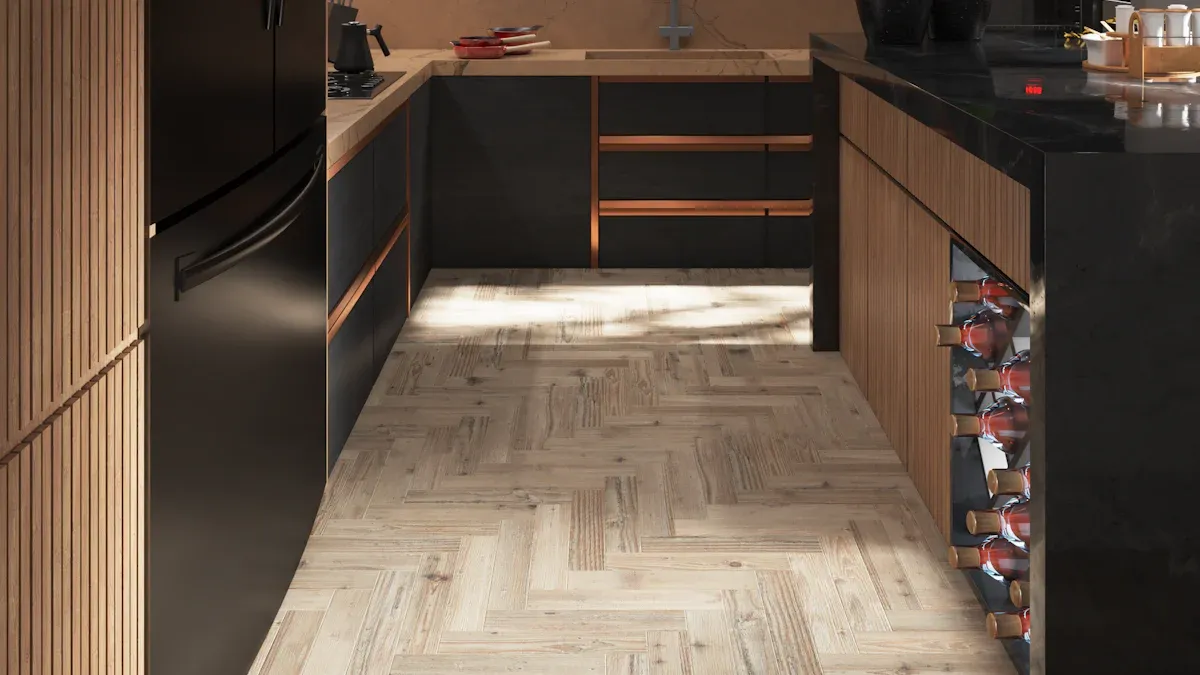
Looking to brighten up your cabinets? An LED strip is the perfect solution! It’s sleek, energy-efficient, and adds a modern touch to your space. Plus, it’s not just about looks—these strips provide practical lighting that makes your kitchen or workspace more functional and inviting. Why settle for dull cabinets?
Key Takeaways
LED strips save energy, using 75% less power than normal bulbs. This lowers your electricity bills and helps the environment.
Pick the right brightness and color for your LED strips. Use 30-35 lumens per foot for work lighting.
Installing them correctly is important. Clean the surface, measure well, and connect securely to make them last longer and work better.
Benefits of Using LED Strips
Energy efficiency and cost-effectiveness
Using LED strips saves money and helps the planet. They use 75% less energy than regular bulbs, says the U.S. Department of Energy. This means lower power bills for you! They also last 25 times longer, so replacements are rare. Think about how much you’ll save over time.
💡 Tip: Want bigger savings? Pick certified LED strips for better efficiency.
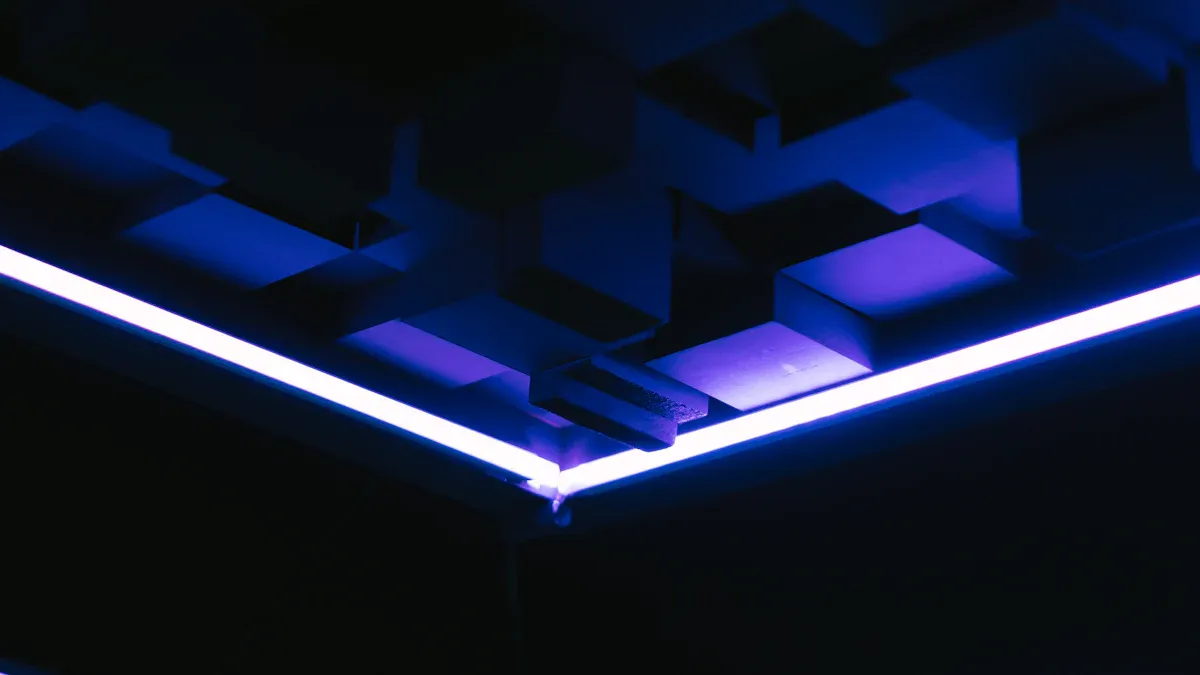
Modern and sleek design
LED strips give your space a stylish, modern vibe. Their thin and bendable design fits almost anywhere, like under cabinets or on shelves. They light up evenly, removing shadows and giving a neat look. Whether it’s your kitchen or living room, LED strips add elegance.
Indirect light makes rooms feel warm and inviting.
Soft tones create a comfy and cozy mood.
Great for homes and businesses alike.
Customizable and versatile options
The best part about LED strips is how flexible they are. You can cut them to fit, pick different colors, and even control them with smart gadgets. Need bright light for work or soft light to relax? Easy! With dimming and color-changing features, you can set the perfect mood anytime.
Long-lasting and durable performance
LED strips are made to last. Unlike old bulbs that stop working suddenly, LEDs slowly dim over time. They can last 50 times longer than regular bulbs and 10 times longer than fluorescent ones. Installing them properly and keeping them cool can make them last even longer.
🔧 Note: Good-quality LED strips pass tough tests like LM-80 and TM-21 to prove they’re strong and reliable.
How to Choose the Right LED Strip
Determining the ideal brightness (lumens)
Brightness matters when choosing an LED strip. It’s measured in lumens, which tell you how much light the strip produces. For under-cabinet lighting, aim for 30-35 lumens per foot for task lighting. Need something brighter? Some strips go up to 2,000 lumens, perfect for larger spaces.
💡 Tip: Use lower lumens for cozy lighting and higher lumens for work areas.
Selecting the right color temperature
Color temperature, measured in Kelvins (K), affects the mood of your space. Warm white (2700K-3000K) creates a soft, inviting glow, while cool white (4000K-5000K) feels crisp and modern. Interior experts recommend warm tones for kitchens and living spaces.
🚫 Avoid 5000K or higher—it can feel too harsh for most homes.
Measuring the length and size
Before buying, measure your cabinets carefully. Use a tape measure to get the exact length and width. Plan your layout to decide where the power supply will go. LED strips can be cut to size, but only at marked points to avoid damage.
Higher density strips (60 LEDs/M) give brighter, more even light.
Standard density (30 LEDs/M) works for subtle lighting.
Waterproof vs. non-waterproof options
If your LED strip will be near water, like in a kitchen or bathroom, choose a waterproof option. Look for IP ratings:
IP Rating | Protection Level | Best Use Case |
|---|---|---|
IP65 | Water-resistant | Kitchens |
IP67 | Temporary submersion | Bathrooms |
IP68 | Fully waterproof | Outdoor areas |
Non-waterproof strips are fine for dry spaces like living rooms or bedrooms.
Compatibility with dimmers and smart controls
Want to adjust brightness or control your lights with your phone? Make sure your LED strip is compatible with dimmers or smart systems. Many strips work with apps like Alexa or Google Home. For dimming, check if the strip uses 12V or 24V DC and pair it with a dimmable power supply.
🛠️ Note: Single-color strips usually support dimming, but RGB strips may need special controllers for color changes.
Step-by-Step Installation of LED Strips
Tools and materials required
Before you start, gather everything you’ll need. Having the right tools and materials on hand makes the process smoother. Here’s a quick checklist:
LED strip lights (unroll them from the reel).
Power supply compatible with your LED strip.
Scissors or a utility knife for cutting.
Measuring tape for precise measurements.
Rubbing alcohol and a soft cloth to clean surfaces.
Adhesive or mounting clips for secure attachment.
Optional: dimmer switch, connectors, and gloves.
💡 Tip: Lay out all the items and do a mock setup to ensure you have everything ready.
Measuring and cutting the LED strip
Accurate measurements are key to a perfect fit. Follow these steps:
Measure the area where you’ll install the LED strip.
Mark the desired length on the strip.
Cut along the marked line using scissors, but only at designated points to avoid damage.
✂️ Pro Tip: Double-check your measurements before cutting to prevent mistakes.
Preparing the cabinet surface
A clean surface ensures the LED strip sticks properly. Here’s how to prep:
Wipe the surface with rubbing alcohol to remove dust and grease.
Sand glossy areas lightly with 120-grit sandpaper for better adhesion.
Test a small area to ensure the adhesive will stick well.
Attaching the LED strip securely
Now it’s time to attach the strip:
Peel off the adhesive backing from the LED strip.
Press the strip firmly onto the cleaned surface.
For extra security, use clear silicone glue or mounting clips.
🛠️ Note: Avoid touching the adhesive with your fingers to maintain its stickiness.
Connecting to a power source
Proper wiring is crucial for your LED strip to work. Follow these steps:
Check that the power supply voltage matches the LED strip (12V or 24V).
Connect the strip to the power supply using the correct connectors.
Plug the power supply into an outlet.
⚡ Safety Tip: Always turn off the power before handling electrical connections.
Testing and troubleshooting
Before finalizing the installation, test the setup:
Turn on the power supply to check if the LED strip lights up.
If it doesn’t work, inspect the connections and ensure they’re secure.
For uneven brightness, check for voltage drops and adjust wiring if needed.
🔧 Troubleshooting Tip: If the strip shows inconsistent colors, try reconnecting or replacing damaged sections.
Tips for Getting the Best Lighting Results
Best placement for even light
Where you put your LED strip matters a lot. Place it near the front edge of the cabinet. This helps spread light evenly and reduces shadows.
Here are some lighting types to guide your placement:
Light Type | What It Does | Best Use |
|---|---|---|
Type III | Spreads light forward in an oval shape. | Big spaces. |
Type IV | Half-circle light with little backlight. | Edges. |
Type V | Full-circle light for all-around glow. | Work areas. |
Use diffusers for softer light
Want softer, smoother light? Use diffusers! They cut down glare and make the light look even. Frosted sheets or aluminum channels work well. They also help keep the LED strip cool, making it last longer.
💡 Tip: Install diffusers correctly for better light and style.
Add dimmers for mood control
Dimmers let you change the brightness easily. Whether cooking or relaxing, dimming sets the right mood. Some dimmers even let you change colors if your LED strip supports it. This makes them great for homes and businesses.
Clean and maintain your LED strips
Keep your LED strip clean to make it last. Wipe it with a soft cloth to remove dust. Don’t overload it—follow the maker’s rules. Use surge protectors to avoid power damage. Keeping it cool also helps it last longer.
🛠️ Pro Tip: Clean your LED strip every few months for the best look and performance.
LED strips are amazing for lighting under cabinets. They save energy, look modern, and work in many ways. You can adjust them to fit your style and enjoy their durability. Don’t wait! Install LED strips and watch your home turn magical.
FAQ
How do I know if my LED strip is compatible with dimmers?
Check the product label or manual. Look for “dimmable” or “compatible with dimmers.” Most single-color strips work with dimmers, but RGB strips need special controllers.
Can I install LED strips without professional help?
Yes, you can! LED strips are beginner-friendly. Follow the steps in this guide, and you’ll have them installed in no time.
💡 Tip: Watch a quick tutorial video if you’re unsure about any step.
What’s the best way to hide the wires?
Use cable clips or adhesive channels to keep wires neat and out of sight. You can also run them along the cabinet edges for a cleaner look.
🛠️ Pro Tip: Paint the channels to match your cabinets for a seamless finish.
See Also
Stylish LED Lighting Solutions For Your Kitchen Cabinets
Understanding The Functionality Of COB LED Strips
Versatile COB LED Strips For Unique Design Projects
Adjustable COB LED Strips For Customized Lighting
Creative LED Strip Lighting Concepts For Holiday Decor


