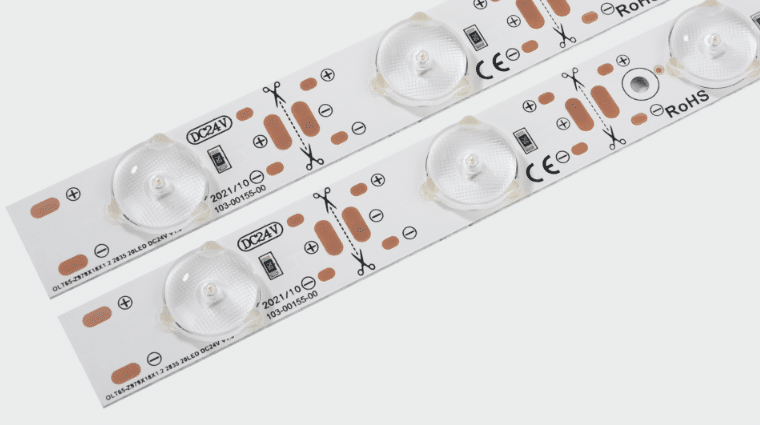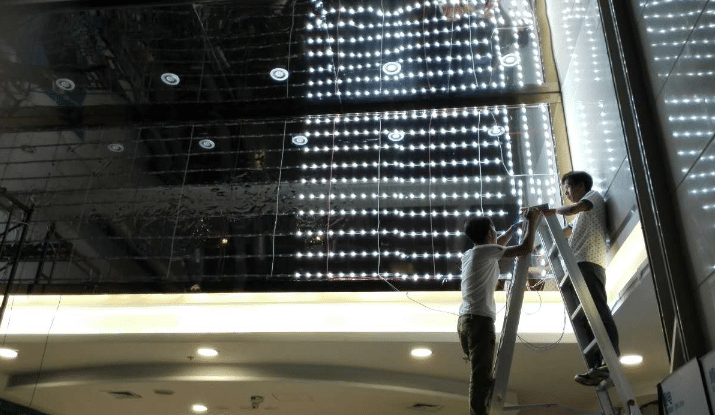
Have you ever wanted to brighten your room with cool lights? Rigid LED strip lights can help you do that. They save energy, look great, and are easy to set up. The LED strip market is growing fast. It might increase from USD 2.5 billion in 2023 to USD 7.8 billion by 2032. This growth is due to better LED technology and smart home gadgets. These lights are simple to install and can be customised. They are ideal for improving your home or office space.
Key Takeaways
Collect basic tools such as screwdrivers, pliers, and wire cutters. Being ready helps save time and makes things easier.
Wipe the surface well before sticking the LED strips. A clean spot helps them stick better and last longer.
Check your LED strips first to make sure they work. This finds problems early and stops trouble later.
Tools and Materials for Installing LED Strip Lights

Before starting, gather all the tools and materials you need. Being prepared will make the job easier and save time.
Basic Tools for Installation
You don’t need expensive tools to set up LED strips. Simple tools will work fine. Here’s what you’ll need:
Screwdrivers: Use flathead and Phillips types to secure connections.
Pliers: Helpful for adjusting and holding light fixtures in place.
Wire cutters: Use these to cut wires or LED strips neatly.
Voltage meter: Check the power is off before starting for safety.
Ladder: Needed to safely reach high spots during installation.
These tools are easy to find and will make the job simpler.
Materials Needed for Rigid LED Strip Lights
Now, let’s look at the materials. These items are important for a smooth installation. Here’s a quick list:
Tool/Material | Purpose |
|---|---|
Power supply and connectors | Provides the right voltage and links multiple strips together. |
Measuring tape | Measures the LED strip length accurately. |
Scissors | Cuts the strip to the size you need. |
Cleaning supplies | Cleans surfaces for better sticking of the strips. |
Adhesive clips or mounting tape | Keeps the strips firmly attached to the surface. |
For outdoor use, add waterproof materials like silicone glue. It lasts long and handles bad weather well. Also, choose LED strips with CE or ROHS labels for good quality.
Having these tools and materials ready will help you install LED strips easily. It’s a simple way to get a neat and professional result.
Getting Ready to Install LED Strips
Cleaning and Preparing the Surface
Before putting up your LED strips, clean the surface well. A smooth and clean area helps the adhesive stick better. This makes the installation last longer. Follow these steps:
Get your cleaning tools. Use a soft cloth with rubbing alcohol. Don’t use strong cleaners, as they might leave marks.
Clean the surface gently. Wipe the area where the LED strips will go. Remove all dust, grease, or dirt.
Wait for it to dry fully. Make sure the surface is dry. Wet areas can weaken the adhesive, causing the strips to fall off later.
For bumpy or damp places, use mounting clips or extra glue. These steps will help your setup look neat and stay in place.
Tip: Measure carefully! Use a measuring tape to find the exact strip length before cleaning.
Testing the LED Strips Before Installation
Testing your LED strips first can save you trouble later. It checks if everything works and helps find problems early. Try these tests:
Test Type | What It Checks |
|---|---|
Lighting source test | Makes sure the light source works well. |
Colour comparison checking | Confirms all colours match properly. |
Waterproof test | Checks if the strips resist water. |
Environmental test | Tests how well the strips handle different conditions. |
Also, inspect labels and connections. Rub the label to check it’s clear, and ensure all parts are connected. After testing, you’re ready to install the strips.
Note: Always use a voltage meter to confirm the power is off before touching wires.
Step-by-Step Guide to Install LED Strip Lights

Measuring and Marking the Installation Area
Start by measuring the area for your rigid LED strip lights. Accurate measurements help avoid mistakes. Follow these simple steps:
Measure the surface length using a tape.
Mark where the strips will go with a pencil or tape.
Check your measurements again to ensure they are correct.
Tip: If installing around a corner, include the corner length. This prevents cutting extra pieces later.
Cutting Rigid LED Strip Lights to Fit
You can cut rigid LED strips at specific points. Cutting them properly keeps them working well. Here’s how:
Find the marked cutting points on the strip.
Use sharp scissors or a cutting tool for clean cuts.
Follow the manufacturer’s instructions to avoid damage.
Note: Cutting carefully saves material and keeps the strip working.
Attaching LED Strips to the Surface
Stick the strips to the surface carefully. Good sticking makes the installation last longer. Here’s what to do:
Clean the surface with alcohol or a degreaser to remove dirt.
Peel off the adhesive backing and press the strip firmly.
Use clips or extra adhesive for uneven surfaces or weak sticking.
Pro Tip: Heat-resistant adhesives are great for hot areas.
Connecting LED Strips to the Power Supply
Connect your LED strips to a power supply to make them work. Follow these steps for a safe setup:
Match the power supply voltage with the strip’s voltage.
Use connectors to join strips without soldering.
Plug in the power supply and test before finishing.
Safety Tip: Use certified components like CE or UL Listed to prevent problems.
How to Install LED Strip Light Around a Corner
Corners can be tricky, but you can make them look neat. Try these methods to install LED strips around corners:
Fold the strip gently at a 90-degree angle.
Bend the strip softly for smooth corner transitions.
Use an accordion fold for rounded corners.
Reminder: Avoid sharp bends to prevent damage and poor lighting.
Testing and Adjusting the Installation
Testing the LED Strips After Installation
After attaching your LED strips, test them to ensure they work. Testing helps find problems early and fixes them quickly. Here are some common tests you can try:
Test Type | What It Does | Key Measurements |
|---|---|---|
Integrating Sphere Test | Checks the light source using standard measures. | Brightness (Lumens), Colour Rendering Index (CRI), Power Use, Colour Temperature, Power Factor |
Hi-Pot Test | Tests electrical safety by checking insulation. | Measures current leakage and insulation strength. |
Function Test | Confirms the LED works as it should. | Tests basic functions like on/off, dimming, and brightness. |
Endurance Test | Checks how well the LED performs over time. | Observes performance during four hours of continuous use. |
You can also check how long the lights last. For example:
L70: The strip keeps 70% of its brightness after its lifespan.
L80: It keeps 80% of its brightness.
L90: It keeps 90% of its brightness.
Tip: Test in a dark room to see if the light spreads evenly.
Adjusting Alignment and Brightness
If something looks off, adjust the strips for a better finish. Fixing alignment and brightness makes your setup look neat. Here’s how to adjust:
Fix crooked strips: If a strip is uneven, peel it off gently. Re-stick it using a ruler to keep it straight.
Change brightness: Use dimmers to control how bright the lights are. Here are some common dimming methods:
Dimming Method | What It Does | Advantages |
|---|---|---|
0-10V Dimming | Simple way to adjust brightness levels. | Reliable and good for large setups. |
DALI Dimming | Offers advanced control for each fixture. | Great for detailed designs. |
DMX | Used for stage lighting and effects. | Perfect for creative displays. |
Pro Tip: Use dimmers that match your LED strips to avoid flickering.
By testing and adjusting, your lights will look perfect and brighten your space beautifully.
Tips for a Durable and Safe Installation
Making Sure LED Strips Stick Well
It’s important to make your rigid LED strip lights stick properly. A strong hold keeps them in place and working well. Follow these steps for better adhesion:
Clean the surface: Ensure the area is smooth, dry, and dust-free. Use rubbing alcohol and a soft cloth to clean it.
Pick the right adhesive: Use double-sided tape for flat areas. For uneven spots, mounting clips work better.
Strengthen the bond: For tricky surfaces like metal or plastic, add extra adhesive for better grip.
Pro Tip: If installing outdoors or in damp places, use waterproof glue or silicone for longer-lasting results.
Testing the stickiness is also helpful. Try tests like corrosion resistance or environmental checks. These steps stop the strips from peeling or falling later.
Taking Care of Rigid LED Strip Lights
After installing your LED strips, keeping them in good shape is important. Regular care helps them last longer and work better.
Dust often: Dust can make the lights dim. Wipe them gently with a dry cloth to keep them bright.
Check wires: Look at the power supply and connectors now and then. Loose wires can cause flickering or damage.
Prevent overheating: LEDs need airflow to stay cool. Make sure there’s space around them or use strips with heat sinks.
Use wisely: Don’t leave the lights on for too long. Overuse can cause heat stress and shorten their life.
Tip: Buy good-quality rigid LED strip lights. They last longer and work better over time.
By following these tips, your lights will stay bright and work well. A little care makes a big difference in keeping your setup looking great.
Putting up rigid LED strip lights can be enjoyable and satisfying. They can make any room look stylish and comfortable. These lights are cheap, flexible, and save energy. Many cost under £20 and reduce power bills. Work carefully, follow the guide, and enjoy your new lights!
FAQ
What makes rigid LED strips different from flexible ones?
Rigid LED strips are fixed on solid boards. They are strong and best for flat areas. Flexible strips can bend, so they work well on curved or uneven spots.
Can I use LED strips again after taking them off?
Yes, but only if the sticky part still works. If it doesn’t stick, add new glue or use clips to put them back.
How do I pick the right power supply for my LED strip?
Check the strip’s voltage and power use. Choose a supply with a bit more power for safety and good performance.


