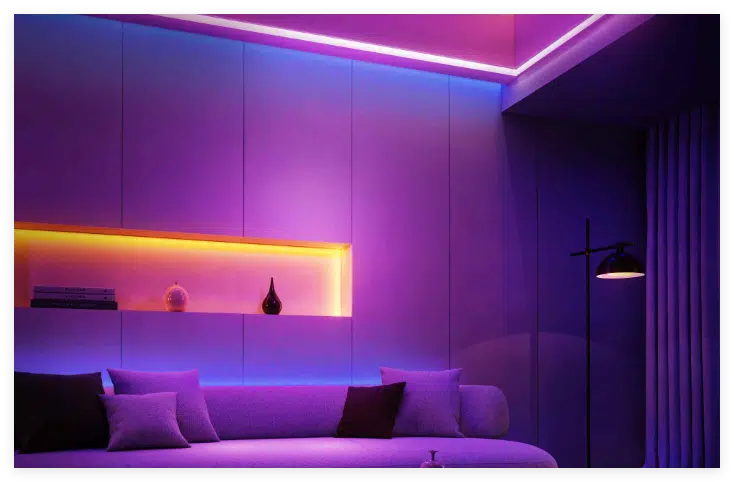
LED strip lights for room add a modern and stylish look to your space. They change the feel of the area with soft, even lighting. These flexible lights work well in many places, such as bedrooms or home offices. You can use dimmers to adjust their brightness, making them ideal for setting the mood or enhancing visibility.
Key Takeaways
Clean the surface with rubbing alcohol to prepare the area. A clean surface helps the lights stick better and last longer.
Pick LED strip lights with the right brightness and controls. Think about your room’s use to choose the best option.
Mount the strips using aluminium channels. These protect the strips, reduce heat, and make it look neat.
Getting Ready to Install LED Strip Lights
Tools and Materials You’ll Need
Before you begin, collect all the tools and materials. Being prepared will make the job easier and quicker. Below is a table of items often used for home LED light projects:
Tool/Material | Description |
|---|---|
LED Tape Strips | Bendable strips in different lengths and colours. |
Aluminium Profile | Gives a strong base and spreads light better. |
Dimmable Power Supply | Lets you adjust brightness for indoor lighting. |
Angled Batten | Positions strips at angles for better light spread. |
Silver Sticky Back Tape | Provides a smooth surface and cools the strips. |
LED Profiles | Keeps strips straight and firmly in place. |
Wiring in Parallel | Makes lighting even and avoids connection problems. |
Energy-saving LED strips are best for homes as they use 75% less power than old-style bulbs. They are perfect for saving energy in your house.
Measuring and Cleaning the Area
Getting the area ready is key for a neat finish. First, draw a simple plan of your room. Mark where the strips will go, where power sources are, and how the strips will connect. This helps you stay organised before starting.
Then, clean the surface where the strips will stick. Use isopropyl alcohol to get rid of dust, grease, or dirt. A clean surface helps the strips stick well. Let the area dry fully before moving on. For the best results, make sure the surface is at room temperature when cleaning and installing.
By preparing properly, you can avoid problems like uneven lighting or strips falling off. A clean and ready surface makes your lights last longer and look tidy and professional.
Picking LED Strip Lights and Power Supply
Kinds of LED Strip Lights
When choosing LED strip lights, think about brightness and controls. Different strips suit different needs. For example, NexLux LED and DayBetter WiFi strips are bright and easy to control with a WiFi app. Pangton Villa strips are also very bright but use simple controls without an app. These are great for people who like easy setups.
Product Name | Brightness Level | Easy to Use | Control Type |
|---|---|---|---|
NexLux LED | Above average | Yes | WiFi app |
L8Star Smart LED | Brightest | No | Non-WiFi app |
DayBetter WiFi | High | Yes | WiFi app |
Pangton Villa | Very bright | Yes | No app |
Armacost | Bright white | N/A | N/A |
Think about your room’s purpose when picking lights. Softer lights like NexLux LED are good for bedrooms. Brighter lights like Armacost strips work better for workspaces.
Choosing the Right Power Supply
A proper power supply is important for safe use. LED strips usually need low voltages like 12V or 24V. Make sure the power supply matches the strip’s voltage and current needs.
Criteria | What It Means |
|---|---|
Voltage | LED strips use low (12V, 24V) or high (220V AC) voltage. |
Current | Current (A) = total power (W) ÷ voltage (V); check power supply supports this. |
Wattage | Power supply should be 1.2–1.5 times the strip’s total power. |
Protection Level | IP ratings show if it’s safe for indoor (IP20/IP33) or wet areas (IP65/IP67). |
Dimming | Dimmable drivers let you change brightness with switches or smart systems. |
For extra features, look for an RGB controller. It can dim lights and change colours to match your mood. Always check for safety marks like UL or CE to ensure the product is reliable.
Installing LED Strip Lights in Bedroom or Other Spaces

Cutting and Connecting the Strips
Start by cutting the LED strip to the needed length. Look for small scissor icons on the strip to find cut lines. Use scissors to cut straight across these lines carefully. This prevents damage to the strip’s internal parts. After cutting, check the ends for copper contacts. These contacts are important for joining strips together.
To connect strips, use clips or soldering. Clips are easy and flexible, while soldering is stronger and lasts longer. Make sure the copper contacts fit properly in the connectors. If connecting to power, calculate the total power needed for your strips. Pick a power supply that matches the voltage and current requirements. For longer strips, spread power evenly to avoid drops in brightness.
Mounting and Securing the Strips
Mounting strips correctly makes them look neat and professional. You can choose from different methods, each with pros and cons:
Mounting Method | How It Works | Advantages | Disadvantages |
|---|---|---|---|
Adhesive Mounting | Stick strips with double-sided tape. | Quick and simple setup. | May not stick well everywhere. |
Clip Mounting | Secure strips with clips. | More stable than tape. | Takes more effort to install. |
Channel Mounting | Place strips in protective channels. | Protects and lasts longer. | Harder to install. |
For bedrooms, tape mounting works well if the surface is smooth and clean. To hide strips or make them last longer, use channels. Aluminium channels protect strips and help cool them, making them last longer.
When placing strips around corners, use corner connectors or bendable strips. Don’t bend strips sharply, as this can break them. Use gentle curves or special corner connectors instead.
Testing and Adjusting the Lights
Test your lights after installing them to check they work. Look at the power supply and connections. Turn on the lights and check their brightness and colour. If they flicker or look uneven, fix the connections or check the power supply.
Adjust the lights to match your needs. Warm white lights at 2700K are good for bedrooms. They make colours look natural and create a cosy feel. Use dimmers or smart controls to change brightness. For relaxing, set lights to 50-100 lux. For reading, increase brightness to 400 lux.
Studies show LED light settings can affect mood and focus. Green light can make you feel happy, while red light feels intense. Try different colours and brightness levels to create the best atmosphere for your room.
Troubleshooting LED Strip Lights
Fixing Common Issues
Sometimes, LED strip lights may not work perfectly. Knowing how to fix problems can save time. Here are common issues and how to solve them:
Fading Brightness: If lights seem dim, check for voltage drops. Use shorter strips or reconnect every 6-9 metres. Thicker wires can reduce voltage loss. A multimeter helps test voltage on the strip.
Non-Working Sections: If part of the strip is dark, mark the faulty LEDs. Replace the broken section with a matching new one. Ensure it matches the original strip’s type.
Flashing or Chasing Lights: This happens with incompatible dimmers. Remove the dimmer and connect the lights directly to the power supply.
Overheating: Overheating can damage your LED strip lights. Use metal profiles to spread heat evenly. This keeps brightness steady and prevents damage.
Entire Strip Not Lighting Up: If no lights turn on, check if the power supply matches the strip’s voltage and current. Also, check for loose or corroded wires.
Follow these steps for better troubleshooting:
Check if the power supply matches the strip’s needs.
Look at all connections for loose or damaged wires.
Test the setup with another power supply to find faults.
Read the manufacturer’s guide for specific advice.
Fixing these problems quickly will make your LED strip lights work like new.
Tips for a Professional Finish
To make your LED strip lights look neat, plan carefully. These tips will help you achieve a polished result:
Plan Your Layout: Draw a simple layout before starting. Mark power sources, corners, and obstacles. This avoids mistakes during installation.
Prepare the Surface: Clean the surface well for better sticking. Use isopropyl alcohol to remove dust and grease. Let it dry fully before attaching the strips.
Use Aluminium Channels: Place strips in aluminium channels for a tidy and strong finish. These channels protect strips and help spread heat, making them last longer.
Hide Wires and Connectors: Keep wires and connectors out of sight. Use clips or adhesive holders to secure them neatly.
Test Before Finalising: Test the lights after placing them but before fixing them permanently. This lets you adjust if needed.
Choose the Right Accessories: Use corner connectors for sharp turns and diffusers to soften light. These improve the look and function of your lights.
For outdoor setups, use waterproof strips and covers. Protect them from extreme weather by following product instructions.
By using these tips, you can create a clean and stylish LED strip lighting setup that improves your room’s atmosphere.
Putting up LED strip lights is an easy way to improve your room. Aluminium channels keep the strips safe, spread heat, and make the light better. Try different spots and settings to get the right mood. Careful setup makes them last longer and turns your room into a cosy, trendy space.
FAQ
What surfaces are best for installing LED strip lights?
Flat, smooth, and dry surfaces are the best choice. Clean the area with isopropyl alcohol before sticking the strips. Avoid bumpy or rough areas to help them stick better.
Can LED strip lights be used again after removal?
Yes, but only if the sticky backing still works. If it doesn’t stick anymore, use new double-sided tape or mounting clips to secure them again.
How can you stop LED strip lights from getting too hot?
Use aluminium channels to spread heat evenly. These channels protect the strips and help them last longer by keeping the temperature steady.
See Also
Effective Methods for Installing LED Strip Lights in 2025
Best Practices for Installing RGB LED Strip Lights
Utilising Smart LED Strips for Home Lighting in 2025


