
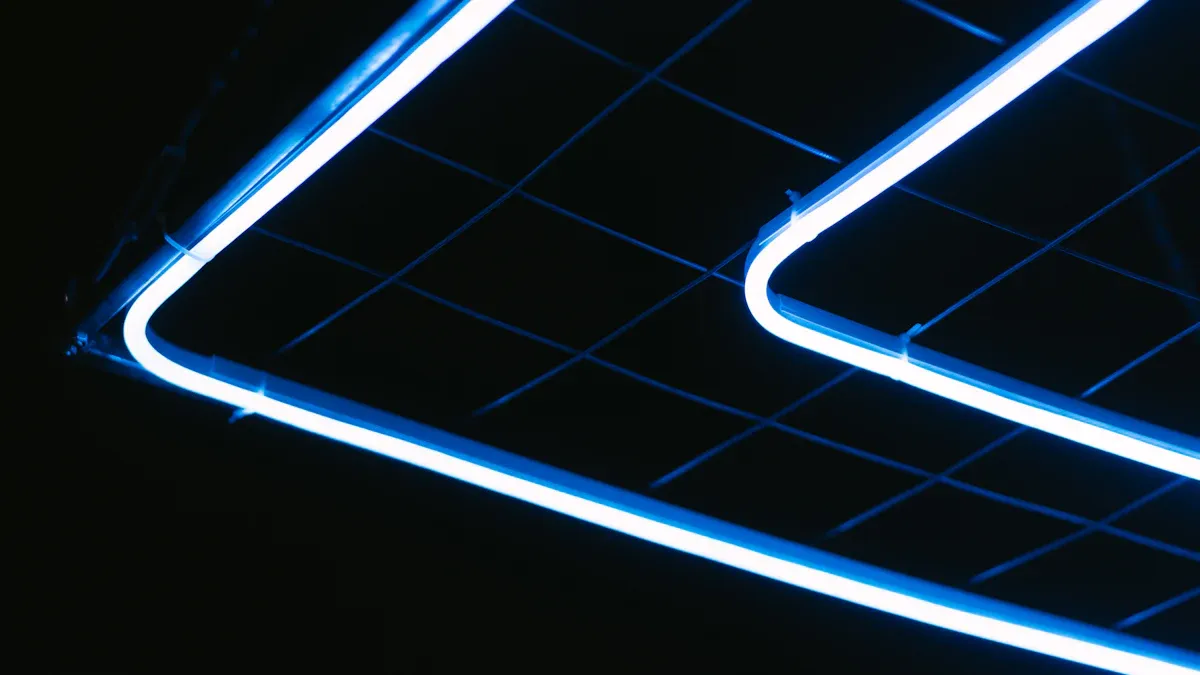
Looking to light up your room with a cool style? LED лента is a great choice! These lights save energy and money. They can last a long time—up to 50,000 hours if used right. They are safe to touch, good for the planet, and very useful. Whether you love DIY projects or just want a cozy home, LED лента is amazing. You can change how bright they are or pick fun colors. LED лента lets you make your lighting unique. Are you ready to change your space?
Key Takeaways
Pick good LED strips with a solid warranty for lasting use.
Measure your area carefully before cutting to avoid mistakes.
Wipe the surface well before sticking LED strips to keep them in place.
Materials Needed for Installing LED Strip Lights
Before starting, gather all the items you’ll need. Having everything ready makes the setup easier and faster. Here’s what you’ll need:
LED strip lights
These are the main part of the project! Pick good-quality LED strips for better light and longer use. Look for ones with at least a one-year warranty. Higher-priced strips often last longer and work better. Did you know LED strips with gold wire connections are stronger and last longer? Keep this in mind when buying.
Power supply and adapter
Get a power supply that matches your LED strip’s voltage and wattage. This helps them work well and stay cool. Always check your LED strip’s details before buying the adapter.
Measuring tape
Measuring correctly is important for a neat setup. Use a measuring tape to find out how much LED strip you’ll need.
Scissors or cutting tool
If the LED strip is too long, you can cut it. Only cut at the marked spots to avoid damage.
Adhesive or mounting clips
Most LED strips have sticky backs, but you can also use clips for extra hold. Adhesive tape is strong and handles heat well, making it a good choice.
Cleaning supplies (e.g., alcohol wipes)
Clean the surface where you’ll stick the LED strips. Dust and grease can make the adhesive weak, so don’t skip cleaning.
Optional: connectors, dimmer, or remote control
Want more control over your lights? Connectors help join strips neatly. A dimmer or remote lets you change brightness and colors for the perfect look.
Pro Tip: Don’t connect LED strips longer than 5 meters at once. This avoids uneven lighting and overheating. For better quality, pick strips with a circuit board that has five or more layers.
Parameter | Description |
|---|---|
Warranty | Lasts 6 months to 3 years; longer warranties mean better quality. |
Thickness of the substrate | Thicker layers with more copper improve performance and reduce heat. |
Quality of LED chips | Gold wire connections make chips stronger and last longer. |
Adhesive tape | Designed for strong sticking and good heat handling in different temperatures. |
With these items ready, you can start setting up your LED lights. Let’s make your space bright and stylish!
Planning and Getting Ready for LED Strip Lights in Your Room
Pick the best spot for your LED strips
Choosing where to place your LED strips is very important. Think about how you’ll use the room. For example:
Use open LED strips for ceilings, kitchens, or hallways.
Pick waterproof LED strips for bathrooms, stairs, or wet areas like tables.
In a bedroom, try putting LED strips under the bed, along the ceiling, or behind furniture. This creates a warm and cozy glow.
Measure the space to find the right length
Before starting, measure the area carefully. This helps you get the correct length of LED strips and avoid wasting any. Use a measuring tape to measure accurately.
Sample | Installation Quality | Adhesive Type | Notes |
|---|---|---|---|
Sample 1 | LEDs placed evenly | 3M tape | Strong and long-lasting stickiness |
Sample 3 | LEDs placed unevenly | Unknown tape | May peel off in a few months |
Good measurements make your setup look neat and professional.
Clean the surface for better sticking
To help your LED strips stick well, clean the surface first. Wipe away dust, dirt, or grease with a damp cloth or alcohol wipes. Let it dry completely before sticking the strips.
For bumpy surfaces, fill gaps with putty and sand them smooth. On wood, paint or varnish the area for a flat base. For glass, use a primer to help the adhesive stick better.
Plan where to plug in and hide cables
Decide where to plug in your LED strips. Keep the power source close to the strips to avoid messy wires. Use cable clips or hooks to keep cords neat and hidden.
If you’re doing it yourself, hide cables behind furniture or along walls. This keeps your setup tidy and stylish.
Pro Tip: Match your power supply to your LED strip’s voltage and wattage. This stops overheating and keeps your lights working well.
Step-by-Step Guide to Install LED Light Strips

Trim the LED strips if needed
Before sticking the LED strips, check their length. Most strips have marked spots for cutting. Use sharp scissors to cut only at these marks. This keeps the strip’s connections safe. If you want to attach wires to the cut ends, keep the soldering heat below 260°C and finish within 4 seconds. You can also use special connectors instead of soldering.
Tip: Measure carefully before cutting. It’s better to cut once than make a mistake!
Stick the strips using adhesive or clips
Peel off the backing to stick the LED strips. For stronger hold, use double-sided tape or mounting clips. Foam tape works best on smooth surfaces. For uneven areas, use thin metalized tape. In damp places like bathrooms, silicone glue is a good choice because it resists moisture.
Pro Tip: Clean the surface well before sticking the strips. Dirt or grease can make the adhesive weak, causing the strips to fall later.
Connect the strips to power
After attaching the strips, connect them to the power supply. Make sure the power supply matches the strip’s voltage and wattage. Wrong connections can cause overheating or uneven lighting. If you’re using more than one strip, use connectors to link them properly.
Test the LED strips
Before finishing, test the LED strips. Unroll the strip and plug it into the power supply. Check if all the lights work evenly. For RGB strips, test each color by connecting the negative wire to R, G, and B inputs. If the lights don’t work, check the connections or use a multimeter to test the voltage.
Adjust for the best lighting
Move the LED strips to get the best light. Place them to avoid shadows and spread light evenly. LED strips give steady light, unlike regular ceiling lamps. For example, at 1 meter away, the light is about 530 lux, which makes the space bright and cozy.
Note: If the light looks uneven, move the strips or use diffusers to soften it.
Troubleshooting and Tips for Installing LED Strip Lights
Common problems and how to solve them
Sometimes, setting up LED strips doesn’t go perfectly. Here are some issues and fixes:
LED strips not lighting up: Make sure the power supply matches the strip’s voltage. If they don’t match, the lights won’t work.
Flickering lights: Loose wires or weak power can cause flickering. Tighten connections or use a stronger power supply.
Uneven brightness: Check if the power supply can handle the strip’s length.
Wrong colors: If RGB lights show incorrect colors, the controller might be broken. Replace or update it.
Parts not working: Look for cracks or bad soldering. Fix by re-soldering or replacing damaged parts.
Tip: Test your LED strips before installing them. This saves time if something is wrong.
Tips for neat and smooth lighting
Want your LED lights to look great? Follow these tips:
Use diffusers to make the light softer and remove shadows.
Hide the strips under cabinets or behind furniture for a clean look.
Measure and cut carefully to avoid gaps or overlaps.
Pick high-quality LED strips for even brightness and easy setup.
If hardwiring, insulate wires properly to avoid damage.
Pro Tip: Keep strips at least 2 inches from walls for even lighting.
How to make your LED strips last longer
With care, LED strips can last many years. Here’s how to extend their life:
Use a power supply that matches the strip to avoid overheating.
Install strips in places with good airflow to prevent heat buildup.
Clean the strips often to remove dust that can lower performance.
Use waterproof strips in wet areas to protect them from moisture.
Follow the manufacturer’s rules, especially for temperature limits.
Did you know? Good-quality LED strips can last up to 100,000 hours. That’s over 11 years of nonstop use!
Installing LED strips is a fun and easy way to transform your space. You can create cozy vibes or brighten up any room with these versatile lights. By following this guide, you’ll set up your LED lights like a pro. Enjoy the perfect lighting and the amazing atmosphere it brings to your home!
FAQ
How do I choose the best LED strip lighting for my space?
Look for LED strip lighting with adjustable brightness, good adhesive, and the right color temperature. Match the strip’s features to your room’s purpose.
Can I cut LED strips to fit smaller spaces?
Yes, you can cut LED strips at marked points. Use sharp scissors and ensure the cut section is properly connected to maintain the lights’ functionality.
How do I hide the wires for a clean look?
Use cable clips or adhesive hooks to secure wires along walls or furniture. This keeps your LED strip lighting setup neat and stylish.
See Also
Effective Methods for Installing RGB LED Strip Lights
Choosing the Perfect LED Strip Lights for Linear Lighting
Best Practices for Installing LED Strip Lights in 2025
Utilizing Smart LED Strips for Home Lighting in 2025
Finding the Ideal RGB LED Strip to Suit Your Needs


