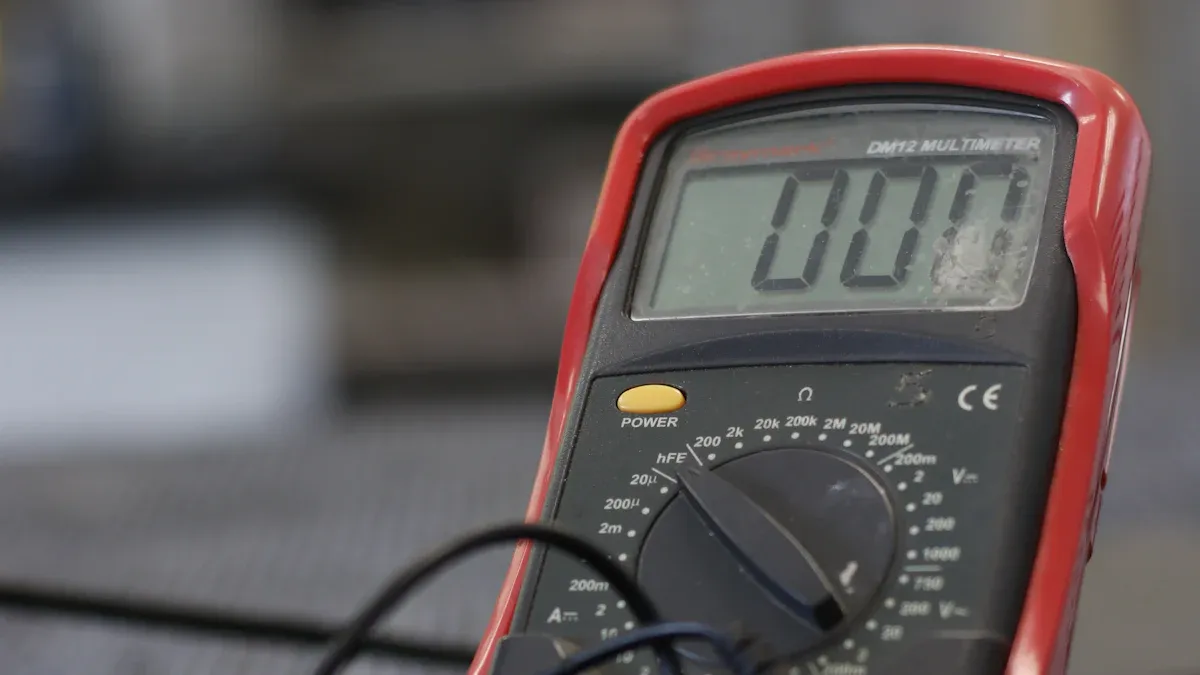
Testing an LED strip with a multimeter is easy and useful. This tool helps you check voltage and current output. These checks are important to see if your LED driver works well. It also lets you test continuity to ensure the circuit is complete. Regular testing stops problems and makes your LED strip last longer. To save time and money while keeping it working well, use a multimeter.
Key Takeaways
Use a multimeter to check voltage, current, and connections on your LED strip. This helps find problems early and makes it last longer.
Always switch off the power before testing to stay safe. Safety is very important when handling electrical parts.
Check connections by placing multimeter probes on the copper pads of the LED strip. A beep means the circuit works, but no sound means it’s broken.
Look at your LED strip often for dirt, damage, or loose wires. This care keeps it shining and working properly.
Keep your LED strip in a dry, clean spot to avoid harm. Stay away from very hot or cold places to protect it.
Tools and Preparation
Essential Tools
To check an LED strip, you need proper tools. Here’s what you’ll need:
Multimeter: This is the main tool. It measures voltage, current, and continuity.
LED strip to be tested: Make sure it’s clean and not damaged.
Power source: A matching power supply is needed for voltage tests.
Optional: Alligator clips: These clips make secure connections easier during testing.
Other tools might also help. The table below shows extra tools and their uses:
Tool | Purpose |
|---|---|
Scissors | To cut the strip to the right size. |
Wire strippers | To connect strips directly to the power source. |
Soldering iron | To solder connections if needed. |
Tape measure | To measure lengths accurately. |
Level | To keep the strip straight on surfaces. |
Utility knife | To trim adhesive or make small adjustments. |
Adhesive tape | To hold strips temporarily in place. |
Safety Guidelines
Safety is very important when using LED strips and a multimeter. Follow these tips to stay safe:
Turn off the power before testing. This avoids electric shocks.
Be careful with the multimeter probes. Don’t touch bare wires or cause short circuits.
Work in a dry, bright area. Water can cause problems, and good lighting helps you see clearly.
Improper handling can cause accidents. For example:
Safety Guideline | Description |
|---|---|
Ensure Power is Off | Always switch off power to avoid electric shocks. |
Use Insulated Gloves and Safety Glasses | Wear gloves and goggles to stay safe from shocks or burns. |
Avoid Water | Test in dry areas to prevent shocks or short circuits. |
By following these steps, you can test your LED strip safely and easily.
Setting Up the Multimeter
Before using a multimeter, set it up properly. Follow these steps:
Choose the right mode: Pick continuity, diode, or voltage mode based on your test.
Check the battery: A weak battery can give wrong readings. Replace it if needed.
Test the multimeter: Use it on a working circuit to ensure it works well.
For specific tests, here’s how to set up your multimeter:
Measuring Output Voltage: Set it to DC voltage mode. Place probes on output terminals and compare the reading to the expected voltage (e.g., 12V or 24V).
Measuring Output Current: Switch to current mode. Connect the multimeter in series with the LED driver and note the reading.
Testing Input Voltage: Use AC voltage mode. Touch the input terminals and check if the reading matches the expected value.
Setting up correctly gives accurate results and helps find problems quickly.
Step-by-Step Guide to Test an LED Strip

Testing for Continuity
To check if your LED strip works, test for continuity. This finds breaks in the circuit. Follow these steps:
Turn your multimeter to continuity mode. This checks if the circuit is complete.
Touch the probes to the positive and negative copper pads on the strip. Make sure they touch firmly.
Listen for a beep or look at the display. A beep or a low number means the circuit is fine. No sound or a high number means the circuit is broken, and the strip might be faulty.
Checking continuity helps find problems early. It shows where the circuit is broken.
Tip: Test at different points on the strip to check the whole circuit.
Testing Individual LEDs
If one LED seems broken, test it alone using diode mode. Here’s how:
Set the multimeter to diode mode.
Put the red probe on the anode (+) and the black probe on the cathode (-).
Check the results. A working LED will glow dimly or show a voltage drop. If it doesn’t, the LED is likely broken.
For example, a working LED might show a voltage drop of about 2V. If there’s no reading or it’s very different, replace the LED.
Note: Testing each LED helps fix problems without changing the whole strip.
Testing Voltage Across the Strip
To check if your LED strip gets enough power, test its voltage. Follow these steps:
Connect the strip to a power source. Make sure the power matches the strip’s needs.
Set the multimeter to DC voltage mode.
Place the probes on the positive and negative ends of the strip. Compare the reading to the expected voltage. For example, a 12V strip should show close to 12V, with a small difference of ±0.12V.
If the voltage is too low, check the power or wires. A big drop in voltage might mean a problem with the power supply or too much resistance.
Pro Tip: Regular voltage tests can stop problems and make your strip last longer.
Troubleshooting Common Issues

No Readings on the Multimeter
If your multimeter shows nothing, check the setup first. Make sure the multimeter is in the right mode. Use continuity mode for circuit tests and DC voltage mode for voltage checks. Wrong settings can cause no readings or incorrect results.
Next, inspect the probes. They must touch the copper pads or terminals firmly. Loose contact can stop the test from working. If it still doesn’t work, test the multimeter on a working circuit. This ensures the multimeter is functioning properly.
Tip: Clean the copper pads on the LED strip before testing. Dirt or rust can block accurate readings.
Inconsistent Results
Getting mixed results can be annoying but shows possible problems. Look at the LED strip for damage, like burnt parts or loose wires. These can break the circuit and cause unstable readings.
Check your multimeter’s accuracy by testing it on a good circuit. Small voltage changes are normal, but big differences may mean a faulty multimeter or power supply. For example, a 12V strip should read close to 12.12V. Switching probe positions can also confirm the correct polarity of the strip.
Pro Tip: Watch for voltage drops on long strips. Drops can make lights dim and tests unreliable. Using parallel wiring can reduce this problem.
LED Strip Not Lighting Up
If the LED strip won’t light, check the power source first. Make sure it works and matches the strip’s voltage needs. A bad power supply can stop the strip from getting enough power.
If the power is fine, check the strip for broken or burnt LEDs. Use diode mode to test each LED and find faulty ones. Replace damaged LEDs to fix the strip. Also, check the circuit and wire size to avoid voltage drops that stop the strip from lighting.
Note: Cutting the strip wrong can cause short circuits. Always cut along marked lines to keep the circuit safe.
Maintenance Tips for LED Strips
Regular Inspections
Checking your LED strip often keeps it working well. Dust and dirt can build up, making it dim and hot. This problem, called Lumen Dirt Depreciation (LLD), can make your LED strip wear out faster. Cleaning and checking it regularly stops these issues and keeps it bright.
When inspecting, follow a simple checklist to spot problems:
Check for cracks or dents on the strip’s surface.
Look at the LED chips for burns or colour changes.
Make sure all connections are tight and nothing is missing.
Look for cracks or damage in the housing.
Confirm the strip has proper labels and certifications.
For detailed checks, use these methods:
Inspection Method | What to Check |
|---|---|
Visual Inspection | Spot cracks, dents, or damage. |
Voltage Testing | Use a multimeter to find power problems by checking voltage. |
Resistance Testing | Measure resistance to find short circuits; no reading means no short. |
Circuit Design Check | Check for voltage drops from long strips or thin wires. |
Tip: Regular checks save money and make your LED strip last longer.
Proper Storage
Storing your LED strip correctly keeps it in good shape. Always keep it in a dry, clean place to avoid damage. Dust and water can harm the strip’s parts and cause it to fail. Use resealable bags or its original box for safe storage.
Don’t let the strip face extreme heat or cold. Heat can bend the adhesive, and cold can make it break. Store it in a place with normal temperatures to keep it safe.
Avoid Overloading
Overloading can ruin your LED strip. Always use a power supply that matches its voltage and current needs. For example, a 12V DC strip needs a 12V DC power source. Using the wrong power can cause overheating or failure.
Follow these tips to avoid overloading:
Keep the power supply’s load below 80% of its maximum capacity.
Use surge protectors to stop power spikes from damaging the strip.
Calculate the total power needed by multiplying the strip’s power use per foot by its length.
Pro Tip: Test for voltage drops often to catch overload problems early. This keeps your LED strip safe and working well.
By following these tips, you can make your LED strip last longer and work better. Whether you’re learning to test LED lights or using a battery to check them, proper care protects your investment.
Checking your LED strip with a multimeter is simple and saves money. Follow the steps to keep your strip working well. Always stay safe by turning off power and using tools carefully. Regular care and good storage will make your LEDs last longer.
A multimeter has many benefits:
Measuring Output Current: Finds problems that shorten LED life.
Testing Input Voltage: Ensures the driver gets the right voltage.
Checking for Circuit Issues: Quickly spots broken or short circuits.
These methods help you find and fix issues easily, saving effort and cost.
FAQ
How can I check if my multimeter works?
Try your multimeter on a working circuit. For example, test a battery’s voltage. If the reading matches the battery’s value, it works fine. If results are wrong, replace the battery or check the probes.
Can I check an LED strip without plugging it in?
Yes, you can test LEDs using diode mode on a multimeter. Place the probes on the LED’s positive and negative sides. A good LED will glow faintly or show a voltage drop. This method doesn’t need a power source.
What if my LED strip has no continuity?
First, clean the copper pads to remove dirt or rust. Then, test again with the multimeter. If it still fails, check for visible damage. Fix broken parts or replace faulty sections to make it work again.
Why is my LED strip dim even with correct voltage?
Dim lights often mean voltage drops. Long strips or thin wires can cause this. Use thicker wires or parallel wiring to lower resistance. Also, ensure the power supply gives enough current for the strip.
Is it safe to test an LED strip while powered?
Testing a powered strip is safe if you’re careful. Wear insulated gloves and avoid touching bare wires. Set the multimeter to DC voltage mode and place probes carefully. Always follow safety rules to avoid accidents.
See Also
Evaluating 5V Versus 12V LED Strips For Your Project
Understanding COB LED Strips And Their Functionality
Selecting The Perfect LED Strip Lights For Linear Lighting


