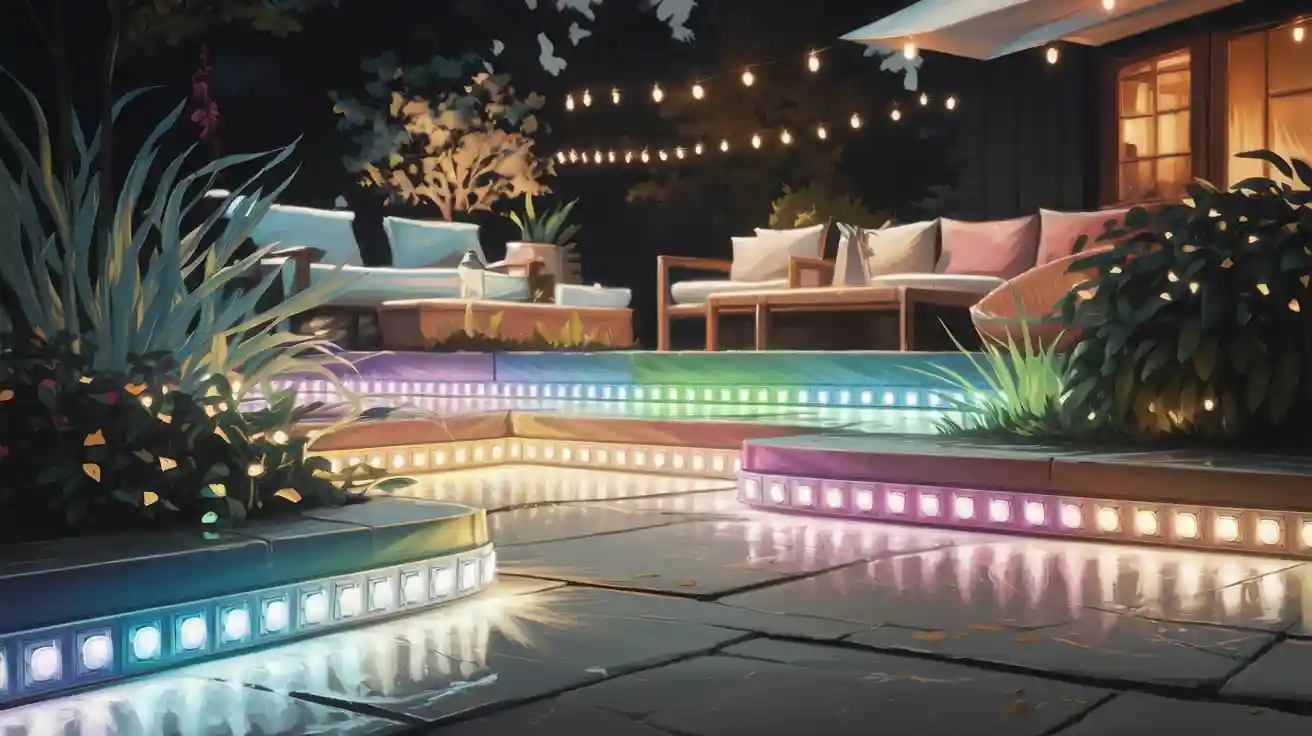
When you think about putting outdoor RGBW LED strip waterproof lights, remember that good installation is important. It’s not only about making your space look nice; it’s also about safety. You want your lights to shine bright without any chance of damage or danger. Using waterproof RGBW LED strip waterproof options is crucial to protect your investment. So, whether you’re lighting up your patio or garden, taking time to install them right will improve both the beauty and safety of your outdoor area.
Key Takeaways
Plan your installation carefully. Look at your outdoor area. Think about power supply and weatherproofing. This helps keep everything safe and working well.
Choose good waterproof RGBW LED strips. Find strips with a high IP rating. This protects them from rain and moisture. It helps them last longer.
Gather the right tools and safety gear first. Having the right equipment makes it easier to install. It also helps avoid accidents.
Take care of your LED strips regularly. Clean them often. Check the connections to keep them bright and working well for years.
Test your setup after you install it. Make sure all lights work correctly. Change settings to create the right mood in your outdoor space.
Planning Your Installation
Before you start putting up your RGBW LED strips, take time to plan. This step is very important for getting great results. It helps your lights shine bright without problems.
Assessing Your Space
First, look at your outdoor area. Think about these things to get it right:
Tip: Use the table below to help you check.
Factor | Description |
|---|---|
Power Supply Compatibility | Make sure the power supply fits the voltage and length of the LED strips to stop flickering or damage. |
Weatherproofing | Pick LED strips that can handle rain, dust, and temperature changes for lasting use. |
Layout Planning | Measure the area and plan how to place the lights for the best effects. |
Safety Precautions | Follow safety rules like turning off power and using proper insulation to avoid dangers. |
IP Ratings | Know the IP ratings for water and dust resistance to make sure they last outside. |
Durable Materials | Choose strong materials like silicone coatings and UV resistance for better performance. |
Thinking about these factors will help you make a safe and nice-looking lighting setup.
Length of Strips Needed
Next, find out how much LED strip you need. Here’s an easy way to do it:
Measure the area where you want the LED lights.
Figure out the length of the LED strip from your measurements.
Remember that standard LED strips usually come in 5-meter rolls.
To help you see the different lengths, look at the table below:
Voltage | Length Of The LED Strips |
|---|---|
12V/24V | 5-meter/reel |
24VDC | 20-meter/reel |
36VDC | 30-meter/reel |
48VDC & 48VAC/110VAC/120VAC/230VAC/240VAC | 50-meter/reel |
48V Constant Current | 60-meter/reel |

By planning your installation and figuring out the length of strips needed, you prepare for success. This planning will save you time and effort when you install, making your outdoor space look great with your new RGBW LED strips!
Choosing the Right Products
When you install lights outside, picking the right products is very important. You want your RGBW LED strips to look good and handle weather well. Let’s look at what you should think about.
Selecting RGBW LED Strip Waterproof
First, make sure the RGBW LED strips you pick are waterproof. This is key for outdoor use. Look for strips with a high waterproof rating to keep them safe from rain and moisture. Here are some important features to think about:
Feature | Description |
|---|---|
Waterproof Rating | Knowing IP codes is important; IP65, IP67, and IP68 show different levels of water protection. |
Color Types | RGBW strips give bright colors and clear white light, good for both useful and pretty lighting. |
Installation Methods | Choices include double-sided tape, clips, and recessed mounting for strength and looks. |
For outside areas, choose LED strips with an IP65 rating or better. IP65 works for partly covered spots, while IP67 is best for fully open areas. This helps your lights deal with any weather.
Tip: Always check the IP rating before you buy. It can help you avoid problems later!
Power Requirements
Next, let’s discuss power needs. Using the right power supply is very important for your RGBW LED strips. A wrong power supply can cause overheating, damage, and uneven brightness. To prevent these problems, make sure the power supply fits the voltage and current needs of your strips.
Here’s what to remember:
Voltage Compatibility: Most RGBW LED strips work on 12V or 24V. Make sure your power supply matches this.
Current Rating: Check the current rating of your strips. A power supply that can’t handle the needed current may burn out too soon.
Wattage Calculation: Find the total wattage needed by multiplying the length of the strips by their wattage per meter. This helps you pick a power supply that can manage the load.
By choosing the right waterproof RGBW LED strips and making sure you have the right power supply, you prepare for a successful outdoor lighting project. Your lights will shine bright and last longer, making your outdoor space look beautiful.
Gathering Necessary Tools
Before you start installing your RGBW LED strips, get the right tools. Having the right equipment makes the job easier. It also helps you avoid mistakes. Here’s what you need:
Essential Tools
Here’s a list of tools you should have for your installation:
Compatible Power Supply and Power Cord: Make sure your power supply matches the voltage of your LED strips.
Waterproof Connectors: These are important for connecting different parts of your LED strips safely.
Mounting Clips: Use these to hold your strips in place and stop them from sagging or falling.
Wire Strippers: These help you cut and strip wires easily.
Screwdrivers: You’ll need these to secure LED parts.
Volt Meter: This tool is useful for checking electrical connections.
Wire Connectors, Electrical Tape, and Heat Shrink: These help with proper connections and insulation.
Solder Iron (Optional): If you need to cut and reconnect LED strips, a solder iron can be useful.
Having these tools ready will make your installation easier and faster.
Safety Gear
Safety should always come first when working with electrical installations. Here’s a table of safety gear that can help keep you safe during your outdoor LED strip installation:
Type of Gear | Purpose |
|---|---|
Safety Glasses | Protects your eyes from debris and sparks. |
Hard Hats | Shields your head from falling objects. |
Insulated Gloves | Prevents electrical shock and gives you a better grip. |
Arc-Rated Clothing | Reduces the risk of burns from electrical arcs. |
Arc Flash Suits | Prevents serious burns and injuries near arc flash hazards. |
Rubber Insulating Blankets | Protects you from accidental contact with live electrical wires. |
Wearing the right safety gear is very important. It keeps you safe while you work on your outdoor lighting setup. So, before you start, make sure you have everything you need to stay safe and do the job right!
Area Preparation

Before you start installing your RGBW LED strips, you need to prepare the area properly. This step is crucial for ensuring your lights stick well and perform beautifully.
Cleaning the Surface
A clean surface makes all the difference in how well your LED strips adhere. Here are some effective cleaning methods to follow:
Ensure the surface is smooth, clean, and completely dry.
Use isopropyl alcohol for cleaning. Avoid common rubbing alcohol and household cleaners, as they may leave residues.
Lightly sand the surface with fine grit sandpaper (150-300 grit) in a circular motion. This helps create a better grip for the adhesive.
After sanding, wipe the area with a cloth soaked in rubbing alcohol to remove any dust or debris.
Taking these steps will give your LED strips the best chance to stick and shine brightly.
Weather Conditions
Weather plays a big role in your installation process. You want to choose a day that’s dry and mild. Here’s why:
Humidity: High humidity can affect the adhesive on your LED strips. If it’s too humid, the strips may not stick properly.
Temperature: Extreme temperatures can also impact adhesion. Aim for a temperature between 60°F and 80°F (15°C to 27°C) for the best results.
Wind: If it’s windy, debris can blow onto your clean surface, ruining your hard work. Wait for a calm day to avoid this.
By preparing your area and checking the weather, you set yourself up for a successful installation. Your RGBW LED strips will look great and last longer when you take these steps seriously!
Installation Process
Mounting LED Strips
Now that you’ve prepared your area, it’s time to mount your RGBW LED strips. Follow these steps to ensure they stick well and last long outdoors:
Clean and Dry Surfaces: Make sure the area is free from dirt, grease, and moisture. A clean surface helps the adhesive work better.
Test the LED Strips: Before you stick them down, connect the strips to a power source. This way, you can check if they light up evenly and function properly.
Use Strong Adhesives: Apply high-quality double-sided tape or waterproof glue to secure the strips firmly. This will help them stay in place, even in bad weather.
Manage Corners and Curves: If you need to go around corners, cut the strips at designated marks. Use connectors to keep the circuit intact.
Tip: Take your time during this step. Proper mounting ensures your lights will shine bright for a long time!
Securing Connections
Once your LED strips are mounted, you need to secure the connections. This step is crucial for preventing any electrical issues. Here are some best practices to follow:
Store power supplies and controllers in weather-sealed boxes or indoors. This protects them from rain and other environmental damage.
Use waterproof connectors and enclosures. Seal any exposed wires to keep moisture out.
Insulate all connections with heat shrink tubing or electrical tape. This helps avoid short circuits or electric shock.
By following these steps, you ensure that your RGBW LED strip waterproof installation is safe and reliable. Proper mounting and securing of connections will keep your outdoor lighting looking great and functioning well for years to come!
Connecting to Power
When you connect your RGBW LED strips to power, knowing the basics of wiring is very important. You want everything to be safe and work well. Here’s what you should know:
Wiring Basics
First, gather your materials. You’ll need your RGBW LED strips, a matching power supply, and some wires. Here’s a simple guide to help you:
Find the Positive and Negative Wires: Most LED strips have clear labels. The positive wire usually has a red or white stripe. The negative wire is often black.
Cut the Wires to Length: Measure the distance from your power supply to the LED strips. Cut your wires, leaving a little extra for flexibility.
Strip the Ends: Use wire strippers to take off about half an inch of insulation from each end of the wires. This helps you make a strong connection.
Tip: Always check your connections before turning on the power. A wrong connection can cause short circuits or damage.
Using Connectors
Using the right connectors is very important for outdoor setups. Here are some types to think about:
Waterproof LED Strip Connectors: These connectors keep moisture out, making them great for outdoor use.
Compatibility Check: Always make sure the connectors match your strip’s coating or IP rating. This helps create a secure connection.
Know Your LED Strip Type: Understand if your strips are single-color, RGB, or RGBW. This helps you choose the right pin count for your connectors.
Choose the Right Shape: Depending on your layout, you might need L-Shape or T-Shape connectors to make installation easier.
By following these steps and using the right connectors, you can make sure your RGBW LED strip waterproof installation is strong and effective. Good connections will keep your lights shining bright, no matter the weather!
Weatherproofing Your Installation

Making your RGBW LED strips safe from bad weather is very important. You want your lights to shine bright, no matter what happens outside. Here’s how to seal connections and protect your strips well.
Sealing Connections
To stop water from getting into your connections, you need to seal them right. Here are some materials that work great:
Waterproof silicone: This is perfect for sealing the ends of your LED strips. It keeps water out and helps them stick well.
Silicone foam or closed-cell silicone sponge gaskets: These give extra protection against water and dust. They stay flexible in different temperatures, making them good for outside use.
Conformal coating: This thin layer protects against moisture, especially in wet areas. It’s like a raincoat for your connections!
Heat shrink tubing: This adds another waterproof layer. It tightly seals connectors and wires, keeping them dry.
Combining silicone sealant with heat shrink tubing: For the best protection, use both. This combo makes a strong barrier against water.
By using these materials, you can keep your connections safe and sound.
Protecting Strips
Your RGBW LED strips also need protection from rain, dust, and UV rays. Here are some good ways to protect them:
Choose high-quality materials: Look for strips that resist the environment well and are flexible. This helps keep them safe from moisture and damage.
IP ratings matter: Check the IP rating of your strips. Here’s a quick guide:
IP Rating | Protection Level | Description |
|---|---|---|
IP67 | Complete dust-tight and temporary water submersion | Good for direct rain and outdoor use |
IP65 | Protection from moisture but not submersion | Best for damp places like kitchens and covered outdoor areas |
UV-resistant coatings: These keep light quality over time and stop cracking. They help your strips last longer, even in tough weather.
By sealing connections and protecting your strips, you make sure your outdoor lighting setup stays beautiful and works well for years! 🌧️✨
Testing Your Setup
After you put up your RGBW LED strips, it’s time to test them. This step is very important to make sure everything works right. Here’s how to check if everything is okay:
Functionality Check
Turn On the Lights: Use the remote, app, or switch to turn on your RGB LED strip lights. Watch if all parts light up evenly. Look for any dim spots or areas that don’t light up.
Inspect for Consistency: Walk around where you installed the lights. Look at them from different angles. Make sure the brightness and colors are the same all along the strip. If the lighting is uneven, there might be a connection problem or a voltage drop.
Check the Placement: Make sure the lights match your design plan. If any part looks out of place, gently move it to make it look better.
Pro Tip: If you see flickering or dimming, check the power supply and connections. These are common reasons for problems.
Adjusting Light Settings
Once you know everything is working well, you can change the light settings to create the right mood. Here are some ways to do this:
Remote Controls: These let you quickly change brightness and color, making it easy to set the mood.
Smartphone Apps: Many LED strips come with easy-to-use apps that let you control the lights from your phone.
Smart Home Integration: Connect your lights with other devices for better control. This can include voice commands or automatic schedules.
Advanced Digital Control Protocols: If you like complex setups, protocols like DMX512, DALI, and SPI give you precise control over your lighting.
By following these steps, you can make sure your RGBW LED strips work well and create the right atmosphere for your outdoor space. Enjoy your beautifully lit area!
Maintenance Tips
Taking care of your RGBW LED strips is very important for how well they work and how long they last. Regular maintenance helps you avoid problems and keeps your lights shining bright. Here’s how to keep your outdoor lights looking good!
Regular Cleaning
You need to clean your outdoor RGBW LED strips often to keep them working well. Here’s an easy cleaning schedule based on where you live:
Environment Type | Recommended Cleaning Frequency |
|---|---|
General | At least twice a year |
High pollution areas | More than twice a year |
Areas with heavy foliage | More than twice a year |
Coastal regions | More than twice a year |
Sheltered locations | Every six months |
Dusty or coastal areas | Monthly or every two weeks |
For most outdoor lights, try to clean them every 1 to 3 months. If you live near busy roads or by the coast, think about cleaning them every month. This stops dust and dirt from building up, so your lights stay bright and colorful.
Tip: Spring and fall are great times for cleaning. This helps you get your lights ready for the changing seasons!
Troubleshooting Issues
Even with good care, you might face some common problems with your RGBW LED strips. Here’s a quick guide to help you find and fix these issues:
Issue | Description | Resolution |
|---|---|---|
Compatibility Problems | Wrong connectors can cause your lights to not work right or get damaged. | Pick connectors that fit the needs of your LED strips. |
Overheating | Signs include color changes or melting from too much current or bad connectors. | Check current ratings and use heat-resistant materials for connectors. |
Difficulty in Installation | It can be hard to install, especially in tight spots. | Choose easy-to-use connectors with guides for installation. |
Water Damage | Non-waterproof connectors can rust or short circuit in wet places. | Use waterproof connectors and make sure to seal them well to keep moisture out. |
By keeping up with cleaning and fixing problems, you can enjoy your outdoor RGBW LED strips for many years. Regular maintenance not only makes them look better but also helps them work safely and well. Happy lighting! 🌟
Troubleshooting Common Issues
When you set up your RGBW LED strips outside, you might face some common problems. Let’s look at two of the most common issues: power problems and flickering lights.
Power Problems
Power problems can really mess up your RGBW LED strip waterproof setup. Here are some main causes to watch for:
Voltage Loss: This can make your lights dim, especially the green and blue colors. If you see uneven brightness, this might be the reason.
Poor Connections: Loose or rusty connections can cause voltage drops. Always check your wiring to make sure everything is tight.
Overheating: This is a big reason for LED failures. It can hurt both the bulbs and drivers, so keep an eye on how hot things get.
Inadequate Power Supply: If your power supply can’t handle the load, it may trigger overload protection, making your LEDs blink.
By fixing these issues, you can keep your lights shining bright and steady.
Flickering Lights
Flickering lights can be annoying, but you can usually fix them with a few easy steps. Here’s what to do:
Check Wiring Issues: Look for loose wires or rusty connections. These can interrupt the electricity flow.
Address Power Supply Problems: Make sure your power source is stable. If needed, think about using a voltage stabilizer.
Ensure Compatibility: Use LED bulbs from the same brand and wattage. Mixing different types can cause flickering.
Manage Circuit Load: Don’t overload circuits. Spreading the electrical load across several circuits can help.
Use High-Quality LED Products: Pick trusted brands. Good products usually work better and reduce flickering.
Professional Help: If problems keep happening, ask an electrician for help. They can check for bigger electrical issues.
By following these troubleshooting tips, you can fix common problems and enjoy your outdoor RGBW LED strips without any trouble!
In conclusion, putting up outdoor RGBW LED strips can change your area, but you must do it correctly. Here are some important points to remember:
Plan your installation carefully to keep it safe and looking good.
Choose waterproof products so they can handle the weather.
Regular maintenance is very important. Simple tasks like cleaning the lenses and checking connections can help your lights last longer. Following the manufacturer’s instructions keeps them working well.
By doing these things, you’ll enjoy bright lighting for many years! 🌟
FAQ
What is the best way to clean my RGBW LED strips?
To clean your RGBW LED strips, use a soft cloth dampened with isopropyl alcohol. Avoid harsh chemicals. Gently wipe the surface to remove dust and dirt, ensuring the strips remain bright and functional.
How long do RGBW LED strips last outdoors?
With proper installation and maintenance, RGBW LED strips can last up to 50,000 hours outdoors. Choosing high-quality, waterproof strips and protecting connections will help extend their lifespan.
Can I cut my RGBW LED strips?
Yes, you can cut RGBW LED strips at designated marks. Make sure to use connectors to reconnect the pieces if needed. This allows you to customize the length for your installation.
Do I need a special power supply for RGBW LED strips?
Yes, you need a power supply that matches the voltage and current requirements of your RGBW LED strips. Check the specifications to ensure compatibility and avoid overheating or damage.
How do I troubleshoot flickering lights?
If your RGBW LED strips flicker, check for loose connections or a faulty power supply. Ensure the voltage is stable and that you’re using compatible components. Replacing damaged parts can also resolve flickering issues.
See Also
Effective Methods for Installing RGB LED Strip Lights
Safe Ways to Utilize LED Strips in Outdoor Settings
A Complete Guide for Using Outdoor LED Light Strips


