
Cutting LED strip lights the right way is very important. It helps to prevent damage and keeps them working well. If you cut them wrong, some sections might not work. Can you cut LED strip lights outside the marked lines? Doing so can harm the internal circuits. To make clean cuts, you need sharp scissors, a utility knife, and measuring tools. Always focus on safety. Use the correct tools and be careful with the strips. Remember, using dull scissors can bend the PCB layers. This might cause short circuits.
Tip: Always cut along the lines with scissors symbols or copper pads. This keeps them working properly.
Key Takeaways
Always cut LED strip lights on the lines marked. Look for scissor icons or copper pads. This helps to avoid damage and keeps them working well.
Get the right tools. You will need sharp scissors and measuring tools. This helps you make clean cuts and stay safe while cutting.
Measure the length carefully before cutting. Plan where to install them. This helps you avoid mistakes and get a perfect fit.
Follow safety rules. Unplug the lights and wear protective gear. This reduces risks while cutting and handling LED strips.
If you reconnect cut strips, think about using quick connectors. They are easy to use. You can also solder for a stronger connection, based on what you need.
Can You Cut LED Strip Lights?
Yes, you can cut LED strip lights. But, it is very important to follow some rules for safety and to keep them working. Cutting in the wrong places can cause big problems. This includes broken circuits and parts of the strip that do not work. So, always follow the manufacturer’s instructions when cutting your LED strips.
Designated Cutting Points
Most LED strip lights have special cutting points. These points are usually marked by copper pads or scissors icons. These signs show you where it is safe to cut. By following these marks, you can stop damage to the internal circuits.
Here are some key steps to think about before you cut:
Preparation: Measure and mark how long you want it. Check the cutting points again to make sure they are right.
Cutting Process: Hold the strip firmly while you cut. Make sure your cuts are clean and straight.
Safety Precautions: Always unplug the strip before cutting. Do not cut through wires, and think about wearing safety gear like gloves and goggles.
Best Practices: Use sharp tools for cutting. Always cut along the marked points and measure carefully to avoid mistakes.
Cutting in the wrong places can cause many risks:
It may make parts of the strip useless.
You could create safety problems.
The lighting might not be even.
Cutting in the wrong spots can damage the circuit and cause more issues. So, always make sure you cut only where it says to.
Preparing to Cut LED Light Strips

Tools Required
Before cutting LED light strips, you need to gather the right tools. This will help everything go smoothly. Here are some important tools that professionals suggest:
Wire Strippers: These help you cut and remove wire coverings.
Screwdrivers: You will need these for putting in most LED parts.
Volt Meter: This tool helps check electrical connections.
Wire Connectors, Electrical Tape, and Heat Shrink: These are needed for making good connections in your LED work.
Solder Iron (Optional): This tool is good for cutting and reconnecting LED strips.
Having the right tools ready will make cutting and installing easier and better.
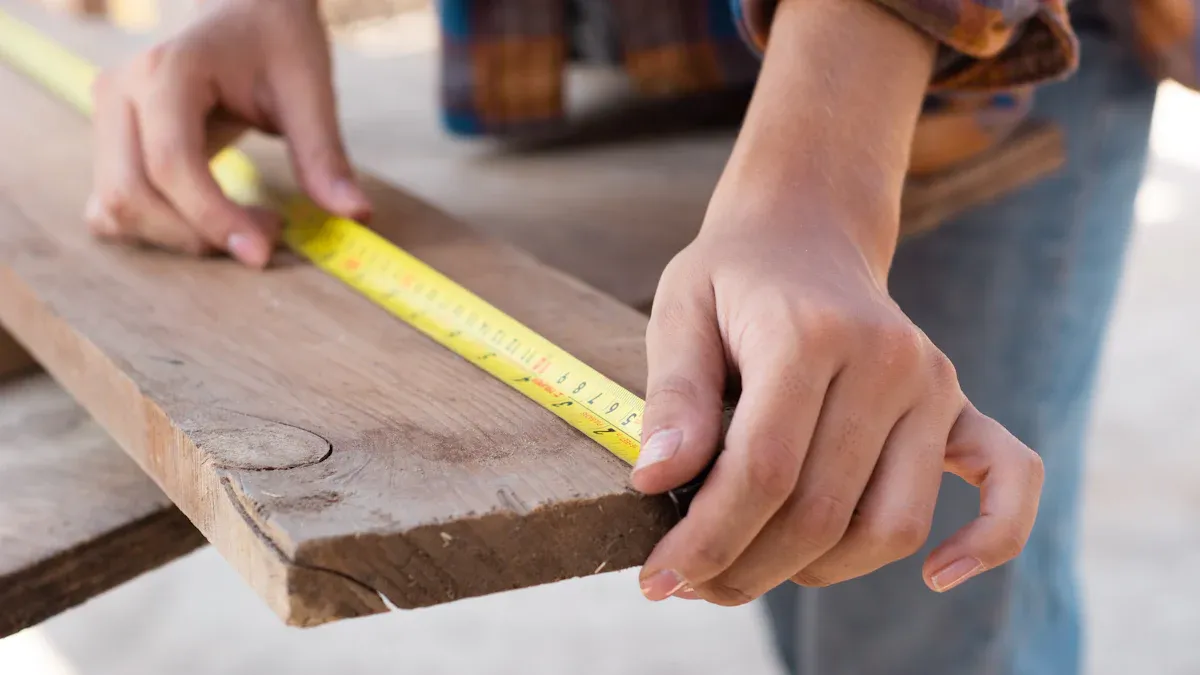
Measuring and Planning
Measuring and planning correctly is very important for your LED strip light installation. Here are some things to think about:
Good measurements make sure you fill the space without crowding or leaving gaps.
Following the maker’s spacing advice helps keep the light even everywhere.
Using the right tools stops problems during installation and makes sure connections are strong.
Testing parts before the final setup helps you find any lighting problems.
To prepare well, do these steps:
Clean the surface so the LED strips stick well.
Measure how long you need and cut the strips right for a perfect fit.
Test the stickiness on a small part before using the whole strip.
Apply the strip evenly to avoid bubbles or it coming off.
Not planning properly can cause problems, like strips that are the wrong size or damage to the circuits. So, take your time to measure carefully and plan your installation well.
Cut LED Light Strip Points
When you get ready to cut LED light strips, finding the right cutting points is very important. You will see signs that help you make safe cuts. Look for these markers on your LED strip:
Scissor icons: These symbols show where it is safe to cut.
Dotted lines: These lines show the exact place to cut.
Copper contact pads: These pads mark where you should cut.
Here’s a quick reference table that sums up these signs:
Indicator Type | Description |
|---|---|
Scissor icons | Symbols showing safe cut points |
Dotted lines | Lines showing where to cut |
Copper contact pads | Pads that mark cutting spots |
Cutting along these marked points helps keep the electrical circuit safe. The copper pads on the LED strips are made for cutting. They usually appear every three LEDs on 12V strips or every six on 24V strips. If you cut in other places, you might stop the current from flowing. This can cause parts of the strip to not work right.
Here are some key reasons why you must cut along the copper solder pads:
Cutting in the wrong places can stop the current flow.
Wrong cuts may make parts of the strip fail, causing dim or uneven lighting.
Following the maker’s rules is very important to avoid these problems.
By sticking to these cutting points, you make sure your LED strip lights work well and safely. Always remember to check the signs again before you cut.
How to Cut LED Strip Lights
Step-by-Step Cutting Instructions
Cutting LED strip lights needs careful attention. Follow these steps to cut safely and well:
Find the marked cut lines on the LED strip. These lines help protect the circuit. Look for scissor icons or dotted lines.
Gather the right tools: You will need sharp scissors or a utility knife, measuring tape, connector clips, and maybe a soldering iron.
Make the cut: Place the strip on a flat surface. Use your sharp scissors or utility knife to cut straight along the marked line. This gives you a clean cut.
Check the cut ends: Look at the cut ends for any exposed copper contacts. This step is very important for making strong connections later.
By following these steps, you can cut LED strip lights safely and well.
Tips for a Clean Cut
Getting a clean cut on your LED strip lights makes the installation better. Here are some tips to help you:
Measure and Plan: Before cutting, measure the area carefully. Decide where to cut the strip to fit just right.
Find the Cut Points: Always look for the cut points on the strip. These are usually marked by lines or scissor icons.
Make the Cut: Use sharp scissors or a utility knife to cut along the marked line. A cutting mat can give you a stable surface and protect your area.
Soldering or Connecting (Optional): If you want to reconnect the strips, think about soldering for a strong connection. Or, use connector clips for an easier way.
By using these tips, you can make sure your cuts are exact and clean, which is important for how your LED strip lights work.
Reconnecting Cut LED Light Strips
When you cut LED light strips, it is very important to reconnect them correctly. This helps keep them working well. You have two main ways to reconnect: using quick connectors or soldering. Each way has its good and bad points.
Using Quick Connectors
Quick connectors are an easy way to reconnect cut LED light strips. They let you fix and install quickly without needing many tools or skills. Here’s how to use them properly:
Insert the ends of both strips into the connector. Make sure the positive and negative markings line up correctly.
Lock the connector with a plastic cover to keep it secure.
This method is great for those who want a simple way. But remember, while quick connectors are handy, they might not be as strong as soldering. For temporary setups or changes, quick connectors are a good choice.
Soldering Techniques
Soldering is the best way for permanent connections. It makes a strong bond that can handle wear and tear. Here’s a step-by-step guide to soldering your LED strips:
Peel the adhesive off the solder pads on both ends of the strips.
Pre-tin the pads by putting a small amount of solder on each pad.
Align the strips carefully so the copper pads match up.
Heat the strips with a soldering iron to make a strong bond.
While soldering gives a reliable connection, it has some risks. If you solder incorrectly, you can damage the LED strip or cause short circuits. Also, soldering can take time and needs some skill. Always work in a well-ventilated area to avoid smoke and stay safe.
Here’s a quick comparison of both methods:
Method | Advantages | Disadvantages |
|---|---|---|
Quick Connectors | Easy to use, fast repairs | Less durable, not great for permanent connections |
Soldering | Strong, permanent connections | Needs skill, takes time, risk of damage |
By picking the right way to reconnect your cut LED light strips, you can make sure they work well and last longer.
Safety Precautions and Common Issues
When you work with LED strip lights, safety is very important. Following the right safety steps can help avoid accidents and make cutting easier. Here are some key safe handling tips to remember:
Safe Handling Practices
Disconnect Power: Always turn off the power before you touch the lights. This is very important to stay safe from electric shocks.
Use Proper Tools: Use sharp scissors or utility knives for cutting. Dull tools can slip and hurt you.
Wear Safety Gear: Put on personal protective equipment (PPE), like gloves and goggles. This gear keeps you safe from injuries while cutting.
Follow the S.A.F.E.T.Y. Guidelines:
S: Shut off power.
A: Ask a licensed electrician if needed.
F: Follow NEC guidelines.
E: Equip yourself with proper PPE.
T: Treat the wires as live.
Y: You are responsible.
Avoid Cutting Through Wires: Be careful not to cut any wires or circuits while cutting the strip. This mistake can cause the lights to stop working.
Measure Twice, Cut Once: Always check your measurements again before cutting. This helps avoid mistakes and saves materials.
Tip: Make sure to install LED lights properly. Space them between furniture to keep them tidy.
Troubleshooting Common Problems
Even if you cut carefully, you might face some common problems. Here are a few issues you could see and how to fix them:
Loss of Waterproofing: If you cut waterproof LED strip lights, they will lose their waterproof feature. This means they won’t meet UL and IP ratings anymore. Once cut, you cannot reseal the ends to make them waterproof again. To keep them working well, do not cut waterproof strip lights.
Uneven Lighting: If some parts of your LED strip do not light up after cutting, you may have cut in the wrong spot. Always cut along the marked points with scissor icons or dotted lines.
Short Circuits: If you see flickering or parts not working, check for exposed wires. Cover any exposed wire ends when installing in a channel to stop short circuits.
Overheating: Make sure there is enough airflow and heat escape around the lights. Overheating can shorten their lifespan and cause problems.
By following these safety tips and fixing common issues, you can have a successful LED strip light installation while keeping risks low.
Cutting LED strip lights safely needs careful attention. Here are some important steps to follow:
Measure the length: Measure the strip light carefully to avoid cutting too much.
Follow the cut points: Look for the copper section and cut along the marked lines if you see them.
Cut with a pair of scissors: Make sure to cut straight to keep them working well.
Using the right tools and following safety rules helps your LED strip lights last longer and work better. Good installation methods are very important. Avoid bending or twisting too much to stop damage. Regularly clean and check connections to keep them bright and efficient.
Take your time, enjoy the DIY process, and make sure your LED strip lights shine brightly for many years! 🌟
FAQ
How do I know where to cut my LED strip lights?
Look for scissor icons or dotted lines on the strip. These signs show safe cutting spots. Always cut along the copper pads to keep the circuit working well.
Can I use any scissors to cut LED strip lights?
You should use sharp scissors or a utility knife. Dull tools can hurt the strip and cause uneven cuts, which can affect how well it works.
What should I do if my LED strip lights don’t work after cutting?
Check your cuts to make sure they match the marked points. Look for exposed wires or weak connections. Reconnect using quick connectors or soldering if needed.
Are there any risks when cutting LED strip lights?
Yes, cutting in the wrong places can harm the circuit, causing it to stop working. Always follow the manufacturer’s rules and safety tips to avoid problems.
Can I reconnect cut LED strips without soldering?
Yes, you can use quick connectors to reconnect easily. They offer a simple way without soldering, but make sure the connections are tight for the best performance.
See Also
Ultimate Resource for Outdoor LED Strip Lighting Solutions
Steps for Properly Cutting a COB LED Strip
Effective Installation Techniques for LED Strip Lights in 2025


