
High density LED matrices allow you to create amazing visual projects. You can make cool animations or interactive designs with them. These devices transform simple DIY ideas into stunning displays. Imagine crafting special wall art for your room or bright lights for a wedding or party. They’re also utilised in theatres, shops, and outdoor events due to their versatility.
Why are these displays so impressive? Full-colour LED matrices showcase millions of colours. This makes them excellent for sharp and clear visuals. Their moving images capture attention, keep people engaged, and promote brands. Features like remote control and interactivity render them perfect for modern designs. As they become increasingly popular, now is an ideal time to embark on your own DIY high density LED matrix project.
Key Takeaways
Pick an LED matrix that fits your size and pixel needs. Check the scan rate to match your project’s display goals.
Use a steady power source to avoid flickering or dim lights. Test voltage often and add capacitors for smoother power flow.
Solder carefully to make strong connections. Use a multimeter to check if joints work well.
Add sensors to make your LED matrix fun and interactive. Start with one sensor to learn before trying more ideas.
Try making cool animations and effects to improve your display. Use simple software to design amazing visuals easily.
Components and Tools for High-Density LED Matrix Projects
Picking the Right High-Density LED Matrix
Choosing the correct LED matrix is key to your project. Think about pixel density, size, and scan rate. Below is a simple comparison to guide you:
Feature | Description |
|---|---|
Pixel Density | 1024 pixels (3072 LEDs) for 32×32 panel |
Scan Rate | 1:16 scan rate |
Size | 7.5″x7.5″ for 32×32 panel |
Pixel Density | 2048 pixels (6144 LEDs) for 32×64 panel |
Scan Rate | 1:16 scan rate |
Size | 5″x10″ for 32×64 panel |
Microcontroller Needed | Arduino Mega 2560 or faster for big panels |
For brighter displays, pick matrices made with advanced materials. GaN on silicon substrates are great. They make light brighter and save energy.
Power Supply and Voltage Needs
A steady power supply keeps your LED matrix working well. Most matrices use 12V input, but LEDs need 3.3V. You’ll need a power supply that converts energy properly.
Important specifications include:
Voltage Range: 4V to 5.5V
Current per Segment: 40mA max
Power Use: Low-power CMOS technology
If using a Raspberry Pi, ensure its power supply is strong. It must support both the Pi and the matrix. Weak power can cause dim or flickering LEDs.
Microcontrollers for RGB LED Matrix Control
Microcontrollers help control your RGB LED matrix. Small matrices can use an Arduino Uno. Bigger panels need more power, like an Arduino Mega 2560 or Raspberry Pi.
When choosing a microcontroller, check its speed and memory. Faster ones handle animations better. If expanding your matrix, pick one with extra GPIO pins. Compatibility with libraries like Adafruit NeoPixel or FastLED is also helpful.
Essential Tools and Materials for DIY Assembly
To build your high-density LED matrix, you need the right tools. Missing key items can delay your project. Let’s check what you’ll require.
Tools You’ll Need 🛠️
Here’s a simple list of tools to help you:
Soldering Iron: Use a fine-tip one for neat connections.
Solder Wire: Choose lead-free solder for safer use.
Wire Strippers: These make wires ready for connecting.
Multimeter: Test circuits to ensure they work properly.
Screwdrivers: Small screwdrivers are useful for assembly.
Hot Glue Gun: Helps secure wires and small parts.
Tweezers: Handy for picking up tiny components.
Tip: Get a soldering station with temperature control. It avoids overheating fragile parts.
Materials to Gather
You’ll also need these materials for your project:
Wires: Flexible jumper wires or ribbon cables are ideal.
Connectors: Pin headers or JST connectors make assembly easier.
Heat Shrink Tubing: Covers and protects soldered joints.
PCB or Breadboard: Use this as a base for your circuit.
Fasteners: Screws, nuts, or zip ties secure the matrix.
Insulating Tape: Stops short circuits from happening.
Workspace Essentials
Work in a clean, bright area. A magnifying glass or headlamp helps with small details. Use a container to store screws and tiny parts safely.
With these tools and materials, you’re ready to start your project. Next, we’ll plan your circuit and layout!
Step-by-Step Guide to Building a High-Density LED Matrix

Designing the Circuit and Layout
Before building your high-density LED matrix, plan the circuit well. Think of this as drawing a map for your project. A good circuit plan helps avoid mistakes and ensures smooth working.
Choose the right parts first. For instance, a P2.5 RGB LED matrix with 128×64 pixels works well for high-density displays. After selecting your matrix, draw how the power supply, microcontroller, and cables will connect. Use tools like Fritzing or KiCad to make a clear circuit diagram.
Tip: Keep LED gaps between 4 mm and 24 mm for better brightness. Also, manage heat properly. LEDs get hot, and poor cooling can shorten their life. Use PWM to adjust brightness and reduce heat problems.
Aspect | Value/Description |
|---|---|
Maximum Temperature | Kept between 65.1 ℃ and 58.7 ℃ |
Luminance Efficiency | Increased from 114.8 lm/W to 126.8 lm/W |
Thermal Relaxation Time | No more than 0.013 s |
LED Distance Range | From 4 mm to 24 mm |
PWM Operation | Helps reduce heat issues |
Check your circuit diagram twice for mistakes. Even a small error, like a wrong wire, can cause big trouble later.
Pro Tip: Label all wires and parts in your diagram. This makes assembly easier and faster.
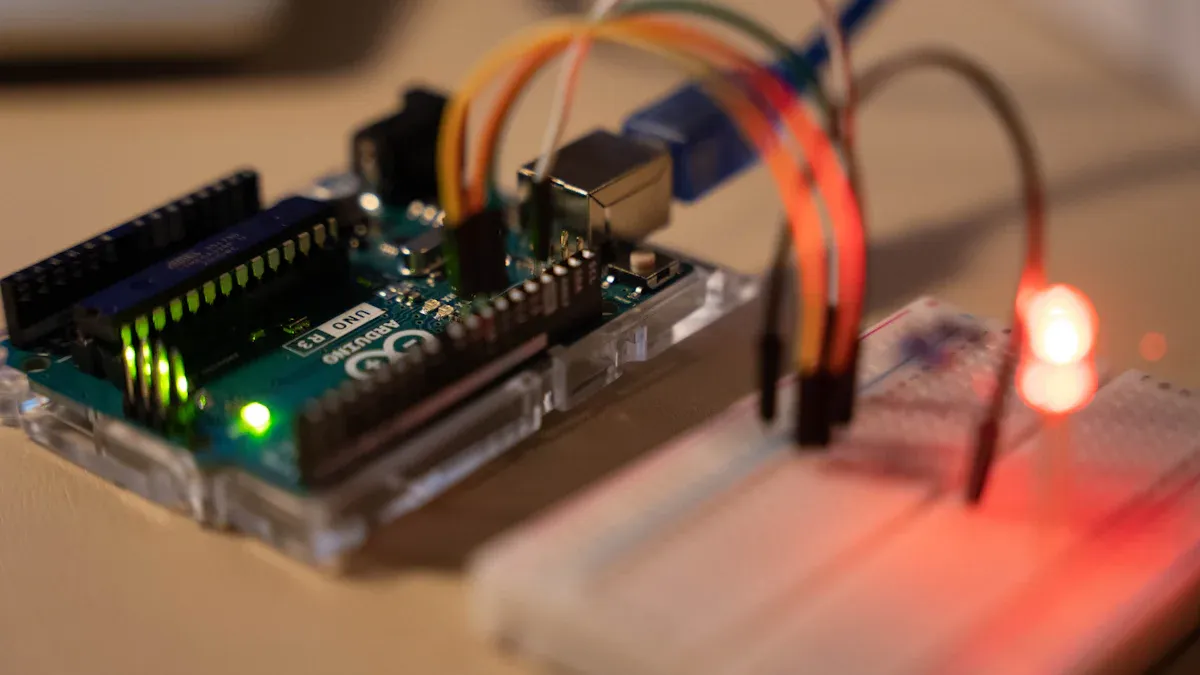
Soldering Techniques for High-Density Connections
Soldering is where your LED matrix starts to take shape. It needs care and focus, especially for dense connections. If you’re new to soldering, don’t worry—just follow these steps.
Set Up Your Workspace: Work in a clean, bright area. Use a soldering station with temperature control to protect parts.
Pick the Right Tools: Use a fine-tip soldering iron and lead-free solder. Tweezers help with tiny parts.
Apply Solder Paste: Solder paste improves heat and electricity flow. It also makes connections stronger, which is vital for dense LEDs.
Test Connections: After soldering, use a multimeter to check if everything works. This ensures all joints are secure.
For extra safety, use coupon systems to test your soldering. These systems check how well your connections work under different conditions. Strong solder joints improve LED performance and last longer.
Note: Flickering LEDs might mean bad soldering. Check your joints again and clean them if needed.
Mounting and Securing the RGB LED Matrix
After soldering, mount and secure your RGB LED matrix. This step keeps your project steady and ready to use.
Pick a strong base, like wood or acrylic. Place your LED panels on the base, leaving space for cables. Use screws, nuts, or zip ties to hold the panels firmly.
Next, connect the power and data cables. Make sure they are tight and won’t loosen over time. If using a Raspberry Pi, connect it with an Adafruit RGB Matrix Bonnet. This makes the setup neat and simple.
Finally, check if everything is stable. Shake the base gently to see if anything moves. A firm setup protects your parts and makes your project look better.
Quick Tip: Use hot glue or tape to hold small parts and stop short circuits.
With your matrix secured, you can now set up the power and test your display.
Setting Up the Power Supply for Reliability
A steady power supply is crucial for your high-density LED matrix. Without it, LEDs may flicker, dim, or stop working. Here’s how to set up your power supply properly.
Step 1: Pick the Correct Power Supply
Choose a power supply that fits your matrix’s voltage and current needs. Most RGB LED matrices use 5V, but bigger ones might need more power. Check your circuit plan to find the total power needed. Multiply the number of LEDs by the current each uses (about 0.02A per LED). Add 20% extra to ensure it works smoothly.
Tip: If your matrix has over 1,000 LEDs, use more than one power supply to share the load.
Step 2: Use Thick Wires
Thicker wires lower resistance and stop voltage drops. For dense setups, use 18-gauge or thicker wires for power. Keep wires short to save energy. Connect the ground (GND) of the power supply to the GND of the microcontroller to avoid problems.
Step 3: Add Capacitors for Smooth Power
Capacitors help stabilise your power supply. They reduce voltage changes and protect LEDs from sudden spikes. Place a 1000µF capacitor near the matrix’s power input. This small step improves performance a lot.
Step 4: Check Voltage Levels
Before turning on your matrix, use a multimeter to test voltage at different spots. The reading should match the needed voltage (e.g., 5V). If it’s too low, LEDs may not work well. If it’s too high, parts could get damaged.
Step 5: Control Heat
High-density LED matrices can get very hot, especially at full brightness. Too much heat can cause failures or damage LEDs. Use a fan or heatsink to cool things down. Lowering brightness with software also reduces heat and power use.
Mistakes to Avoid
Not Calculating Power Needs: Always figure out the total power and add extra.
Skipping Ground Wires: Missing GND links can make your matrix act strangely.
Ignoring Heat Issues: Heat can slowly harm your LEDs if not managed.
By following these steps, your power supply will stay stable, and your high-density LED matrix will work well. Spending time on this now avoids problems later.
Troubleshooting High-Density LED Matrix Issues
Fixing Flickering or Dim LEDs
Flickering or dim LEDs can spoil your display. Start by checking the power supply. Weak or unstable power often causes flickering. Use a multimeter to check if the voltage is correct. If it’s too low, upgrade to a better power supply.
Next, inspect your connections. Loose wires or bad soldering can block electricity flow. Re-solder weak joints and secure all wires tightly. Also, check your microcontroller settings. Wrong configurations can cause uneven brightness or flickering.
Tip: If problems persist, lower the brightness of your LEDs. This reduces power use and stabilises the display.
Resolving Connectivity and Signal Problems
Connectivity issues can stop your matrix from working. First, check the data cables. Damaged or loose cables can block signals. Replace faulty cables and ensure they’re firmly connected.
Look at the microcontroller’s GPIO pins. For Raspberry Pi or Arduino, ensure pins match the matrix correctly. Wrong pin settings can cause signal loss.
Interference from other devices can also disrupt signals. Keep your setup away from Wi-Fi routers or similar devices. Adding a resistor to the data line can improve signal stability.
Pro Tip: Use short cables for data connections. Long cables weaken signals and cause delays.
Preventing Overheating and Power Failures
High-density LED matrices can get very hot. Too much heat can damage LEDs or cause power failures. Ensure good airflow around your matrix. Add a small fan or heatsink to cool it down.
Your power supply is important too. An underpowered supply can overheat while trying to meet demands. Always choose a supply that exceeds your matrix’s power needs.
Lowering brightness is another way to reduce heat. Use software to limit maximum brightness. This helps prevent overheating and extends LED life.
Note: Check your matrix regularly for overheating signs, like hot surfaces or discoloured LEDs. Catching problems early can save your project from damage.
Programming and Software Integration for RGB LED Matrices
Picking the Right Software and Libraries
To program your high-density LED matrix, you need good software. These tools control colours, animations, and brightness. But not all software fits every project, so choose carefully.
Libraries like Adafruit NeoPixel, FastLED, or rpi-rgb-led-matrix are great for beginners. They offer many features and are easy to use. If you’re using a Raspberry Pi, the rpi-rgb-led-matrix library is a top pick. It works with many panels, including those with direct addressing (3 to 5 address lines) and some using shift registers. However, it doesn’t yet work with Raspberry Pi 5, so remember that.
Here’s a simple guide to software compatibility:
Aspect | Details |
|---|---|
Supported Panels | Works with most panels using direct addressing or shift registers. |
Raspberry Pi Compatibility | Supports Raspberry Pi 1, B+, Zero, 2, 3, and Compute Modules; not yet compatible with Pi 5. |
CPU Usage | Uses 30-40% of one core for updates; performance depends on system load. |
Limitations | Doesn’t support PWM panels; may have brightness issues with Adafruit HAT/Bonnet in default mode. |
Tip: New to coding? Start with Adafruit NeoPixel or FastLED. They have easy tutorials to help you learn.
Writing and Uploading Code to Microcontrollers
After picking your software, it’s time to code. Don’t worry if you’re new—most libraries have example codes you can adjust.
First, install the library on your computer. For Arduino, use the Library Manager to add libraries like Adafruit NeoPixel. On a Raspberry Pi, install the rpi-rgb-led-matrix library using terminal commands.
Here’s a simple code example for an RGB LED matrix using FastLED:
#include <FastLED.h>

#define NUM_LEDS 64
#define DATA_PIN 6

CRGB leds[NUM_LEDS];

void setup() {
  FastLED.addLeds<WS2812, DATA_PIN, GRB>(leds, NUM_LEDS);
}

void loop() {
  for(int i = 0; i < NUM_LEDS; i++) {
    leds[i] = CRGB::Red; // Turn LEDs red
    FastLED.show();
    delay(100);
    leds[i] = CRGB::Black; // Turn LEDs off
  }
}
Once your code is ready, upload it to your microcontroller. For Arduino, connect it to your computer via USB and click upload in the IDE. On a Raspberry Pi, run the script directly on the Pi.
Pro Tip: Check your wiring before uploading code. Wrong connections can make your matrix act strangely.
Testing and Fixing Issues with the LED Matrix
Now it’s time to test your LED matrix! After uploading the code, power it up and see it in action. But what if it doesn’t work right?
Start by checking simple things. Are all LEDs lighting up? If not, check your wires and soldering. Loose connections often cause problems. Use a multimeter to ensure power reaches every part of the matrix.
Next, review your code. Did you pick the right library and panel type? A mismatch can cause flickering or wrong colours. On a Raspberry Pi, check CPU usage. If it’s over 40%, updates might slow down.
For harder problems, debug your code. Add print statements to track what’s happening. For example, print the values sent to LEDs to ensure they’re correct.
Note: Brightness glitches, especially with Adafruit HAT/Bonnet setups, can be fixed by adjusting settings. Lowering brightness in software can also help.
Testing and fixing issues takes time, but it’s worth it. Once everything works, your RGB LED matrix will look amazing!
Enhancing Your DIY LED Matrix Project
Adding Sensors for Interactivity
Want your LED matrix to be more fun? Add sensors to make it interactive. Sensors can sense movement, touch, or changes in the environment. This lets your display react in cool ways. For example:
Use a touch sensor with Arduino to change colours or animations by tapping.
Add a DHT22 sensor to show live temperature and humidity on your matrix.
Try MatriXDeck kits for motion sensing and joystick controls to add fun features.
Pairing your matrix with a MAX7219 chip makes controlling sensors easier. This chip works well with many sensors and helps you add interactive parts. Whether it’s for games or smart home displays, sensors make your project exciting.
Tip: Begin with one sensor. Learn how it works before adding more.
Creating Custom Animations and Effects
Custom animations make your LED matrix look amazing. With good software, you can design effects for any setting. Tools like VJ Loop Studio are great for this. They help you create glowing effects, colour changes, and export designs straight to your LED controllers.
Here’s what users say:
“The glowing effects are perfect for clubs. Exporting saves time.” – Mark J., Visual Artist, London
“It’s simple to make content for events. The matrix effects are always popular.” – Sarah T., Event Producer, New York
If you’re new to animation tools, don’t worry. Most have templates and guides to help you start. Once you learn the basics, try advanced features like 4K exports and faster processing for big displays.
Pro Tip: Start with easy animations. Complicated ones can slow your microcontroller.
Expanding the Matrix for Larger Displays
Want a bigger display? Expanding your LED matrix is simple. Connect more panels to make a larger screen, great for events or public spaces.
Choose panels that can link together, like those with a 1:16 scan rate. Use a strong microcontroller, like Raspberry Pi, to handle extra data. Upgrade your power supply to meet higher energy needs.
Keep data cables short and tight when connecting panels. Long cables can weaken signals and cause delays. Adding a resistor to the data line helps keep signals stable.
Quick Tip: Test each panel separately before linking them. This finds problems early and saves time.
A bigger matrix lets you create stunning displays that impress everyone. Whether for DIY or professional use, the options are endless.
Now you have everything to start your LED matrix project. Let your imagination flow! Test different designs, create bright animations, or add fun interactive features. There’s no limit to what you can make, and the process is exciting too.
Making something useful and eye-catching feels amazing. Sharing your work with others can lead to new ideas and teamwork. Jump in, try advanced methods, and discover where your creativity leads you!
FAQ
How do I pick the best LED matrix?
Think about size, pixel density, and scan rate. Small matrices are good for simple projects. Bigger ones are better for detailed animations. Make sure it matches your microcontroller and power supply to avoid problems.
Can I use Arduino for dense LED matrices?
Yes, but it depends on the matrix size. Arduino Uno is fine for small matrices. For bigger ones, use Arduino Mega 2560 or Raspberry Pi. Check if your microcontroller has enough pins and memory for smooth performance.
How do I stop LED matrices from overheating?
Use fans or heatsinks to cool them down. Lower brightness with software to reduce heat. Keep your workspace cool and watch for signs like hot surfaces or dim lights.
How can I make my LED matrix interactive?
Add sensors like touch or motion detectors. These let your matrix react to taps or movements. Use microcontrollers like Arduino to connect and control the sensors easily.
Can I make my LED matrix bigger?
Yes, you can! Add more panels and upgrade your power supply. Use short cables to keep signals strong. Test each panel alone before linking them to avoid issues.
See Also
Effective Methods for Installing RGB LED Strip Lights
Comparative Analysis of High-Brightness LED Strips for Use
Comparing Edge-Lit and Backlit LED Lights for Displays


