If you want a useful and stylish way to light up your room, LED strip lights under cabinets are a fantastic option. These LED strip under cabinet lights enhance your space’s appearance while also saving energy. Did you know LED lights use 75% less energy than traditional bulbs? They also last up to 25 times longer! This makes them economical to run and incredibly durable. Whether you need light for your kitchen counters or a cosy work area, these LED strip under cabinet lights are both practical and appealing.
Key Takeaways
LED strip lights use less energy and last much longer. They use 75% less power and can last 25 times longer than regular bulbs.
You can change the brightness, colour, and style to fit your needs.
Placing LED strips correctly gives even light and looks nice.
Add diffusers and aluminium channels for softer light and a neat finish. This makes your space more welcoming.
Be safe when installing. Match the voltage and use approved products for safe lighting.
Why Choose LED Strip Under Cabinet Lighting?
Energy efficiency and cost-effectiveness
Using LED strip under cabinet lighting is a smart way to save energy and cut electricity costs. LEDs use much less power than older lighting types. For example:
A business in New York City saved 50% on energy after adding LED strips.
LEDs need up to 75% less energy than regular bulbs, says the Lighting Research Centre.
A building in San Diego lowered its carbon emissions by 45% with LED lights.
Here’s a simple comparison of lighting types:
Lighting Type | Average Lifespan | Energy Use |
|---|---|---|
Incandescent | 1,200 hours | 60 watts |
CFL | 8,000 hours | 14 watts |
LED | 25,000 hours | 8 watts |
Choosing LED strip under cabinet lighting saves money and helps the planet. 🌱
Long-lasting and durable lighting solution
LED strip lights last a long time. Unlike old bulbs that stop working suddenly, LEDs slowly dim, giving you time to replace them. Most LED strips last about 50,000 hours if cared for properly.
The L70 metric measures how long LEDs stay useful. It shows LEDs are still good when they shine at 70% of their original brightness. Some top-quality LED strips, like those from LEDYi, can last even longer than 50,000 hours.
Tip: Durable LED strips mean fewer replacements and less trouble over time.
Customisable options for various needs
One great thing about LED strip under cabinet lighting is its flexibility. You can adjust it to meet your needs, whether for bright work lighting or a soft, cosy glow. Here’s a quick look at the options:
Customisation Option | Description |
|---|---|
Brightness Levels | Choose between 250 Lumen/ft and 500 Lumen/ft for different tasks. |
Colour Temperature | Pick warm tones or daylight, adjustable with a remote. |
Dimming Options | Use a dimmer to set the brightness you want. |
RGB Colour Changing | Change colours with millions of choices using a remote or voice control. |
Voltage Options | Available in 12V, 24V, and 48V DC for various projects. |
Whether you want a warm kitchen feel or a lively workspace, LED strip under cabinet lighting can match your style.
Enhancing modern interior aesthetics
LED strip lighting isn’t just practical; it’s a game-changer for modern interiors. You can use it to transform your space into something sleek and stylish. Whether it’s your kitchen, office, or living room, these lights add a touch of sophistication that’s hard to beat.
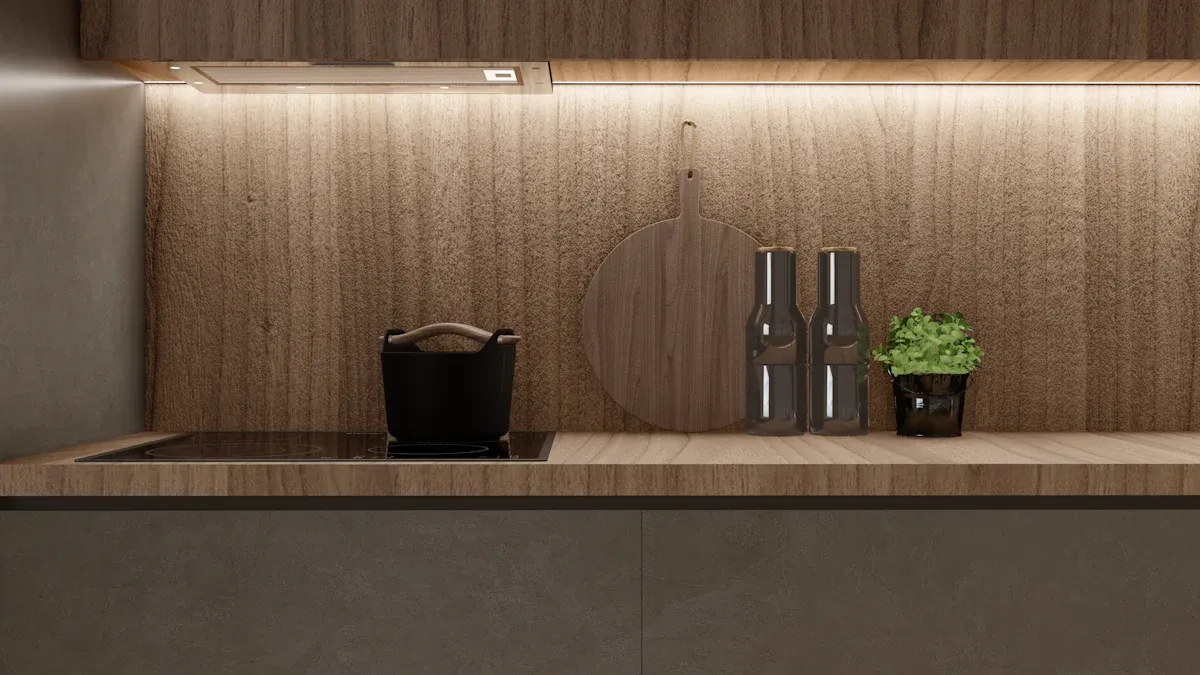
In kitchens, under-cabinet lighting does more than improve visibility. It creates a clean, modern look that makes your space feel high-end. Imagine preparing meals with a soft glow illuminating your countertops—it’s both functional and beautiful. For offices, LED strips can highlight shelves or furniture, creating depth and making the space feel more dynamic. It’s a simple way to make your workspace more inviting.
You can also use LED strips for cove lighting. This indirect lighting technique adds a warm, ambient glow to any room. It’s perfect for creating a cosy atmosphere in your living room or bedroom. The soft light bounces off the walls, giving the space a sophisticated and welcoming vibe.
What’s great about LED strip under cabinet lighting is its versatility. You can choose from various colours and brightness levels to match your style. Want a warm, relaxing tone? Or maybe a bright, energising light? The choice is yours. These lights let you customise your space to reflect your personality.
Tip: Pair your LED strips with diffusers for a softer, more polished look. It’s a small detail that makes a big difference.
With LED strip lighting, you’re not just lighting up a room—you’re elevating its design. It’s the perfect blend of form and function.
How to Pick the Best LED Strip Under Cabinet Lighting
Choosing the right LED strip under cabinet lighting can seem tricky. But don’t worry! Follow these simple steps to find the perfect fit for your space.
Brightness Levels and Lumens
Brightness is measured in lumens, which show how much light a bulb gives. More lumens mean brighter light. For under-cabinet lighting, you need a balance between bright and cosy.
Here’s a quick guide:
Task lighting: For cutting food or reading recipes, go for 300-500 lumens per foot.
Ambient lighting: For a calm, relaxed feel, 150-250 lumens per foot is ideal.
Tip: Test the brightness at home before buying. What looks good in the shop might not work well in your room.
Colour Temperature Choices
Colour temperature changes the mood of your room. It’s measured in Kelvin (K) and ranges from warm yellow to cool blue tones. Picking the right colour temperature is important for under-cabinet lighting.
Here’s how to choose:
Warm white (2700K-3000K): Great for a cosy and welcoming feel in kitchens or living rooms.
Neutral white (3500K-4000K): Perfect for tasks, offering a mix of warmth and brightness.
Cool white (5000K-6500K): Best for workspaces needing clear, focused light.
A study showed that 3000K with 750 lx lighting reduces mental strain. While colour temperature alone didn’t have a big effect, the right mix improves comfort and focus.
Note: Unsure what to pick? Adjustable LED strips let you switch between warm and cool tones for different needs.
Voltage and Safety Tips
Voltage might sound boring, but it’s key for safety and performance. Most LED strips use 12V or 24V. Here’s what you should know:
12V LED strips: Best for small projects or short lengths. They’re safe and easy to use.
24V LED strips: Ideal for longer runs or brighter lights. They keep brightness steady by reducing voltage drop.
Always check if your power supply matches the LED strip voltage. Using the wrong one can damage the lights or cause safety issues.
Safety Tip: Choose a power supply with overload and short circuit protection. This small step avoids big problems.
By thinking about brightness, colour temperature, and voltage, you’ll find the best LED strip under cabinet lighting for your space. It’s all about making your room both useful and beautiful.
Placement for the best lighting
Placing your LED strip lights correctly is very important. It’s not just about sticking them anywhere. Proper placement gives a smooth and even glow, making your space look great. But how can you get it right? Let’s break it into steps.
First, think about how far the strip is from the surface. If it’s too close to the cabinet edge, it may cause shadows or uneven light. The best spot is near the back of the cabinet underside. This way, the light spreads evenly across the countertop, removing dark areas.
Using LED strips with many lights per metre is a good idea. Strips with 60–120 LEDs per metre give smoother light with fewer bright spots. For the best results, COB LED strips are ideal. They have the most LEDs, giving bright and even light.
You can also use aluminium channels to improve the lighting. These channels help cool the lights and make the light softer. They also give your setup a neat and professional look. Aluminium channels are great if you want a polished finish.
Here are some simple tips for better placement:
Choose high-density LED strips for smooth and even lighting.
Place the strips near the back of the cabinet underside for balanced light.
Use aluminium channels for softer light and a tidy appearance.
Lastly, test the placement before sticking the strips permanently. Use tape to hold them temporarily and turn them on. This helps you see how the light looks and avoids mistakes later.
By focusing on placement, you’ll make your LED strip lights more useful and stylish. It’s all about finding the perfect balance between looks and function.
Essential Accessories for LED Strip Under Cabinet Lighting
Power supplies and calculating requirements
Picking the right power supply is very important. It keeps your LED strip under cabinet lighting safe and working well. Here’s what to remember:
Use only 80% of the power supply’s load. This stops overheating and helps it last longer.
Small projects can use power adapters. Bigger setups need special LED power supplies.
If your LED strips can dim, choose a power supply that works with dimmable drivers.
Look for safety features like over-current and short-circuit protections.
Check for UL Certification to ensure high-quality and safe products.
To figure out the power supply size:
Multiply the watts per foot by the strip’s length. For example, a 10ft strip at 4.4W/ft uses 44 watts.
Divide the total watts by 0.8 to follow the 80% Rule. You’ll need a power supply rated at least 55W.
Match the voltage and wattage to the power supply type you pick.
Tip: Double-check your maths to avoid problems with power.
Control systems for dimming and automation
Dimming and automation make your LED lights more useful and energy-saving. Modern systems offer many benefits:
Advantage | Description |
|---|---|
Easy Setup | DALI systems need just two cables for quick installation. |
Saves Money and Time | Simple wiring cuts costs and effort. |
Precise Adjustments | Digital signals allow accurate lighting changes. |
Two-Way Communication | Get feedback from your lights for better control. |
Energy Efficiency | Lower brightness to save power without losing comfort. |
Note: DALI systems are great for setting up different lighting moods or tasks.
Connectors for easy installation
Connectors make installing LED strips simple and neat. They help connect strips to power supplies or switches easily.
Here’s how connectors help:
Use male and female connectors to attach switches securely.
Remove silicone from the LED tape and connect jumper wires with connectors.
Run wires through cabinets and use connectors for a tidy finish.
Tip: Gather all parts like connectors, wires, and LED tape before starting. This makes installation smoother.
With the right accessories, your LED strip under cabinet lighting will be safe, efficient, and easy to set up.
Step-by-Step Installation Guide

Installing LED strip under cabinet lighting might seem tricky, but it’s easier than you think. With the right steps, you can achieve a professional finish that looks stunning and works perfectly. Let’s break it down into three simple stages.
Preparing and testing the LED strips
Before you start, it’s important to get everything ready. A little preparation goes a long way in ensuring your installation is smooth and hassle-free. Here’s what you need to do:
Double-check your LED strips: Test the lights before cutting or installing them. Plug them into the power supply to ensure they work properly. This saves you from surprises later.
Measure and cut: Use a tape measure to determine the exact length you need. Cut the strips only along the marked cutting lines to avoid damaging the circuit.
Prepare the strips: Check the polarity of the strips and make any necessary connections. If you’re using connectors, ensure they’re securely attached.
Test again: Power up the strips to confirm everything is working as expected. It’s better to catch any issues now than after installation.
Tip: Always handle the LED strips with care. Avoid bending them too much, as this can damage the internal wiring.
Mounting techniques for a professional finish
Now that your LED strips are ready, it’s time to mount them. Proper mounting not only ensures the lights stay in place but also enhances their appearance. Follow these tips for a polished look:
Clean the surface: Wipe down the underside of your cabinets with a damp cloth to remove dust and grease. A clean surface helps the adhesive backing stick better.
Use aluminium extrusions: These channels not only make your installation look sleek but also improve functionality. They prevent speckling and allow you to adjust the light angle for better coverage.
Position the strips correctly: Place the LED strips near the back of the cabinet underside. This ensures even light distribution across your countertop, eliminating shadows.
Stick carefully: Peel off the adhesive backing and press the strips firmly onto the surface. Work slowly to avoid air bubbles or uneven placement.
Pro Tip: If you want a softer glow, pair your LED strips with diffusers. They help spread the light evenly and give your setup a refined finish.
Final testing and setup
With the strips mounted, the final step is to test and fine-tune your setup. This ensures everything works perfectly and looks just right.
Power up the lights: Turn on the LED strips to check for any issues like flickering or dim sections. If something doesn’t look right, inspect the connections and power supply.
Adjust the brightness: Use your dimmer or control system to set the desired brightness level. This is especially useful if you’re creating a specific mood or ambience.
Troubleshoot common problems: If you notice any issues, here’s how to fix them:
Dim or flickering lights? Check the power supply rating and tighten any loose connections.
Uneven brightness? Shorten the strip or use amplifiers for longer runs.
Sections not lighting up? Look for damage at transition points and repair them using connectors or soldering.
Secure the setup: Once everything is working perfectly, tidy up the wires and secure them with clips or cable ties. This keeps your installation neat and safe.
Note: Always unplug the power supply before making any repairs or adjustments. Safety first!
By following these steps, you’ll have a beautifully lit space that’s both functional and stylish. Take your time, and don’t rush the process. The result will be worth it! 😊
Design Tips for LED Strip Under Cabinet Lighting
Layered lighting for better atmosphere
Layered lighting can change how your room feels and works. By mixing different light types, you add depth and style to your space. Here’s how to layer lighting:
Ambient Lighting: This is the main light that brightens the whole room. Ceiling lights or chandeliers are good examples.
Accent Lighting: This highlights special areas like art or unique features. Wall lights or spotlights work well for this.
Task Lighting: This focuses on specific jobs, like cooking or reading. LED strips under cabinets are great for this.
Using all three layers creates a balanced and cosy atmosphere. For instance, under-cabinet LED strips can light up your work area while blending with other lights. This makes your room both useful and stylish.
Tip: Use dimmers to control brightness and set the right mood.
Diffusers for softer lighting
Diffusers make your LED strip lights look smoother and less harsh. They spread the light evenly, reducing glare and giving a gentle glow.
Silicone diffusers spread light evenly across surfaces.
They cut down glare, making the light easier on your eyes.
Diffusers make your space feel more comfortable and welcoming.
Imagine cooking under soft, even light that doesn’t hurt your eyes. That’s what diffusers do! They also make your lighting setup look neat and professional.
Pro Tip: Combine aluminium channels with diffusers for the best lighting effect.
Getting expert help for tricky designs
If your project is big or complex, asking a lighting expert can help. Professionals know how to plan and install lights properly, saving you time and money.
Benefit | What It Means |
|---|---|
Saves Money | Experts avoid waste and cut extra costs. |
Energy Efficient | They make sure your lights use less power. |
Complete Service | They handle everything, so you don’t have to worry. |
Custom Designs | They create lighting plans just for your needs. |
Extra Support | Some offer help even after the lights are installed. |
Whether it’s a modern kitchen or a cosy office, experts make sure your LED strip lighting looks amazing and works well.
Note: Complicated designs need careful planning. Professionals can handle these details for you.
LED strip under cabinet lighting isn’t just useful; it makes your space look better. It gives extra light for tasks like cooking or reading. It also adds style by highlighting your countertops or backsplashes. High CRI lighting makes things look clearer and reduces eye strain. It can even boost your mood and make you feel more comfortable.
Tip: Pick good-quality LED strips with the right brightness and colour for the best effect.
Don’t wait! Upgrade your space now with these flexible lighting options!
FAQ
1. Can I install LED strip lights myself?
Yes, you can! LED strip lights are beginner-friendly. Just measure, cut, and stick them in place. Use connectors for easy wiring. If you’re unsure, follow the step-by-step guide above.
Tip: Test the lights before sticking them permanently to avoid mistakes.
2. How do I choose the right brightness for my space?
It depends on your needs. For tasks like cooking, go for 300-500 lumens per foot. For a relaxed vibe, 150-250 lumens work well.
Note: Adjustable LED strips let you switch brightness levels for different moods.
3. Are LED strips safe to use under cabinets?
Absolutely! LED strips are low-voltage and produce minimal heat, making them safe for under-cabinet use. Just ensure you match the power supply voltage and use certified products.
Safety Tip: Always unplug the power supply before making adjustments.
4. Can I dim my LED strip lights?
Yes, most LED strips support dimming. You’ll need a compatible dimmer or control system. Dimming not only saves energy but also helps create the perfect ambience.
Pro Tip: Check if your power supply supports dimming before purchasing.
5. How long do LED strip lights last?
High-quality LED strips can last up to 50,000 hours. That’s over five years of continuous use! Proper care and the right power supply can extend their lifespan even further.
Emoji Reminder: 🌟 Invest in good-quality strips for durability and performance.
See Also
Stylish LED Lighting Solutions For Your Kitchen Cabinets
Versatile COB LED Strips For Unique Design Projects
Understanding COB LED Strips And Their Functionality


