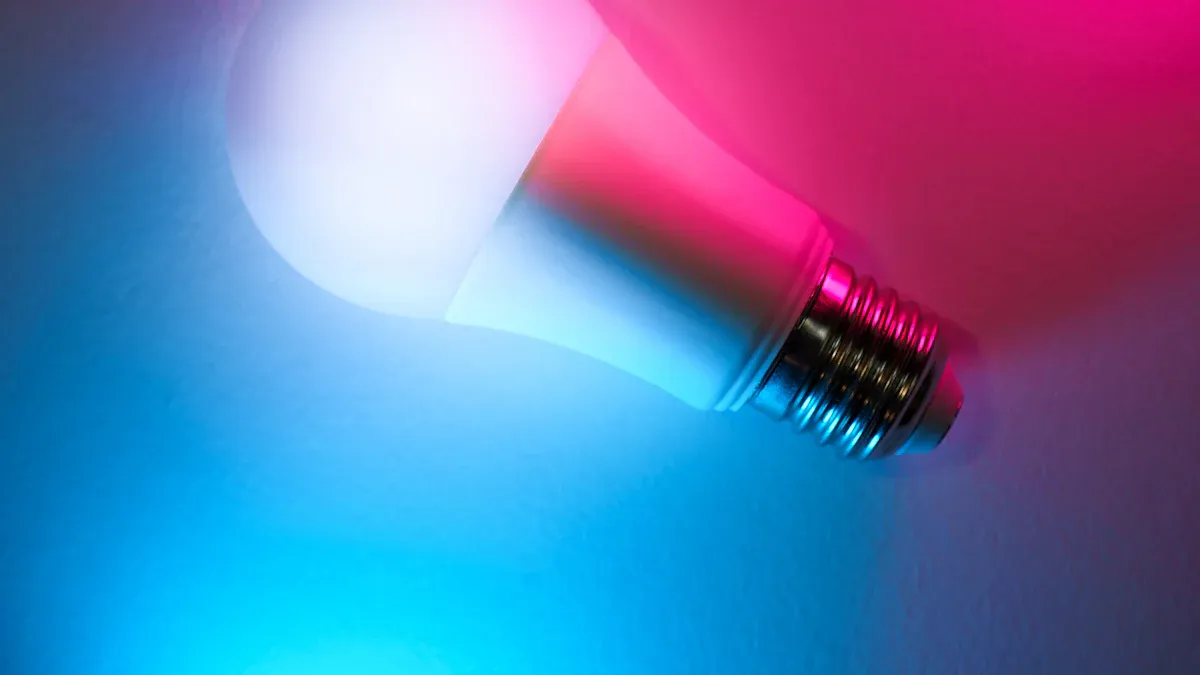
Perfect lighting makes photos and art look amazing. It improves colours and details, making your work bright and professional. Artists use colour temperatures of 5000K to 5500K for accurate colours. LED lightboxes are very helpful for this. They give steady, even light, especially when daylight is not enough. Their high colour rendering index (CRI) shows real colours clearly. This helps with detailed photos or showing off artwork. Whether you photograph flowers or take product pictures, lightboxes are very useful. Some businesses saw a 95% sales boost after using LED lightboxes. This shows how they help creative projects succeed.
Key Takeaways
LED lightboxes give smooth lighting, making photos and art look better. They reduce shadows and show more details clearly.
Pick the right size lightbox for what you are photographing. Small objects need small lightboxes, while big objects need larger ones for good lighting.
Brightness and colour settings that can change are important. These let you adjust the light to fit your needs for great results.
Try different angles and views to take creative photos. Changing setups can show textures and details better.
Use diffusers and bounce screens to make light softer and lessen shadows. This helps make your pictures look much nicer.
Understanding LED Lightboxes
What is an LED lightbox?
An LED lightbox is a flat panel that lights up evenly. It uses energy-saving LEDs to make a bright surface. This is great for photos, art, and design projects. Many lightboxes let you adjust brightness and colour temperature. You can change the light to match your needs. They are easy to carry, lightweight, and come in different sizes. Both professionals and hobbyists find them useful.
Modern LED lightboxes have smart features like automatic settings and remote controls. Sensors can change the light based on the room’s conditions. This keeps the lighting perfect while saving energy. These features make them popular in many industries.
Benefits for lightbox photography
A photo lightbox improves the quality of your pictures. It lights up the subject completely, removing shadows and uneven lighting. This makes sure every detail is clear, giving professional-looking photos. Using lightboxes shows clients you care about high-quality results.
LED lightboxes save energy and last a long time. You can use them for hours without needing replacements. They also work with smart technology and show moving content. This makes them great for creative projects.
Applications in flower photography and art
LED lightboxes are very helpful for flower photography and art. They let you control the light, which is important for showing flower details. Flowers like tulips and lilies look amazing when lit from behind. The lightbox makes their colours and shapes stand out. You can also use them indoors when the weather is bad.
For art, a lightbox gives steady light for accurate colours. This helps with tracing, sketching, or checking small details in artwork. Whether you’re an artist or just enjoy art, a lightbox can improve your work.
Tip: Try different angles when using a lightbox for flower photos. This adds creativity and depth to your pictures.
Choosing the Right LED Lightbox
Key features to consider: size and dimensions
When picking a photo lightbox, size is very important. The size you need depends on what you will photograph. Small items like jewellery or flowers need a small lightbox. Bigger things, like clothes or gadgets, need a larger one for even lighting.
How well a lightbox works depends on its design. Things like Internal Quantum Efficiency (IQE) and External Quantum Efficiency (EQE) affect how it turns electricity into light. Here’s a simple table explaining these factors:
Performance Factor | What It Means |
|---|---|
Internal Quantum Efficiency (IQE) | Shows how well electricity becomes light. Higher IQE means better light. |
External Quantum Efficiency (EQE) | Measures light output compared to electricity used. Affected by current strength. |
Drive Current Density | Controls how much light the LED gives. Too much can lower efficiency. |
Junction Temperature | Refers to heat at the LED’s core. Too much heat reduces efficiency. |
Tip: Pick a lightbox that fits your needs and is good quality. The right size ensures even lighting for better photos.
Brightness levels and adjustability
Being able to change brightness is very useful for lightbox photography. A good lightbox lets you adjust brightness for different needs. Low brightness is great for soft lighting. High brightness shows fine details clearly.
Modern lightboxes have great brightness and even lighting. Here’s a quick table of some key numbers:
Metric | Value |
|---|---|
Minimum Brightness | 600 nits (after calibration) |
Colour Temperature | 2,000~10,000 K (Default 6,504 K) |
Brightness Uniformity | 0.95 |
Colour Uniformity | ±0.02 Cx, Cy |
Adjustable brightness helps in any lighting situation. Whether in a dark room or bright studio, it keeps results consistent. You can also play with shadows and highlights to make photos more interesting.
Note: Always test brightness before taking pictures. This avoids making your subject too bright or too dark.
Colour temperature and its impact
Colour temperature changes how light looks in your photos. It can make light feel “warm” or “cool.” Warm light (2,000–3,000 K) feels cosy. Cool light (5,000–6,500 K) looks sharp and professional.
LED lightboxes offer many colour temperature options. This is great for things like model photos or art, where colours must look right. Unlike old lights, LEDs show colours more naturally. This makes them perfect for industries needing accurate colours.
Did you know? Cool light is often used in workspaces to help focus. Warm light is better for relaxed or casual photos.
Choose a lightbox with adjustable colour temperature. This lets you match the light to your needs, making your photos look their best.
Portability and power options
When picking a photo lightbox, being easy to carry matters. This is important if you work in many places. Lightweight designs and small packing make moving it simple. Some models come with cases on wheels for easy transport. For example, a lightbox 850mm wide and 2m high fits in a portable case. One person can set it up in minutes. Aluminium frames keep it light but strong.
Power choices also make things easier. Some LED lightboxes have rechargeable batteries. These can last 12–14 hours after charging for 5–7 hours. This means you can use them for long shoots or events without stopping. Whether indoors or outside, these features make your work smoother.
Here’s a quick look at portability and power features:
Feature | Details |
|---|---|
Size | 850mm wide x 2m high |
Portability | Lightweight, packed in a wheeled carry case |
Assembly | Assembled in minutes by 1 person |
Frame Material | Aluminium extrusion |
Battery | Charge 5-7 hours, lasts 12-14 hours |
anwendung | Shopping mall, retail store, exhibition |
Tip: If you travel often, choose a lightbox with a rechargeable battery and compact design. It will save time and effort.
Budget-friendly options for beginners
If you’re new to using lightboxes, start with a cheaper option. These kits give you the basics to take great photos. They are perfect for learning lighting techniques and improving your skills.
Cheaper kits usually have simple features like brightness control and standard colours. Mid-range kits offer better options, like advanced colour settings and stronger materials. For experts, premium kits provide top-quality features and last longer.
Here’s a summary of the choices:
Budget Category | Description |
|---|---|
Budget-Friendly Kits | Great for beginners or basic setups. |
Mid-Range Kits | Include advanced features like better colour settings. |
Premium Kits | Best for professionals, offering top durability and customisation. |
Note: If you’re just starting out, pick a lightbox that is affordable and useful. You can upgrade to a better one as you improve.
Setting Up Your LED Lightbox
Positioning for optimal lighting
Where you place your LED lightbox is very important. To get great photos, put the lightbox on a steady table. This keeps it still while you take pictures. Make sure your subject is in the centre of the lighted area. This avoids uneven lighting. For flower photos, try different angles to show details and textures. Tilting the lightbox slightly can reduce glare and shadows, making your pictures better.
For bigger items, raise the lightbox or use stands. This helps you light your subject properly and gives more setup options. Keep the lightbox away from sunlight or shiny surfaces. These can mess up the controlled lighting.
Tip: Use a tripod to keep your camera steady. This helps you take sharper photos with better framing.
Adjusting brightness and colour temperature
Changing the light settings is key for great photos. Modern LED lightboxes let you adjust brightness and colour temperature. Brightness control helps you make the light stronger or softer. Lower brightness can give a dreamy look, while higher brightness shows bright colours clearly.
Colour temperature changes how the light feels in your photos. Warm light (3000K) feels cosy, while cool light (6000K) looks sharp and clear. But using very cool light (above 5500K) for too long can affect sleep and focus. Use cooler tones during the day and warmer ones at night for balance.
Note: Always test the brightness and colour settings before starting. This keeps your lighting even and avoids overexposed or dull photos.
Combining with natural light and diffusers
Mixing natural light with your lightbox can improve your photos. Place the lightbox near a window to add soft daylight. This mix gives balanced lighting, which is great for flower photos. Natural light adds depth, while the lightbox gives even brightness.
Diffusers are useful for softening strong light and reducing shadows. Put a diffuser over the lightbox to spread the light evenly. This works well for delicate flowers or detailed items. You can also make your own diffuser with thin fabric or baking paper to save money.
Installation Complexity: Some lightboxes need special tools to set up. This can make assembly harder and cost more, especially for big or advanced models. If you’re new, pick a simple lightbox design.
Tip: Try using natural light and diffusers together for creative effects. This makes your photos unique and helps them stand out.
Avoiding glare and shadows in lightbox photography
Glare and shadows can make your photos look bad. They take attention away from the subject and hide details. To get great results, you must control how light hits your subject. Here are some simple ways to reduce glare and shadows:
Use a big table with soft side lighting
Put your lightbox on a large table. Place a soft light, like an umbrella light, to the side of your subject. This spreads light evenly and avoids strong reflections. Soft lighting makes the brightness gentle and balanced.Bounce light with white paper
Hang white paper behind or around your subject. This bounces light back onto the item, reducing shadows and reflections. The paper works like a light mirror, giving even brightness across the subject.Direct light with foam boards
Place foam boards around your subject to guide the light. These boards remove dark areas and create smooth, even lighting. Foam boards are light and easy to move, making them handy for setups.Angle the light at 45 degrees
Set your light source at a 45-degree angle to the subject. This stops direct glare and improves brightness. It also keeps light from bouncing into the camera lens, avoiding unwanted reflections.Add more layers to soften light
Cover your lightbox with extra white paper or thin fabric. This spreads the light more and reduces strong shadows. You can also reflect light from above by adding a diffuser or shiny material on top of the lightbox.
Tip: Try these ideas to find the best setup for your photos. Small changes, like moving the light or adding a diffuser, can improve your pictures a lot.
By using these tips, you can avoid glare and shadows. This makes your photos clear and professional. Good lighting shows off the subject and its details, helping your work stand out.
Advanced Techniques for Professional Results
Using diffusers for softer lighting
Diffusers help make light softer and more even. They reduce strong shadows and bright spots in photos. You can use thin fabric or acrylic sheets as diffusers. Place the diffuser between the light and your subject to soften the brightness. For better results, try using two diffusers together. This spreads the light evenly, giving your photos a professional look.
To improve your setup:
Use a bigger light source to cover more space.
Add a reflector to bounce light and reduce shadows.
Move the light further away for a softer effect.
These tips work well for delicate subjects like flowers or food. By combining diffusers with your lightbox, you can create smooth and high-quality lighting.
Experimenting with angles and perspectives
Changing angles can make your photos more interesting. Moving your lightbox or camera creates different effects. For example, lighting from below shows textures, while side lighting adds depth. Tilting the camera or lightbox can reduce glare and show details better.
Try taking photos from different heights or distances. Close-up shots show small details, while wider shots capture the whole scene. Playing with angles helps you find creative ways to make your photos unique.
Tip: Use a tripod to keep your camera steady. This helps you take clear photos with good framing.
Layering multiple light sources for depth
Using more than one light source adds depth to your photos. Combine your lightbox with smaller lights for a balanced setup. For example, use the lightbox as the main light and smaller LEDs for extra highlights. This makes your subject stand out and avoids flat lighting.
Studies show that layering lights improves brightness and quality. Here’s a simple table:
Benefit | What It Does |
|---|---|
High Brightness | Layers of LED lights make the display brighter. |
Even Light Spread | Keeps light balanced across the subject. |
Better Output | Multiple lights give stronger and clearer lighting. |
By layering lights, you can highlight details and textures. This makes your photos look more professional and eye-catching.
Post-processing tips for creating professional product images
Editing your photos is key to making them look professional. By fixing details and improving colours, you can make your product photos much better. Here are some simple tips to create high-quality pictures:
Start with basic fixes
First, adjust brightness, contrast, and white balance. These changes make your photo look clear and well-lit. Use tools like Adobe Lightroom or Photoshop for better control. A well-balanced photo is the base for great results.Improve colours and details
Make colours brighter to help your product stand out. Don’t overdo it, as too much colour looks fake. Sharpen edges a little to show small details clearly. This is useful for items like jewellery or textured products.Remove unwanted objects
Clean the background by erasing extra items or marks. Use tools like the clone stamp or healing brush for a smooth finish. A tidy background keeps attention on your product.Crop and centre
Make sure your product is in the middle and straight. Cropping removes extra space and improves the layout. Use standard sizes to keep your photos consistent.Add soft effects
Add light shadows or reflections to give your photo depth. These effects make your product look more real and attractive. Keep the edits gentle for a natural appearance.Save in the right format
Export your final photo in high quality, like PNG or JPEG. This keeps the image sharp when shared online.
Tip: Always keep a copy of the original photo before editing. This way, you can go back and make changes if needed.
By using these tips, you can create polished and professional product photos. Editing not only makes your pictures look better but also ensures they are ready to impress viewers.
Tips for Showing Product Details
Placing products for clear photos
How you place your product matters for great pictures. Put the product in the middle of the lightbox. This gives even lighting and removes shadows. Use a plain background to keep attention on the product. For small items like rings, raise them on a small stand. This makes them look more noticeable and adds depth.
Try different angles to find the best view. Tilting or side views can show textures better than straight shots. Always use a tripod to keep the camera steady. This helps you take sharp and clear photos of your product.
Tip: Use a ruler or grid to line up your product. This keeps all your photos neat and consistent.
Softening shadows with bounce screens
Bounce screens are easy tools to improve lightbox photos. They reflect light back onto your product, softening shadows. This makes the lighting look smooth and balanced. You can use white boards, shiny paper, or foil as bounce screens. Place the screen across from the light source to spread light evenly.
Move the bounce screen closer or farther to change the effect. A closer screen gives stronger light, while a farther one softens it. This method is great for making products look their best in online photos.
Tip: Use bounce screens with diffusers for even softer light. This makes your photos look more professional.
Shooting in RAW for better editing
Taking photos in RAW format gives you more editing options. RAW saves all the details from the camera without changes. This lets you fix brightness, colours, and shadows without losing quality. It also keeps colours rich and vibrant.
RAW files handle noise and mistakes better than JPEG. You can fix bright spots or dark areas easily. Though RAW files are bigger, you can make them smaller after editing to save space.
Did you know? RAW photos let you adjust the style and details before finishing. This makes them perfect for creating high-quality images.
DIY lightbox setups for budget-friendly projects
Making your own lightbox is a fun and cheap way to try lightbox photography. You only need a cardboard box, white paper, and low-cost LED lights. This setup is great for taking pictures of products or artwork, especially shiny items that reflect light.
First, get a strong cardboard box. Cut big windows on three sides, leaving about two inches of border. Cover these windows with white paper or thin cloth to spread the light evenly. Put a white paper sheet inside the box for the background. This gives a smooth surface for your photos. Place LED lights on both sides of the box for balanced lighting.
This homemade lightbox reduces glare and shadows, helping you take clear, professional-looking pictures. It works well with both cameras and smartphones. You can move the lights or add more fabric layers to make the light softer. These beginner-friendly tips help you get great results without spending much money.
Many people have used this method successfully for their projects. It is easy to set up and works well for lightbox photography. Whether you are photographing small items or delicate art, this setup gives steady lighting. Try different angles and light levels to improve your photos.
Tip: Use a bigger box for larger objects or add coloured paper for creative backgrounds. This makes your DIY lightbox more flexible and fun to use.
Using an LED lightbox improves your creative work. It lets you control light easily for steady results. You can remove strong shadows and shiny spots, making it great for flower or product photos. It is affordable and easy to carry, offering studio-like quality. Try using diffusers or mix with natural light for softer effects. These methods make your photos look deeper and smoother. Whether showing flowers or products, a lightbox makes details and colours stand out. Be creative by trying different angles and light setups.
FAQ
What size LED lightbox should I get?
The size you need depends on your project. Small items like rings or earrings need a small lightbox. Bigger things, like clothes, need a larger one for even lighting. Pick a size that fits your subject well.
Can LED lightboxes be used outside?
Yes, you can use them outside if they have a battery or portable power. Keep the lightbox away from direct sunlight and bad weather. This keeps the lighting steady and stops it from getting damaged.
How do I clean an LED lightbox?
Wipe it gently with a soft cloth that doesn’t leave lint. For tough stains, use a slightly damp cloth with water or mild soap. Don’t use strong chemicals as they can harm the surface or lights.
Are LED lightboxes good for saving energy?
Yes, LED lightboxes use less power than old-style lights. They give bright, even light while saving electricity. This makes them cheaper to run and better for the planet.
Can I use coloured backdrops in an LED lightbox?
Yes, you can use coloured backdrops to make your photos creative. Put coloured paper or fabric inside the lightbox for a fun background. Try different colours to see what looks best with your subject.
See Also
Understanding The Functionality Of LED Light Bars In Lightboxes
Guide To Fitting LED Light Bars In Signage Lightboxes
Effective Methods For Installing RGB LED Strip Lights
Selecting The Perfect LED Strip Lights For Linear Lighting
Using Edgelit LED Bars For Signage And Lightbox Illumination


