Cutting your LED strip lights correctly is crucial for both safety and effectiveness. You want to avoid any mishaps, right? Here are some common safety concerns to keep in mind:
Always disconnect the LED strip lights from the power source before cutting.
Be careful not to cut through any wires or circuitry.
Use sharp tools with caution. Wearing gloves and goggles can protect you from injuries.
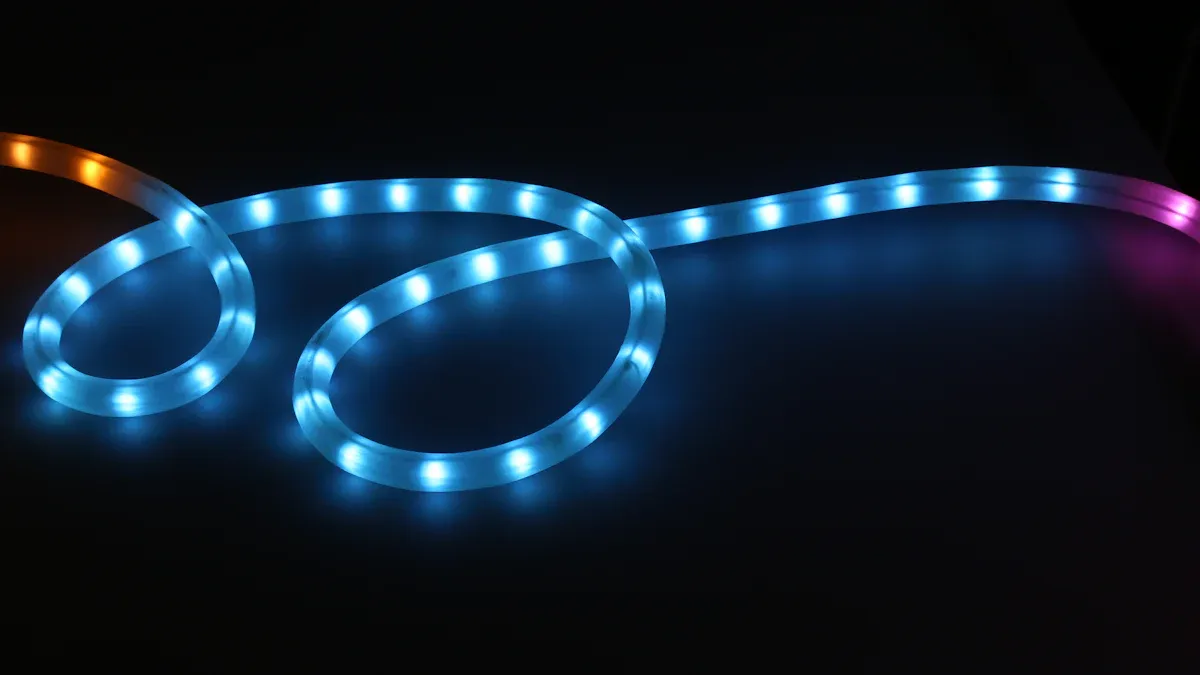
With the right tools and steps, you can confidently tackle your project and enjoy your led strip cuttable lights!
Key Takeaways
Always unplug LED strip lights before cutting. This keeps you safe.
Use sharp scissors or a utility knife to cut. Measure carefully to avoid errors.
You can pick connectors for easy reconnection. Soldering is better for a strong bond.
Preparing to Cut
Before you cut your LED strip lights, gather the right tools. You also need to know how to measure well. This will help you avoid mistakes and get a clean cut.
Tools for Cutting
You don’t need fancy tools to cut LED strip lights. But having the right ones makes it easier. Here’s what you need:
Sharp scissors or a utility knife: These help you cut cleanly without hurting the strip.
Ruler or measuring tape: Good measurements are very important. They stop insufficient lighting and help your LED strips fit in the right space.
Marker or pencil: Use this to mark where you will cut.
Safety goggles and gloves: Protect yourself while you work. Always put safety first!
Good measurement is very important for cutting LED strip lights. Here are some reasons why:
Good measurements stop insufficient lighting.
Proper measurement cuts down on extra power use.
It makes sure LED strips fit in the right space.
If you don’t measure first, your strips might be too short. This mistake could mean more connections or even a full replacement.
Identifying Cut Points
Now that you have your tools, find out where to cut. Most LED strip lights have cut points marked for you. Here’s how to find them:
Look for a printed scissor icon every few inches on the strip. This shows where you can safely cut.
Find a line with two or four exposed copper pads. These pads are for electrical connections, and cutting here won’t hurt the strip.
Different LED strip lights may have different cut intervals. Here’s a quick reference table:
Voltage | Typical Cut Interval | Marking Frequency |
|---|---|---|
12V | Every 3 LEDs | Every ~5 cm |
24V | Every 6 LEDs | Every ~10 cm |
By following these tips, you can prepare to cut your LED strip lights. Remember, taking time to measure and find cut points will save you from problems later!
How to Cut LED Strip Lights
Measuring and Marking
Before you start cutting, take a moment to measure and mark your LED strip lights. This step is crucial for ensuring a clean and precise cut. Here’s how to do it effectively:
Plan Your Layout: Think about where you want to place your LED strip lights. A well-thought-out layout prevents uneven lighting and gaps.
Create a Diagram: Sketch a simple layout diagram. This helps you visualize where each piece will go and avoids costly mistakes.
Measure Twice, Cut Once: Use your ruler or measuring tape to measure the length you need. Mark the cut line clearly with your marker or pencil.
Tip: Rushing into installation without careful measurements can lead to areas left in the dark. Always take your time!
Cutting Techniques
Now that you’ve measured and marked your LED strip lights, it’s time to cut. Follow these steps to ensure you do it safely and effectively:
Identify the Cut Line: Locate the marked cut lines on the LED strip. These are usually indicated by a scissor icon or a line with exposed copper pads.
Gather Your Tools: Make sure you have sharp scissors or a utility knife ready. A clean cut is essential for reconnecting the strips later.
Make the Cut: Align your cutting tool with the marked line and cut straight across. Avoid cutting at an angle, as this can damage the strip.
Inspect the Cut Ends: After cutting, check the ends for exposed copper contacts. These are essential for reconnecting your strips later.
Here are some expert-recommended techniques to avoid damaging your LED strip lights:
Always cut at the designated points to avoid damaging the circuitry.
Use sharp scissors or a utility knife for clean and precise cuts.
Inspect the cut ends for exposed copper contacts essential for reconnection.
By following these steps, you can cut LED light strips safely and effectively. Remember, taking your time during the measuring and cutting process will lead to better results!
Reconnecting Cut LED Light Strips
After cutting your LED strip lights, you’ll want to reconnect them properly to ensure they work effectively. You have two main options: using connectors or soldering. Each method has its pros and cons, so let’s explore both.
Using Connectors
Connectors are a popular choice for reconnecting cut LED light strips. They’re easy to use and don’t require any special skills. Here’s how to go about it:
Choose the Right Connector: Make sure you select connectors that match your LED strip type. Here’s a quick reference table for common connector types:
Connector Type
Specification
10mm 4-pin connectors
Common for Novostella strip lights
5050 4 pin 10mm
For RGB strip lights
3528 4 pin 10mm
For tunable white strip lights
Connect the Strips: Simply slide the cut ends of the LED strips into the connector. Ensure that the positive (+) and negative (-) sides align correctly.
Secure the Connection: Press down firmly to ensure a snug fit. This helps prevent any loose connections that could lead to flickering or failure.
Using connectors has several advantages:
They’re quick and easy to install.
No special tools are needed.
You can reuse them if you need to make adjustments later.
However, keep in mind that connectors can sometimes lead to less secure connections. This might cause flickering or disconnections, especially in high-powered applications.
Soldering for a Secure Connection
If you’re looking for a more permanent solution, soldering is the way to go. This method creates a strong bond that can withstand wear and tear. Here’s what you need to know:
Gather Your Tools: Before you start soldering, make sure you have the following materials:
Soldering iron (30W-60W, temperature adjustable)
Thin rosin core solder
Wet sponge or steel pad for cleaning the soldering iron tip
Masking tape for securing the LED strip
Heat shrink tubing
Heat gun for shrinking the tubing
Prepare the Strips: Strip the ends of the LED wires to expose the copper. Make sure the ends are clean and free of any debris.
Solder the Connections: Heat the soldering iron and touch it to the copper pads on the LED strip. Then, feed the solder into the joint until it flows smoothly.
Insulate the Connection: Once the solder cools, slide heat shrink tubing over the joint and use a heat gun to shrink it down. This protects the connection from moisture and damage.
Soldering has its advantages:
It creates a strong and durable bond, ideal for long-term installations.
It’s highly reliable and resistant to wear and tear.
It works well for high-powered LED strips.
However, soldering isn’t without its challenges:
It requires some technical skill and practice.
The installation process can be time-consuming.
It may not be beginner-friendly.
When deciding between connectors and soldering, consider your project’s needs. If you want a quick and easy solution, connectors are great. But if you’re looking for durability and reliability, soldering is the way to go.
Tip: Always check for correct polarity when reconnecting your LED strips. Mismatched connections can lead to malfunction.
Troubleshooting Common Issues
If your reconnected LED strip lights don’t function properly, don’t panic! Here are some troubleshooting steps to help you out:
Check the power supply to ensure it’s not overloaded.
Inspect the LED strip for any physical damage.
Assess the controller for any issues.
Evaluate environmental factors, like extreme temperatures.
Test the remote control for battery issues.
Ensure the cables connecting the controller to the LED strip are intact.
Verify the polarity of the LED strip connections.
By following these steps, you can enjoy your LED strip lights without any hiccups!
Cutting and reconnecting LED strip lights can be a fun project. Keep these important tips in mind:
Always cut at the marked points to protect the circuit.
Use sharp tools for neat cuts.
Cover the open ends of waterproof strips to avoid damage.
Now, get creative with uses like under-cabinet lights or accent lights! Enjoy all the great things you can do with your LED strips! 🌟
FAQ
What tools do I need to cut LED strip lights?
You need sharp scissors or a utility knife, a ruler, a marker, and safety gear like gloves and goggles.
Can I cut LED strip lights anywhere?
No, always cut at the marked points with scissor icons or copper pads to avoid damaging the circuitry.
How do I reconnect cut LED strips?
You can use connectors or solder the ends together. Both methods work well, but soldering offers a more secure connection.
See Also
Steps To Properly Cut Your Cob Led Strip
Choosing The Perfect LED Strip Lights For Linear Lighting
Effective Installation Tips For RGB LED Strip Lights


