
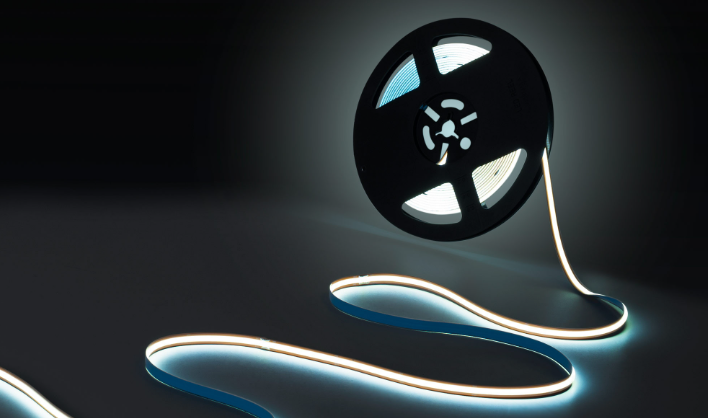
You can cut led light strips, but only at marked spots. These strips are designed to bend and fit your space. Cutting led light strips allows you to create cool and unique designs. Follow the correct steps to ensure the led remains safe and bright.
Key Takeaways
Always cut LED strip lights at marked points to keep the circuit intact. This ensures the lights continue to function properly.
Gather the right tools, such as sharp scissors and a ruler, to make clean cuts without damaging the LED strip.
Seal the ends of cut LED strips with heat shrink tubing or silicone to protect against dust and water, ensuring longevity and safety.
Materials Needed

Before cutting your LED strip lights, gather all the needed items. Using the right tools makes the job easier and avoids damage.
Tools for cutting LED strip lights
You need proper tools to cut LED strip lights neatly. Here’s what you’ll need:
A ruler or tape measure to check the length.
A pencil or marker to mark where to cut.
Sharp scissors or a cutting tool for smooth edges.
A mat or board to protect your table.
These tools help you cut cleanly without harming the LED strip.
Supplies for reconnecting cut LED strip lights
If reconnecting pieces, you’ll need extra supplies. These include:
A soldering iron and solder to join wires securely.
Connectors if you don’t want to solder.
A power supply that matches your LED strip lights.
Extra wires to make longer connections if required.
These items keep your LED strip lights working after cutting.
Optional items for sealing and safety
To keep your LED strip safe, consider these extras:
Heat shrink tubing to cover open wires.
Electrical tape for extra protection.
A tester to check power before setting up.
Tip: Always test your LED strip lights after cutting and joining to avoid problems later.
Having these tools and supplies ready makes cutting and reconnecting LED strip lights simple and safe.
Step-by-Step Guide
Measure the length needed for the LED strip lights
First, measure the area where the LED strip lights will go. Use a ruler or tape to find the exact length. Be precise when measuring. Add a little extra for bends or corners. This ensures the strip fits well without gaps.
Tip: Check your measurements twice. Mistakes can waste materials or cause bad fitting.
Find the marked cut points on the LED strip
LED strip lights have special cut points, often marked by copper pads. These are spaced evenly, usually every 2 inches (5 cm). Look closely to spot these marks. Cutting here keeps the circuit working and the strip usable.
Note: Only cut at the marked points. Cutting elsewhere can ruin the LED strip.
Safely cut the LED strip lights
After measuring and finding the cut points, you can cut. Use sharp scissors or a cutting tool for a clean cut. Lay the strip flat on a surface for stability. Hold it steady and cut through the centre of the copper pads. This keeps both parts working.
Safety Reminder: Don’t cut near flammable items or use unsafe tools. Handle carefully to avoid problems.
By following these steps, you can adjust your LED strip lights to fit perfectly while keeping them functional.
Reconnecting the Strips
Joining cut LED strips with soldering
Soldering is a strong way to join cut LED strips. It makes a lasting bond between the wires. First, match the positive and negative ends carefully. Use a soldering iron to melt solder onto the copper pads. This joins the wires firmly and keeps the connection stable.
But soldering needs practice and proper tools. It can also be risky, like causing burns or shocks. If you try this, work in a ventilated space and wear safety gear. For skilled users, soldering gives a neat and professional result.
Using connectors for easy reconnection
If soldering seems hard, connectors are a simpler choice. These small tools let you join strips without extra equipment. Just slide the strip ends into the connector. Make sure the positive and negative sides match. Once in place, the connection is done.
Connectors are easy to use and prevent mistakes. They are also safer since there’s no heat or soldering involved. This method is great for beginners or anyone wanting a quick fix.
Protecting the ends of cut LED strips
After reconnecting, protect the ends to keep them safe. Dust and water can harm open connections, especially in wet areas. Use silicone sealant to cover the ends for water resistance. Heat shrink tubing is another good option. Heat it, and it wraps tightly around the connection for extra safety.
Sealing the ends helps your LED strips last longer. It also keeps them working well. Don’t skip this step if you want your lights to stay safe and bright.
Common Mistakes to Avoid
Cutting LED strip lights at the wrong spot
A big mistake is cutting LED strip lights in the wrong place. Strips have special cut points marked by copper pads or lines. These marks keep the circuit working after cutting. Cutting elsewhere can break the circuit. This might make the strip stop working or cause uneven lighting. It can also harm the LEDs, making the strip useless.
Tip: Always check the markings before cutting. If unsure, read the manufacturer’s guide to avoid mistakes.
Using the wrong tools to cut LED strip lights
Wrong tools can ruin the strip or make bad cuts. Dull scissors or unsuitable tools may crush the strip. This can damage the circuit, causing dim lights or failure. The strip might not work properly anymore.
To prevent this, use sharp scissors or a proper cutting tool. These tools make clean cuts without harm. A stable surface, like a mat, helps you cut better too.
Not sealing the ends of cut LED strip lights
Many forget to seal the ends after cutting LED strips. Open ends can let in dust or water, causing damage. This is risky in kitchens, bathrooms, or outdoors. Unsealed ends might cause short circuits, making the strip last less time.
Protect the strip by sealing the ends with heat shrink tubing or silicone. These materials block water and dust, keeping the strip safe and working.
Reminder: Sealing the ends is quick but very important. It helps your LED strip lights last longer and work better.
Tips and Warnings
Test LED strip lights before and after cutting
It’s important to test your LED strip lights before and after cutting. First, connect the strip to power to check if it works. This step saves time and prevents wasting materials on a broken strip. After cutting, test the pieces again to ensure they still light up. If a section doesn’t work, inspect the cut point for mistakes or loose wires.
Tip: Unplug the strip before testing or cutting to stay safe.
Handle LED strip lights with care to avoid damage
LED strip lights are fragile and need gentle handling. Don’t bend them too much, as this can break the circuits inside. Use sharp tools when cutting to avoid crushing the strip. Keep strips away from flammable items to reduce fire risks. For outdoor use, pick weatherproof strips with an IP rating of 65 or higher to protect against water.
Use the right wire size to stop overheating or voltage drops.
Attach indoor strips to metal surfaces to help with heat.
Always check the input voltage matches the strip’s needs.
Warning: Bad handling can cause short circuits, overheating, or permanent damage.
Follow manufacturer guidelines for cutting LED strip lights
Manufacturer instructions are the best way to cut LED strip lights properly. Always cut at the marked lines between the copper pads. This keeps both parts of the strip working. Leave enough copper pads if you plan to reconnect the pieces. Use the tools suggested by the manufacturer to avoid harming the strip.
Make sure the surface is clean and dry for good sticking.
Avoid sharp bends to protect the strip’s wiring inside.
Cover open wires with electrical tape or heat shrink tubing for safety.
Reminder: Following these steps helps your LED strip lights last longer and work better.
Cutting LED strip lights is easy with the correct steps. Measure accurately and cut only at marked spots to keep them working. Join the pieces correctly to ensure they function well. Avoid errors like cutting in the wrong place or ignoring safety tips. With good care, your LED strip lights will stay bright and last longer.
Take Action: Begin customising your LED strip lights today to upgrade your space effortlessly!
FAQ
Can you cut LED strip lights anywhere?
No, you can only cut them at marked points. These points ensure the circuit remains intact and the lights continue to function properly.
What tools do you need to cut LED strip lights?
You need sharp scissors or a cutting tool, a ruler, and a stable surface. These tools ensure clean cuts without damaging the LED strip.
How do you reconnect cut LED strip lights?
Use soldering or connectors to join the pieces. Match the positive and negative ends carefully. Protect the connection with heat shrink tubing or silicone for durability.
Tip: Always test the LED strip before and after cutting to ensure it works perfectly.
See Also
Steps For Cutting A Cob Led Strip Safely
Understanding The Functionality Of Cob Led Strips
Adjustable Brightness Options For Cob Led Strips


