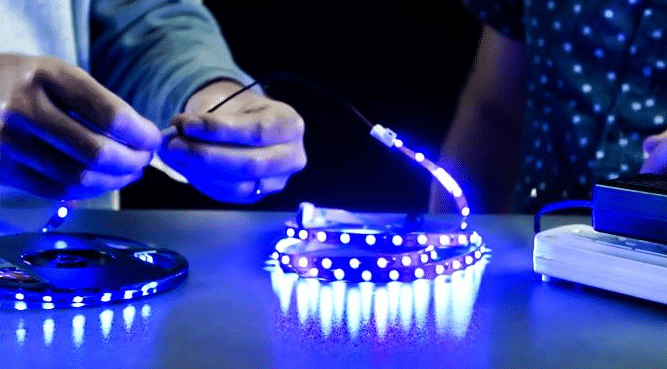
Connecting LED strip lights can brighten your room with colourful lighting. You just need simple tools and basic understanding to begin. Find the input and output ends of the strip for correct signal flow. Use connectors for temporary setups. For stronger connections, soldering works best. Each part must link to a DC power supply or another powered strip. Whether you choose soldering or connectors without solder, it is easy and satisfying.
Key Takeaways
Use connectors for simple and fast setups. They need no special tools and are great for beginners.
Soldering gives a strong and durable connection. It works well for long-term projects but needs practice and specific tools.
Always check polarity and connections before turning on power. This avoids damage to your LED strips and ensures they work properly.
Tools and Materials for Connecting LED Strip Lights

Important tools you will need
To connect LED strip lights, you need some basic tools. These tools make the job easier and ensure good connections. A wire stripper is useful for cutting and removing wire coverings. You also need a screwdriver to fix parts of the LED strips. A voltage tester helps check if the wires are working properly. Keep wire connectors, electrical tape, and heat shrink nearby to secure the wires. If you want a lasting connection, use a soldering iron to join the strips.
Different types of LED strip connectors
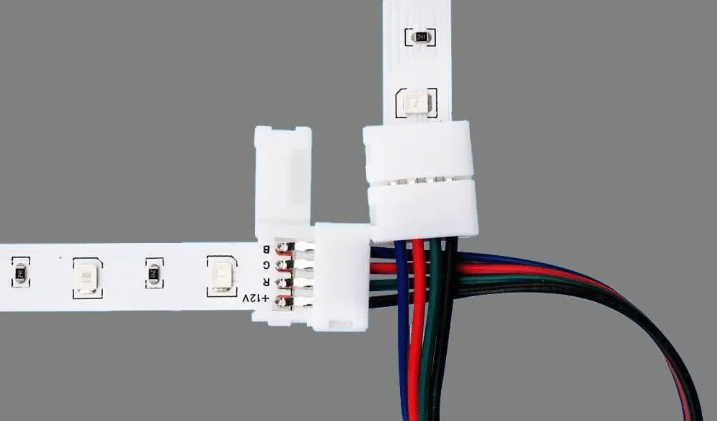
LED strip connectors are important for joining strips or linking them to power. They come in different types, depending on the kind of LED strip. The table below shows the common connectors:
LED Strip Connector | Type Of LED Strip Light |
|---|---|
2 PINs | Single-colour LED strips |
3 PINs | Tunable white & Addressable LED strips |
4 PINs | RGB LED strips |
5 PINs | RGB+W or RGBW LED strips |
6 PINs | RGB+CCT & RGB+Tunable white LED strips |
These connectors often have a pin-lock system. This makes it simple to connect without needing extra tools.
Extra materials for soldering
If you choose soldering, you will need some extra items. A soldering iron and solder wire are needed to join the strips firmly. Use flux paste to help the solder flow better and make clean joints. Have heat shrink tubing ready to cover and protect the soldered parts. These materials make your work look neat and keep your LED strip lights strong and long-lasting.
Step-by-Step Guide to Connecting LED Strip Lights

Measuring and cutting the LED strips
First, measure the space for your LED strip lights. Use a tape measure to get accurate measurements. Look for the cut lines on the strip. These lines are evenly spaced. Cutting outside these lines can break the circuit. Use sharp scissors or a knife to cut neatly. Line up your tool with the cut line and cut straight. Check the ends for copper contacts after cutting. These contacts are needed to connect the strips.
Connecting LED strips using connectors
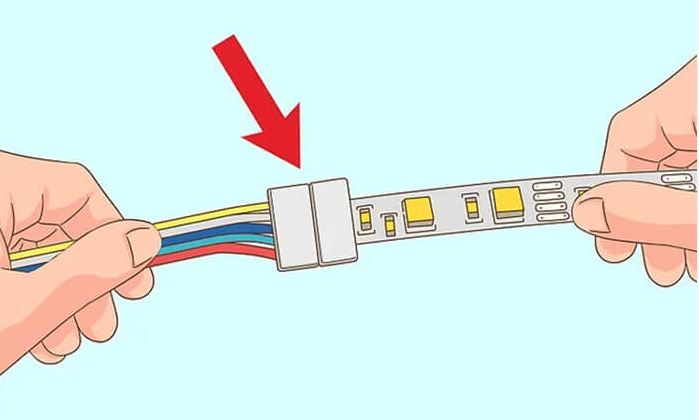
Connectors make joining LED strips simple and fast. They are great if you cannot solder. Open the connector and slide in the strip. Make sure the copper contacts match the pins. Close the clip to secure the strip in place. This method is easy and needs no special tools. But connectors can loosen, so check them often.
Soldering LED strips for a permanent connection
Soldering gives a stronger and lasting connection. Hold the wire in one hand and the soldering iron in the other. Heat the solder pad and wire together. Add solder to join them firmly. Keep the soldering iron at an angle for better control. After soldering, test the strip by turning it on. Soldering makes the connection strong and reliable.
Testing the connection for proper functionality
Once connected, test the strips to see if they work. Plug the LED driver into a power source and switch it on. If the lights do not turn on, check the connections. Also, ensure the power supply matches the strip’s voltage. Testing helps find and fix problems early for a smooth setup.
Choosing the Best Connection Method for LED Strip Lights
Pros and cons of using connectors
Connectors are a fast and simple way to join LED strips. They do not need special tools, so they are great for beginners. You can use them to make different setups, and they work with most LED strip lights. Their clear design keeps your lights bright without blocking the glow. Connectors can also handle strong currents, making them good for powerful setups.
But connectors have some downsides too. They might loosen over time, especially in hot places. If you are new to this, wiring in parallel might feel tricky. Even with these issues, connectors are still popular because they are easy to use.
Pro/Con | Details |
|---|---|
Easy to Use | Quick to install, no special tools needed. |
Flexible Setups | Allows different designs for various needs. |
Works with Many Types | Compatible with most LED strips, making them very useful. |
Keeps Lights Bright | Clear design does not block the brightness of the lights. |
Handles Strong Currents | Can manage up to 6A, good for high-power setups. |
Strong Locking System | Built to stay secure and not loosen easily. |
May Loosen Over Time | Heat can cause connectors to loosen after a while. |
Hard for New Users | Parallel wiring can be confusing for beginners. |
Pros and cons of soldering
Soldering gives a strong and lasting connection for LED strips. It is the best choice for setups that need to last a long time. But soldering needs special tools and skills, which might be hard for beginners.
Pros of Soldering:
Makes a strong and stable connection.
Keeps the LED strips working well over time.
Cons of Soldering:
Needs tools like a soldering iron and solder wire.
Requires practice and skill, so it is harder for beginners.
Picking the right method for your project
The best method depends on what your project needs. If you want something quick and easy, go for connectors. They are simple to use and let you make changes fast. If you need a strong and lasting connection, soldering is better.
Here is a comparison of the two methods:
Factors | LED Strip Connector | Soldering |
|---|---|---|
Strength | Good | Very Strong |
Ease of Use | Very Easy | Harder |
Upkeep | Simple | More Difficult |
Think about what you need. For short-term setups, connectors are great. For long-term setups, soldering is more reliable.
Tips to Avoid Common Problems with LED Strip Lights
Stopping voltage drops in long LED strips
Voltage drops can make your LED lights dim or uneven. To stop this, check how long your strip is. Long strips often lose power, so keep them short. Follow the maximum length suggested for your LED type. If you need a longer setup, split the strip into smaller parts. Power each part separately for better brightness. Adding power at different points also helps keep the light even.
Use thicker wires to lower resistance and avoid power loss. A stronger power supply or voltage booster can also help. For very long strips, use signal amplifiers to keep the brightness steady everywhere.
Checking polarity when connecting
Wrong polarity can stop your LED lights or damage them. Always match the positive and negative sides on the strip and power supply. Use a multimeter to check the copper pads. If there is no resistance, it means the connection is safe.
When cutting the strip, use sharp scissors for clean cuts. This stops damage to the insulation, which could cause problems. Check all connections twice before turning on the power to avoid mistakes.
Staying safe with electrical parts
Be careful when working with electrical parts. Always unplug the power before touching your LED strips. Wear gloves to protect yourself from shocks. Do not work in wet places unless your strips are made for it.
Check your power supply and wires often for damage or heat. Broken parts can cause power issues or even fires. Keep your workspace tidy to avoid accidents. Following these tips will keep your setup safe and working well.
Setting up LED strip lights is a fun DIY task. Use connectors for ease or soldering for stronger links. Following instructions helps you create a safe and smooth setup.
💡 Tip: Begin your project now to enjoy flexible, custom lighting. Brighten your room with colourful and unique designs!
FAQ
How can you pick the right power supply for LED strips?
Find out the voltage and wattage of your LED strip. Multiply the wattage per metre by the strip’s length. Pick a power supply with a bit more wattage than needed.
💡 Tip: Choose a power supply with 20% extra power for safety.
Can different types of LED strips be joined together?
You cannot directly connect RGB and single-colour strips. Each type needs its own controller and power supply to work properly.
Why do LED strip lights get dim at the end?
Long strips can lose power, causing dim lights. Use shorter strips or add power in more places to keep brightness even.
⚠️ Note: Make sure the power supply matches the strip’s voltage to prevent damage.
See Also
Connecting Cob Lighting Strips: A Simple Guide
Effective Installation Tips For RGB LED Strip Lights
Installing LED Strip Lights Efficiently: A 2025 Guide


