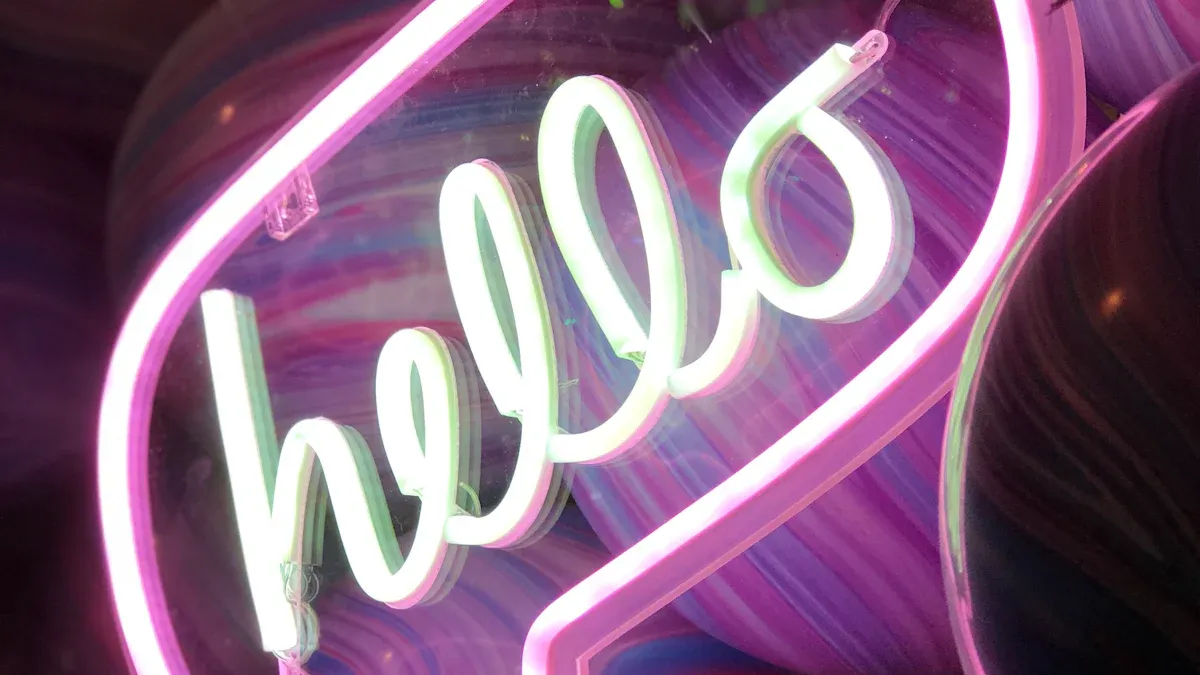
Think about turning a boring corner of your house into a bright, glowing spot with your own DIY LED neon sign. These signs aren’t just decorations—they’re a cool way to show your style and creativity. Plus, making one is cheap and easy for beginners.
Did you know the LED neon light market is growing fast? It’s expected to go from $2.86 billion in 2025 to $6.61 billion by 2034. This is because people love energy-saving and good-looking lights. This shows how popular these signs are for both looks and use.
So, why not try it out? A DIY LED neon sign lets you use fun colors, shapes, and designs. You can make it personal for your space. Whether it’s a heart or your favorite word, you can create anything!
Key Takeaways
DIY LED neon signs are affordable and easy to make, perfect for beginners looking to add a personal touch to their space.
Gather simple materials like LED neon flex lights, a base, and basic tools to start your project without breaking the bank.
Choose simple designs like shapes or short phrases to ensure your first sign is manageable and looks great.
Customization is key! Mix colors, add patterns, and use unique bases to make your sign stand out and reflect your style.
Enjoy the process! Creating your own sign is a fun way to express creativity and can spark a new hobby.
Understanding LED Neon Signs
What Are LED Neon Signs
LED neon signs are modern versions of traditional neon lights. Instead of using glass tubes filled with gas, these signs use flexible LED strips that mimic the glow of neon. They’re made from materials like silicone or PVC, which makes them lightweight and easy to shape. You can create all kinds of designs, from simple shapes to detailed patterns.
What makes them stand out is their versatility. You can use them to decorate your bedroom, living room, or even a party space. They’re perfect for adding a pop of color and personality to any area. Plus, they’re safer and more energy-efficient than old-school neon lights.
Advantages of LED Neon Signs
Why are LED neon signs so popular? First, they’re super durable. Unlike traditional neon, they don’t break easily because there’s no fragile glass involved. This makes them a great choice for homes with kids or pets.
Second, they’re energy-efficient. LED lights use less electricity, so you don’t have to worry about high energy bills. They also last a long time, which means you won’t need to replace them often.
Another big advantage is how customizable they are. You can pick your favorite colors, shapes, and even words to create a sign that’s totally unique. Whether you want a heart, a star, or your name in lights, the possibilities are endless.
Why They’re Beginner-Friendly
If you’re new to DIY projects, LED neon signs are a great place to start. The materials are easy to work with, and you don’t need any special skills to create something amazing. The flexible LED strips can be bent into shapes without much effort, and there are plenty of tutorials online to guide you.
You also don’t need a lot of tools. Basic items like scissors, glue, and a power source are enough to get started. Plus, the process is forgiving. If you make a mistake, you can easily fix it without ruining the whole project. It’s a fun way to explore your creativity and make something you’ll be proud to show off.
Materials and Tools for DIY LED Neon Signs

Making your own LED neon sign is simpler than it seems. With the right tools and materials, you can start this fun project easily.
Key Materials You’ll Need
Before starting, gather everything needed for your LED neon sign. Here’s a simple list to help:
LED neon flex lights: These are the main part of your sign. They’re bendable, bright, and come in many colors.
Substrates: This is the base for your design. You can use wood, PVC, or even a wall.
Wire cutters: Use these to cut wires to the right size.
Soldering iron: Helps connect wires securely.
Hand-held drill: Needed for making holes in the base if required.
Conductor wire (20-gauge): Links your LED lights to the power source.
Handheld adhesive: Keeps the LED strips stuck to the base.
These materials are cheap and easy to find. They’re great for beginners and let you try different designs.
Affordable Tools and Supplies
Making LED neon signs doesn’t cost much. Unlike glass neon signs, which need expensive tools, LED signs use flexible strips. These strips are cheaper, stronger, and save energy. You can make a cool sign without spending too much.
You don’t need fancy tools either. Items like wire cutters and glue might already be at home. If not, you can buy them at hardware stores or online for a good price. This makes the project affordable for almost everyone.
Where to Buy Cheap Materials
Finding low-cost materials for your LED neon sign is easy. Here’s a quick look at where to shop:
Source Type | Pros | Cons |
|---|---|---|
Local Signage Companies | – Easy to visit | – Quality might differ by supplier |
– May offer wholesale prices | – Could take longer to get materials | |
Retail Stores | – Cheap due to mass production | – Fewer options for customization |
– Available right away | – Materials might not last long | |
Reputable Online Retailers | – High-quality items with warranties | – Costs may be slightly higher |
– Better customer service and design help |
If you want variety and ease, online stores are great. But if you like seeing items before buying, local shops or signage companies work too. Either way, you’ll find affordable choices for your project.
Step-by-Step Guide to Making Your Sign
Designing Your LED Neon Sign
Before you dive into the fun part of bending and assembling, you need a solid design. Think about what you want your LED neon sign to say or show. Is it a heart, a star, or maybe your name? Keep it simple if this is your first project. Simple shapes and short words are easier to work with and look just as stunning.
Here’s how you can start designing your neon sign:
Get Inspired: Look around your space or browse online for ideas. Pinterest and Instagram are great places to find inspiration.
Sketch Your Design: Use a pencil and paper to draw your idea. Keep the lines smooth and continuous since LED neon strips work best with flowing designs.
Test Your Concept: Lay the LED strip over your sketch to see if it works. This step helps you figure out if your design is practical.
Choose Colors: Pick colors that match your room or the vibe you’re going for. Bright colors like pink and blue pop, while warm tones like yellow feel cozy.
Pro Tip: If you’re unsure about your design, watch a project video or follow a step-by-step tutorial online. Many creators share their process, from inspiration to the final product, which can help you visualize your own project.
Preparing and Shaping the Materials
Once your design is ready, it’s time to prepare your materials. This step sets the foundation for your LED neon sign, so take your time and do it right.
Here’s what you’ll need to do:
Cut the LED Neon Strip: Use wire cutters to trim the strip to the right length. Most LED neon strips have cutting marks, so follow those to avoid damaging the lights.
Shape the Strip: Gently bend the strip to match your design. Start with the larger curves and work your way to the smaller details. The flexibility of the LED strip makes this step easier than you might think.
Prepare the Base: If you’re using a wooden or PVC base, drill small holes where the LED strip will be secured. This keeps everything in place and ensures your design stays intact.
Note: If you don’t have a drill, adhesive works just as well. Many LED neon strips come with a sticky backing, making it easy to attach them to your base.
Assembling and Wiring the Sign
Now comes the exciting part—putting everything together! This step involves attaching the LED strip to your base and wiring it up so it lights up beautifully. Don’t worry; it’s easier than it sounds.
Follow these steps to assemble and wire your sign:
Attach the LED Strip: Secure the strip to your base using adhesive or small screws. Make sure it follows your design closely.
Connect the Wires: Solder the red wire from the extension cable to the 5V wires on the LED strip. Use heat shrink tubing to cover the exposed connections.
Secure the Circuit: Solder the data wire from the LED strip to the corresponding wire on the extension cable. Double-check that all connections are secure.
Power It Up: Connect the wires to a power source and test your sign. If it doesn’t light up, check your connections and try again.
Safety Tip: Always double-check your wiring before plugging in your sign. Incorrect wiring can damage the LED strip or even cause a short circuit.
Once everything is wired and working, step back and admire your creation. You’ve just made your own LED neon sign!
Adding Final Touches and Testing
You’re almost there! Now it’s time to add those final touches that will make your LED neon sign truly shine. This step is all about refining your work and ensuring everything functions perfectly. Let’s dive into the details.
Securing the LED Strips
Once you’ve shaped and attached the LED strips to your base, double-check that everything is firmly in place. Loose strips can ruin the look of your design. Here’s how you can secure them:
Use Adhesive: If the strips feel loose, apply a bit more adhesive to the problem areas. Make sure it dries completely before moving on.
Reinforce with Clips: For extra stability, use small clips or brackets to hold the strips in place. These are especially helpful for intricate designs.
Pro Tip: If you notice any gaps between the LED strip and the base, gently press them together with your fingers or a soft tool. This ensures a seamless look.
Testing the Wiring
Before you celebrate your finished project, test the wiring to make sure everything works as it should. Follow these steps to test your LED neon sign:
Plug It In: Connect your sign to the power source and turn it on.
Check for Flickering: If the lights flicker, inspect the wiring for loose connections.
Look for Dim Areas: Dim sections might indicate a problem with the LED strip or the power supply.
If you spot any issues, don’t panic! Most problems can be fixed by re-soldering the wires or adjusting the connections.
Safety Tip: Always unplug your sign before making any adjustments to the wiring. This keeps you safe and prevents damage to the materials.
Enhancing the Aesthetic
Now that your sign lights up beautifully, it’s time to focus on the finishing touches. These small details can take your DIY project to the next level:
Trim Excess Material: Cut away any extra wire or adhesive that might distract from your design.
Add a Frame: A simple frame around your sign can give it a polished, professional look.
Paint the Base: If your base is visible, consider painting it a color that complements your neon design.
Fun Idea: Use glow-in-the-dark paint on the base for an extra pop of brightness when the lights are off!
Final Testing and Placement
Before you hang or display your sign, give it one last test. Turn it on in a dark room to see how it looks. Adjust the placement of the LED strips if needed. Once you’re satisfied, find the perfect spot to showcase your creation. Whether it’s on a wall, a shelf, or a desk, your LED neon sign is sure to grab attention.
Congratulations! You’ve completed your step-by-step guide to making your sign. Not only have you created something unique, but you’ve also learned valuable skills along the way. Now, sit back and enjoy the glow of your hard work.
Creative Ideas for Beginners
Easy Shapes and Symbols
Starting with easy shapes is perfect for your first LED neon sign. These designs are simple and fun to make. Try shapes like hearts, stars, arrows, or moons. They’re quick to create and look great in any room.
Why are simple shapes a good choice?
They’re bold and easy to notice.
They show feelings or ideas clearly, like logos do.
They let you try new ideas without being too hard.
For ideas, look at logo designs or art galleries. A heart can mean love, while a star can stand for dreams. These shapes work well as LED neon signs and are great for beginners.
Tip: Start with one color for your design. It’s easier and looks neat.
Short Words or Phrases
Short words or phrases are another fun idea for your neon sign. They’re easy to design and make a big statement. Imagine seeing “Dream Big” or “Good Vibes” glowing on your wall. It’s sure to brighten your day!
Here are some ideas for phrases:
Be Happy
Stay Cool
Love Life
Shine Bright
Chill Zone
These phrases are popular and easy to work with. Pick words that match your style or mood. Whether it’s cheerful, inspiring, or romantic, your sign will feel special.
Pro Tip: Use different colors for the words and background to make it stand out.
Holiday or Seasonal Designs
Holiday designs are a fun way to decorate your home. A glowing pumpkin for Halloween or a snowflake for Christmas adds a festive touch. These designs are cheerful and easy to make.
Why are holiday-themed signs so great?
They make your space feel warm and welcoming.
You can add personal details like names or dates.
They save energy, so you can keep them on all season.
Popular ideas include a Christmas tree, a ghost, or a heart for Valentine’s Day. These designs are eye-catching and reusable every year. They’re a creative way to celebrate holidays.
Fun Idea: Add glitter or shiny paint to your sign’s base for extra sparkle!
Personalized Name Signs
Creating a personalized name sign is one of the most exciting ways to make your LED neon project truly yours. Imagine seeing your name—or someone else’s—glowing in vibrant colors on a wall. It’s not just a decoration; it’s a statement piece that adds a personal touch to any space.
Here’s how you can get started:
Choose a Font: Pick a font style that matches your vibe. Cursive fonts look elegant, while bold block letters feel modern and fun.
Pick the Right Colors: Think about the room where the sign will go. Bright colors like pink or blue stand out, while warm tones like yellow create a cozy feel.
Plan the Size: Decide how big you want the sign to be. A small sign works well for a desk, while a larger one can become the centerpiece of a wall.
Pro Tip: If you’re making the sign as a gift, use the recipient’s favorite colors or nickname. It’s a thoughtful way to make it extra special.
Businesses have also embraced personalized neon signs to boost their branding. For example, Nike used their iconic slogan, “Just do it,” in neon to enhance visibility and connect with customers. This approach helped them increase sales and social media engagement. Similarly, 24/7 Fitness Gyms created custom signs in their brand colors to motivate members, which contributed to a rise in memberships and online presence.
Whether it’s for your home or a gift, a personalized name sign is a fun and meaningful project. It’s a great way to showcase your creativity and make something truly unique.
Tips for Unique Customizations
Want to take your LED neon sign to the next level? Customization is the key. With a few creative tweaks, you can turn a simple design into something extraordinary. Here are some tips and tricks for customization to help you stand out:
Mix Colors: Combine two or more colors in your design. For example, use one color for the outline and another for the text.
Add Patterns: Use stencils or templates to create patterns on the base. Stripes, polka dots, or even a galaxy theme can make your sign pop.
Incorporate Shapes: Add small shapes like stars or hearts around your main design. These details make your sign more dynamic.
Use a Unique Base: Instead of a plain wooden board, try using a mirror or a piece of clear acrylic. The reflection adds depth and makes the neon glow even brighter.
Fun Idea: Create a layered effect by placing multiple LED strips at different heights. This adds dimension and makes your sign look 3D.
Brands like IKEA UK have mastered the art of customization. They’ve used LED neon signs for everything from directional signage to decorative pieces, contributing to millions of store visits and a growing social media following. You can apply similar ideas to your project by experimenting with colors, shapes, and materials.
Remember, the best designs come from your imagination. Don’t be afraid to try new things and make your sign as unique as you are!
Creating your own LED neon sign is easier than you might think. It’s affordable, beginner-friendly, and doesn’t require fancy tools. You can shape flexible LED neon strips into designs that match your style, whether it’s a simple heart or a glowing name.
The best part? You get to unleash your creativity. Making a neon sign lets you personalize your space in a way store-bought decorations can’t. Plus, the satisfaction of seeing your DIY project light up is unbeatable.
Why wait? Grab your materials, sketch a design, and start experimenting. Your first LED neon sign could be the start of a fun new hobby!
FAQ
What’s the difference between LED neon signs and traditional neon signs?
LED neon signs use flexible LED strips, while traditional neon signs use glass tubes filled with gas. LED signs are safer, more energy-efficient, and easier to work with. They’re also lightweight and perfect for DIY projects.
Tip: Choose LED neon for a beginner-friendly, budget-conscious option!
How long does it take to make a DIY LED neon sign?
It usually takes 2–4 hours to complete a simple design. The time depends on the complexity of your design and your experience level. Start with an easy shape or word to save time and build confidence.
Can I reuse materials from an old project?
Yes! You can reuse LED strips, wires, and even the base from an old project. Just make sure the materials are in good condition. Recycling parts is a great way to save money and reduce waste.
Are DIY LED neon signs safe to use?
Absolutely! LED neon signs don’t heat up like traditional neon lights. They’re safe for homes with kids or pets. Just double-check your wiring and use a reliable power source to avoid any issues.
Safety Note: Always unplug your sign before making adjustments to the wiring.
Where should I display my LED neon sign?
You can hang it on a wall, place it on a shelf, or even use it as a centerpiece for parties. Choose a spot where the glow enhances the room’s vibe. Avoid placing it near water or in direct sunlight.
Fun Idea: Use your sign as a nightlight for a cozy ambiance!
See Also
Steps to Create Your Own LED Neon Flex Sign
Guide to Designing and Constructing LED Neon Signs
Creating Your Personalized Neon LED Sign from Scratch
Illuminate Your Area with Custom Neon LED Signs
Why LED Neon Custom Signs Are an Eco-Friendly Choice


